Every jewelry-wearer will have dealt with the panic of accidentally misplacing an expensive or meaningful piece of jewelry before.
While there’s no good way to stop your treasured items from going absent without leave. But a jewelry box will keep all of your valuables organized and protected.
However, a good jewelry box can cost as much as a nice piece of jewelry itself. Also, finding one with the style and layout you want can be a big challenge.
Fortunately, there are plenty of free DIY jewelry box plans and ideas that you can make at home.
In this article, we’ll share 15 of the best DIY jewelry box plans and ideas to inspire you to create your customized storage solution.
There’s something for everyone, from classic wooden designs to repurposed household items.
Let’s find out!
Table of Contents
- 1. Basic Plywood Jewelry Box
- 2. Make A Simple Wooden Jewelry Box
- 3. Oak Jewelry Box with Box Joint Construction
- 4. Fancy Jewelry Box
- 5. Simple Jewelry Box With Mirror
- 6. Newspaper Tube Jewelry Box
- 7. Walnut Jewelry Box
- 8. Closet-style Jewelry Box
- 9. Circular Wooden Jewelry Box
- 10. DIY Jewelry Box From Cardboard
- 11. DIY Marbled Jewelry Box
- 12. Jewelry Box With Screen Lid and Divider
- 13. Jewelry Cabinet
- 14. Jewelry Box With Secret Compartment
- 15. Wooden Jewelry Box By WoodSkills
- Conclusion
1. Basic Plywood Jewelry Box
This design is perfect for those who want a simple, uncomplicated jewelry box.
The box is constructed from plywood and held together by wood glue. You can decide the dimensions and shape of your box and draw it out.
Remember to subtract 2x the thickness of your wood on the parts that don’t go the full length.
Mark your wood and start cutting your pieces according to your design, then assemble your box using the cut wood pieces with glue. Make sure the joints are tight and aligned.
Sand all the pieces smooth after the glue has dried, then finish up and paint or stain your box as you like. Finally, Install the hinges on the back and the hasp on the front.
To best protect your valuables and make the box look extra nice on the inside, you should glue soft interior cloth.
Project details: instructables.com
2. Make A Simple Wooden Jewelry Box
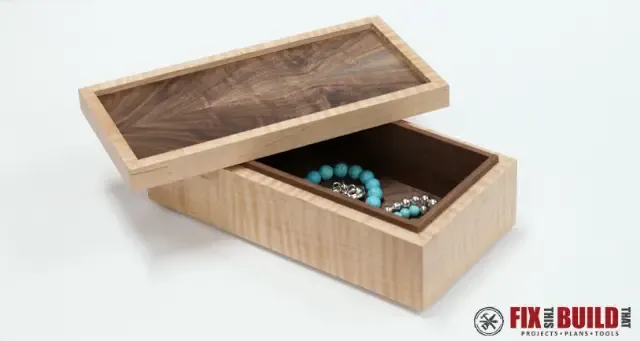
The box looks like a basic plywood box, but the design has a far better aesthetic with clashing dark-colored maple in the interior and light-tone walnut on the outside.
The brighter outside layer brings a cleaner look, while the darker inside one creates a contrast with your beautiful jewelry. Also, the detachable woody lid makes you take out any jewelry conveniently.
To get a great look for the box, you’ll need to use a lot of specialized tools like a miter saw, table saw, clamp, orbital sander, and drum sander. Plus, you can paint a varnish layer to get the best finish.
Project details: fixthisbuildthat.com
3. Oak Jewelry Box with Box Joint Construction
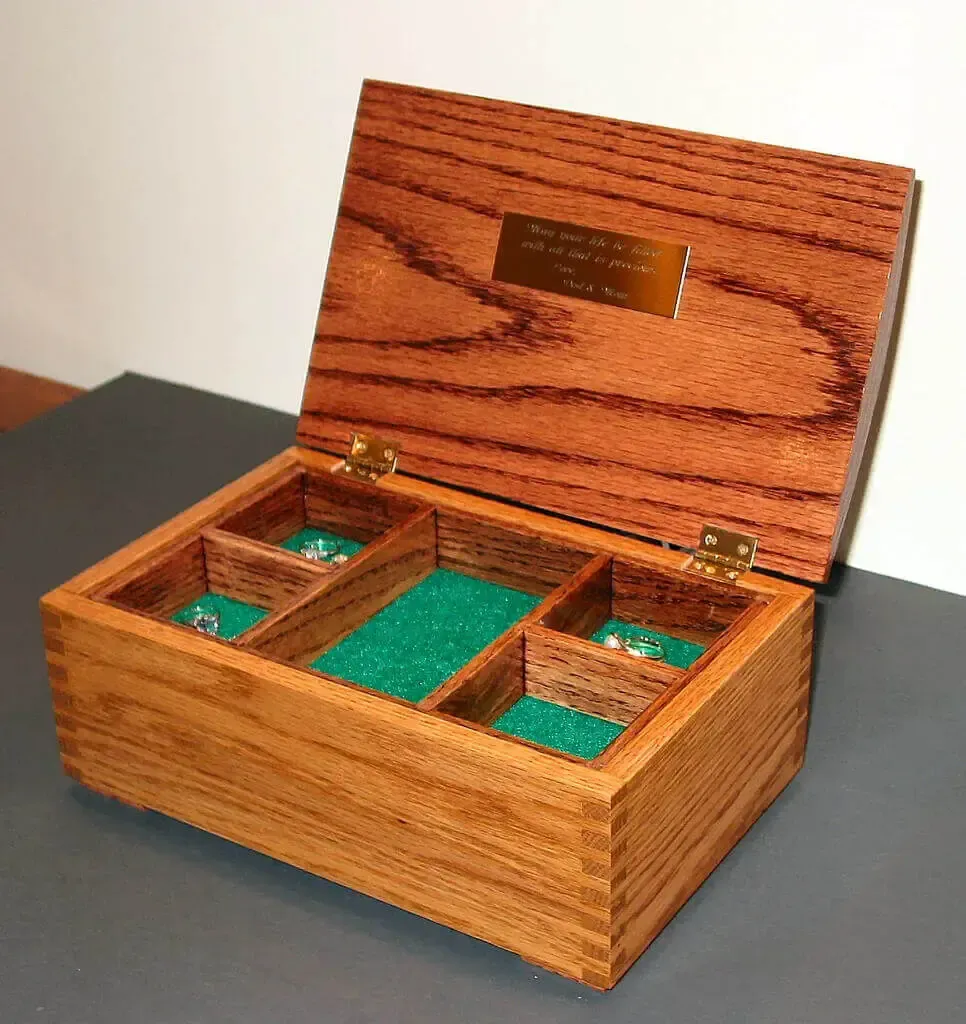
You will get a beautiful jewelry box with a very elegant and aesthetic after finishing this project. That’s all thanks to the rustic patterning and dark wood tone of the oak used in the project.
It’ll be a great gift for friends and family (or yourself!). Anyway, the highlight of this project is the box joint jig. It’s a special device that helps you cut the box joints accurately and consistently.
The box has trays as well as several compartments so you can place rings, bracelets, or any jewelry you have conveniently.
Project details: instructables.com
4. Fancy Jewelry Box
Looking for something even fancier? No worries, here’s a free plan for a fancy jewelry box. It’ll be a great gift for your girlfriend/wife or make a good addition to the vanity.
However, because this design is made to be as refined as possible, it’s an advanced plan that requires a lot of tools, technique, and care.
Besides five main pull-out drawers, this box also has two fold-out doors to hold necklaces and chains.
Project details: ana-white.com
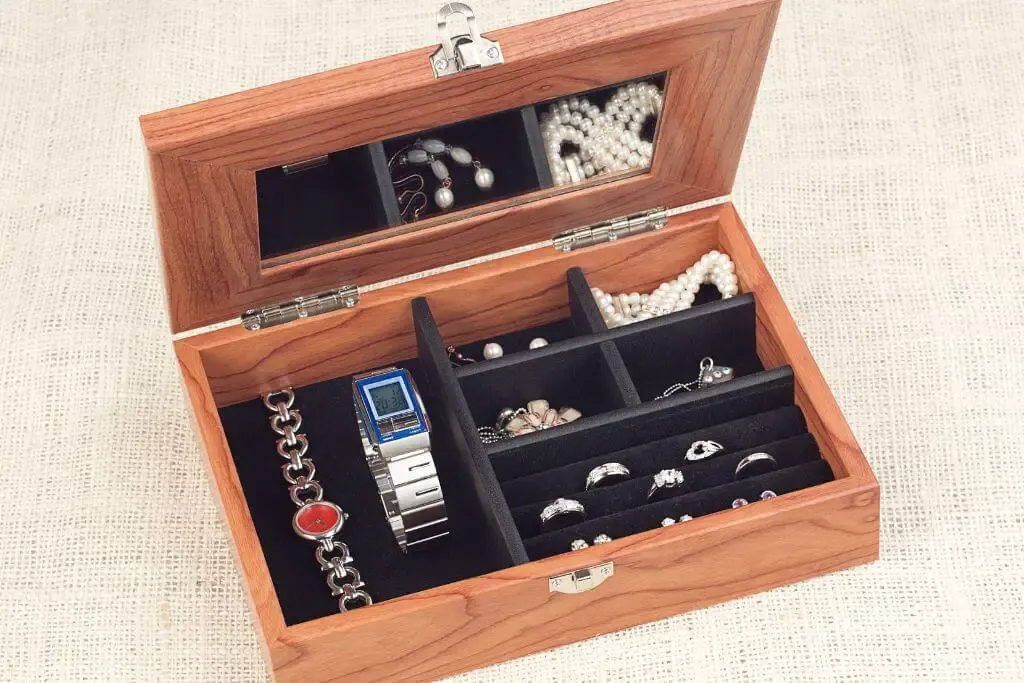
5. Simple Jewelry Box With Mirror
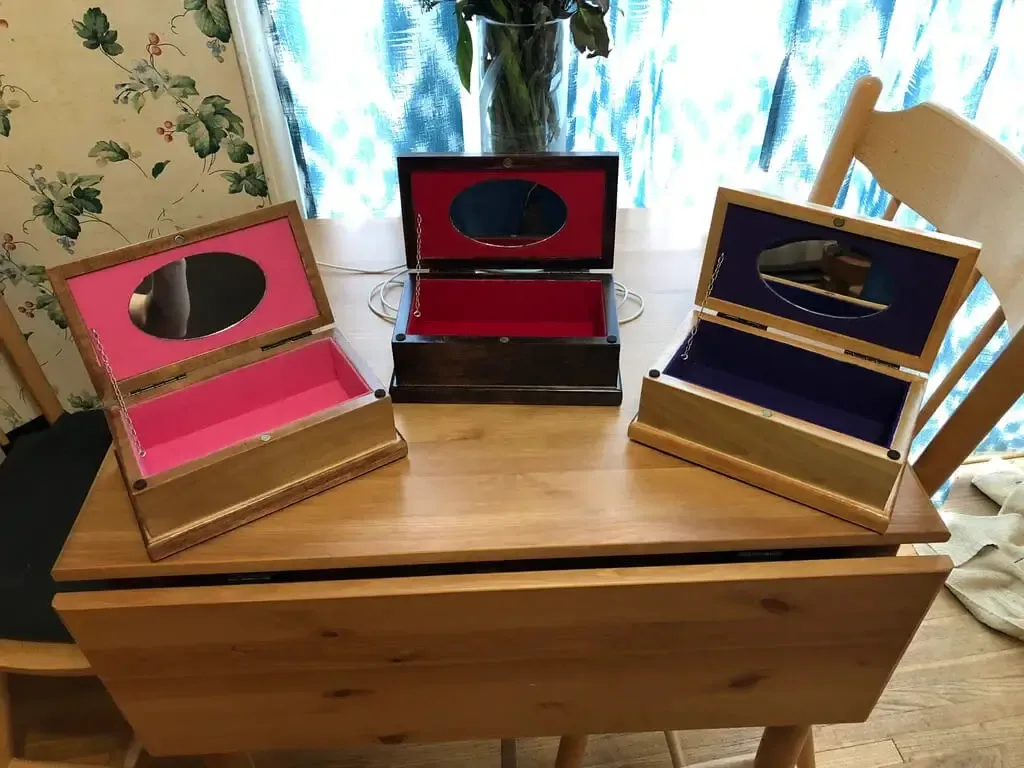
In this project, besides wood and felt, you will work with a mirror. The boxes have a metal hinged lid and a felt-lined interior.
As its name suggests, you only need basic woodworking skills and tools for this project. Basic woodworking saws (miter saw, handsaw, etc.), clamps, tapes, and wood glue are all you need.
After building the box, make an oval cut-out to fit in a small mirror. It’ll give the simple box an extra function and improve its aesthetic.
Project details: instructables.com
6. Newspaper Tube Jewelry Box
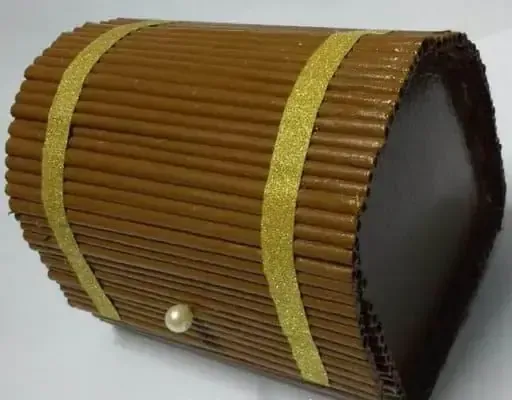
You don’t need expensive wood planks to craft a good-looking jewelry box for yourself or your friends. If you have old newspapers or magazines lying around, surprise, they’ll work as DIY materials, too!
This super creative newspaper tube jewelry box uses rolled-up paper to create tube-shaped “planks,” wrapped in a beautiful curved arch over structural walls made from cardboard.
Cheap and easy to make. You don’t need a saw for this project. A pair of scissors and a glue stick will do. The only thing that you’ll probably need to buy is a small bead to use as a handle, ribbons and brown paint to prettify the outer shell of the box.
Project details: sharingourexperiences.com
7. Walnut Jewelry Box
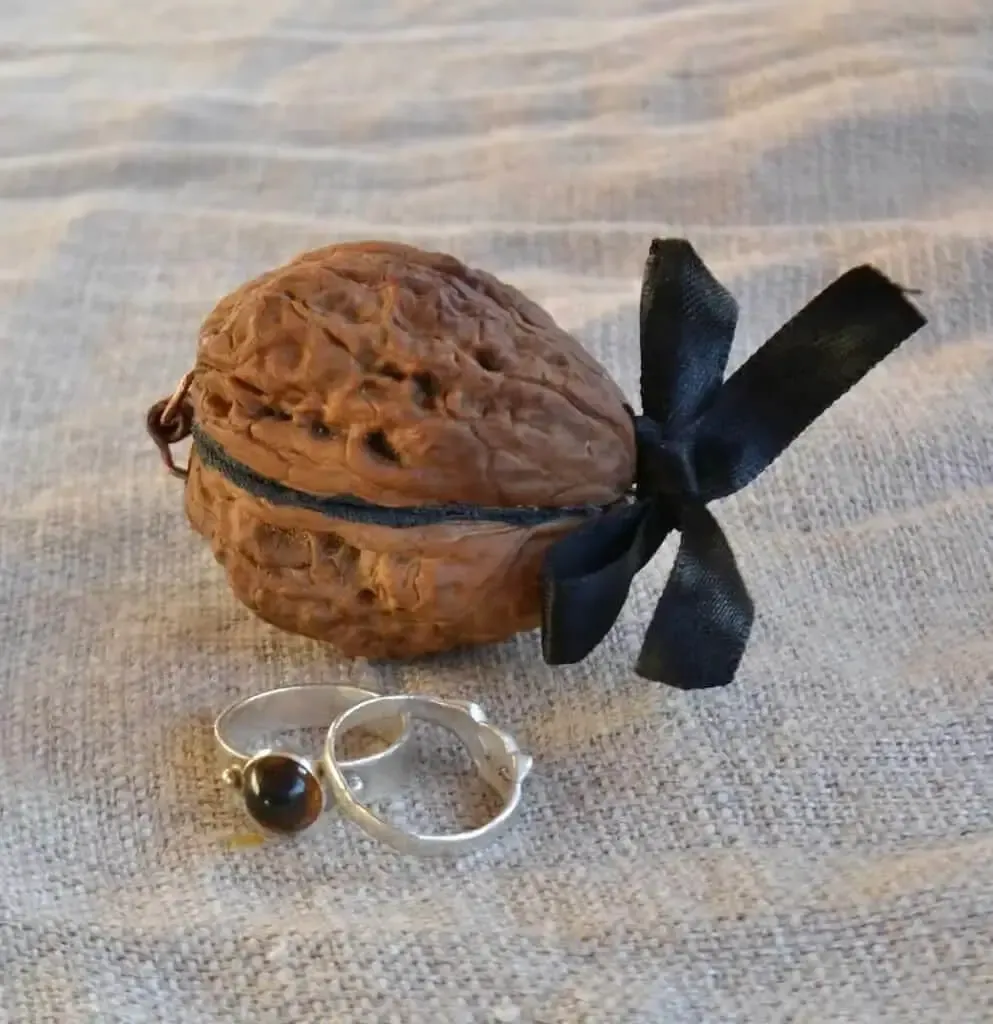
If you want a whimsical, cute way to store your precious rings, a walnut can do the trick, as seen in this project.
And no, we don’t mean “walnut wood.” The box is a literal shell of a walnut with the fleshy bit on the inside scooped out and replaced by felt.
It’s a cheap, creative, and unique way to keep your valuable rings. You really only need a scissor, pliers, and some glue for this project, and it shouldn’t take more than a few hours to finish.
Project details: instructables.com
8. Closet-style Jewelry Box
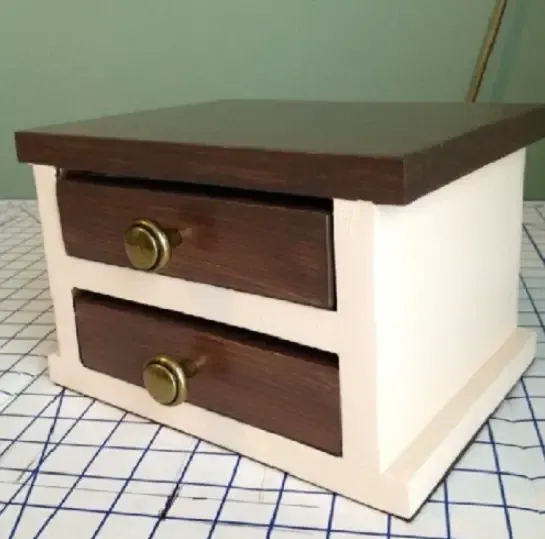
This jewelry box mimics the look of a classic nightstand, with two pull-out drawers for you to store your valuables.
The project is made from small cuts of wood that are glued together. It also includes two small knobs for you to pull in and out your drawers.
Once you’ve finished gluing the wood box and assembling all of its parts together, just paint or stain the wood in any color or pattern you want. You’ll get a cute little jewelry box by the end.
Moreover, you can download PDF file to easily follow with details instructions, dimensions, and images illustration.
Project details: ana-white.com
9. Circular Wooden Jewelry Box
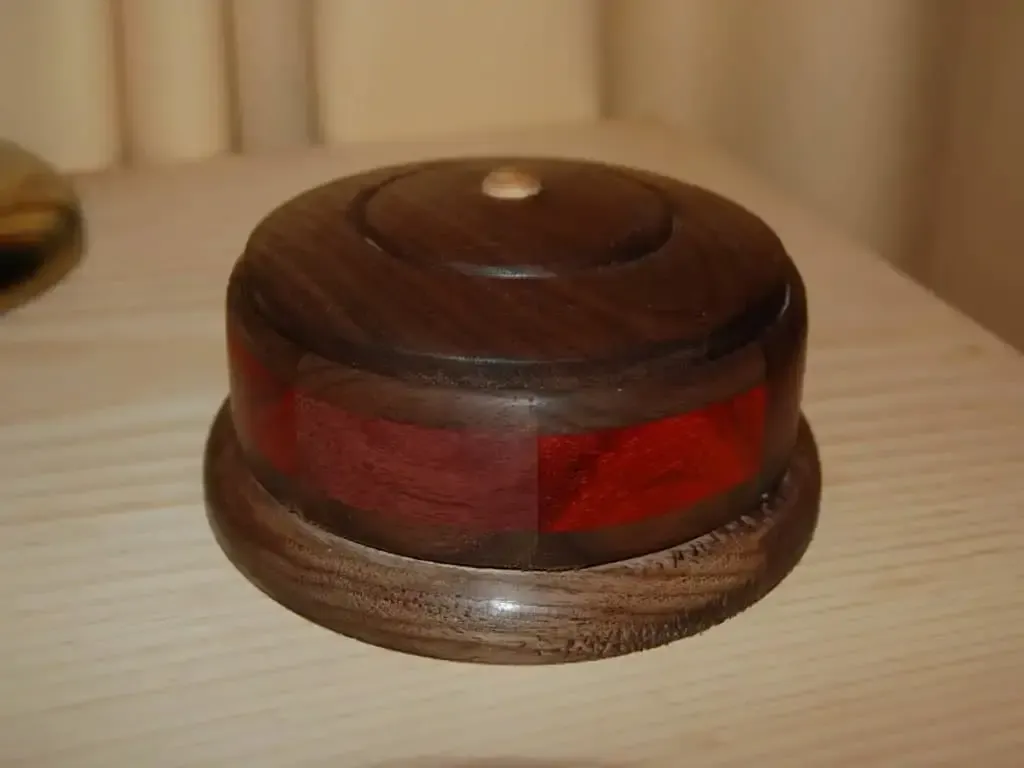
This jewelry box has one of the unique designs out of all plans here.
Unlike the traditional rectangular or squared-off look, this plan will give you a box with a circular design.
It’ll make for a great ring box and storing of your favorite tiny jewelry. It’s worth noting that the box isn’t made from a single piece of circular wood.
Instead, it’s made from eight straight sections of wood glued together, with the ends cut at an angle. The box is an octagon.
Project details: instructables.com
10. DIY Jewelry Box From Cardboard
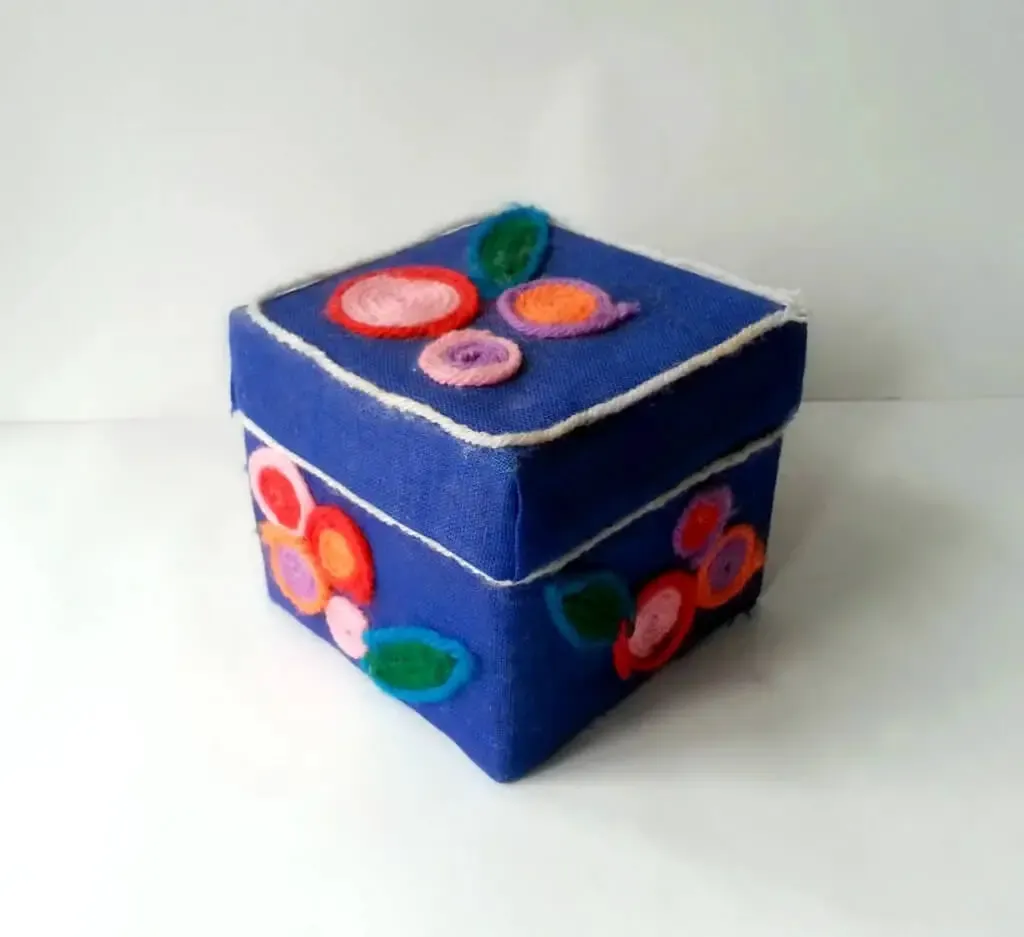
Made entirely from glued-together pieces of cardboard, aside from being a cheap and easy project for adults to undertake.
It’ll also be a superb project idea to teach young children handicrafts. You only need scissors, glue, fabric, yarn and markers or crayons to decorate the outside.
With their cute look, they’ll be a great gift for children or your friends.
Project details: instructables.com
11. DIY Marbled Jewelry Box
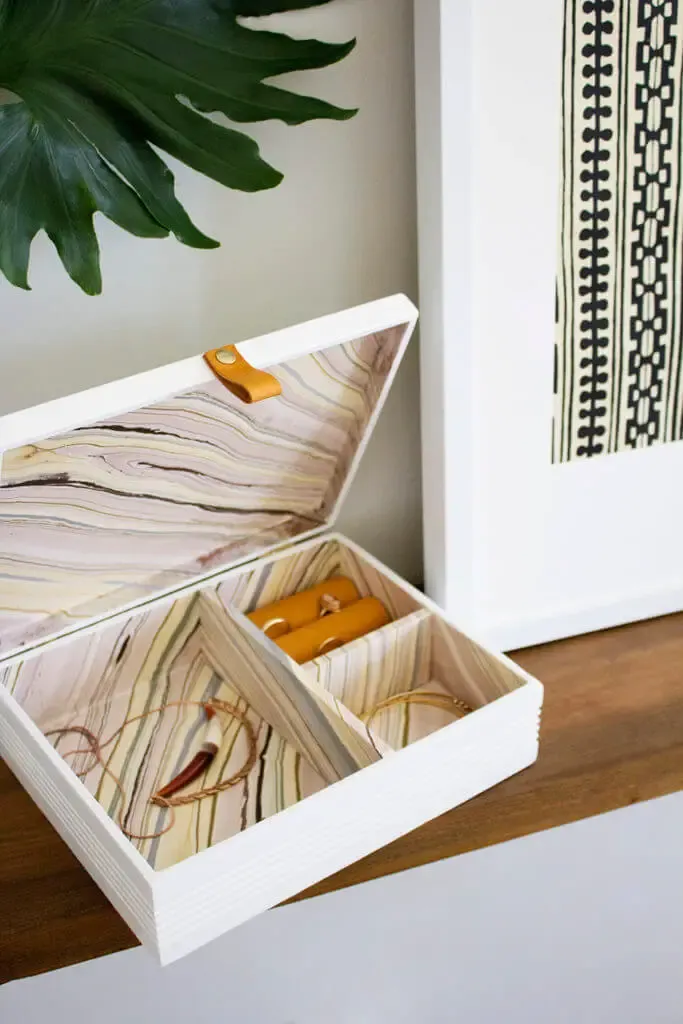
The box design is the peak of elegance. The sample end product in this project has a minimalist white outer shell, and marble-patterned interior, with a chic-looking leather loop as a handle on the outside.
Surprisingly, for such a good-looking box, it’s very easy to make. The project’s done using an old cigar box, and the marbled interior is done using marbled paper (not real marble.)
There are also instructions to make dividers using small lengths of craft wood. This a simple, affordable project.
Project details: annabode.com
12. Jewelry Box With Screen Lid and Divider
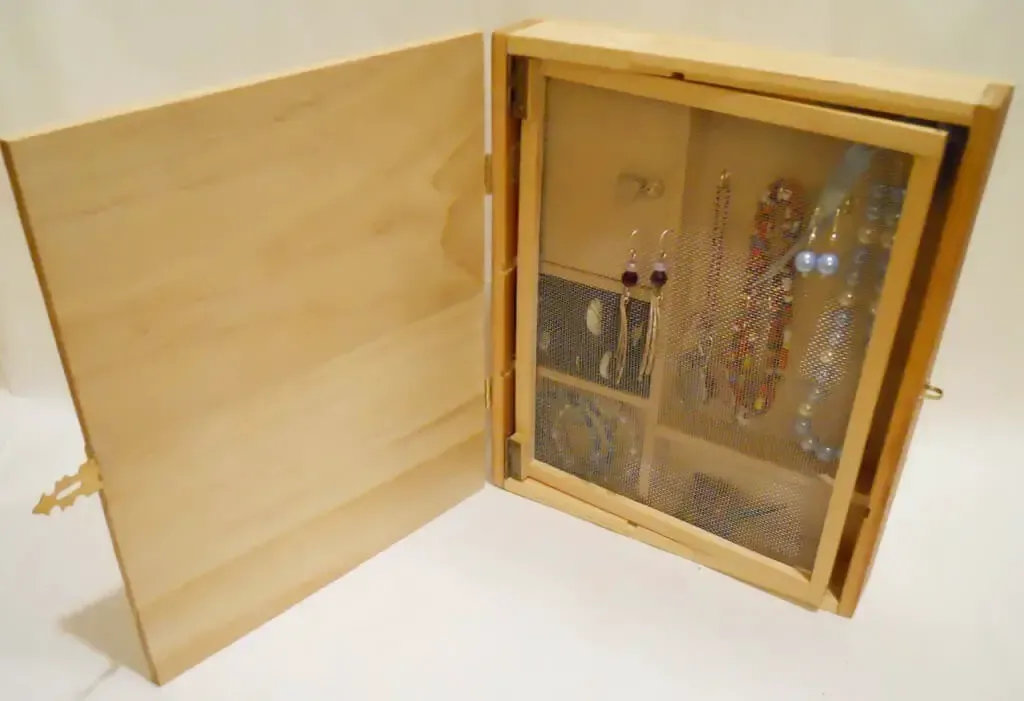
It looks like a collection of jewelry! The highlight of this project is the two lids that it’s got.
There’s a standard solid wood lid on the outside and a secondary lid made from wire mesh inside to keep your jewelry pieces in place.
You don’t have to be afraid of placing your rings or bracelets together, which affects the brightness of the jewelry.
With the hanger design, you can hang them separately. Furthermore, the outside key is convenient to store when using it.
Project details: instructables.com
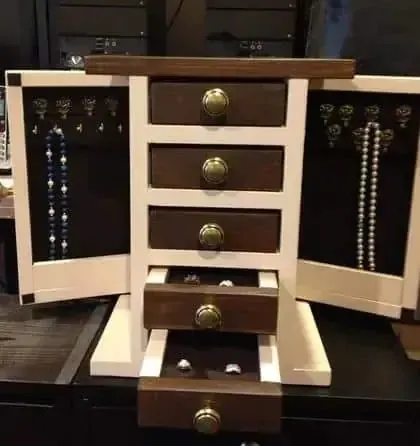
13. Jewelry Cabinet
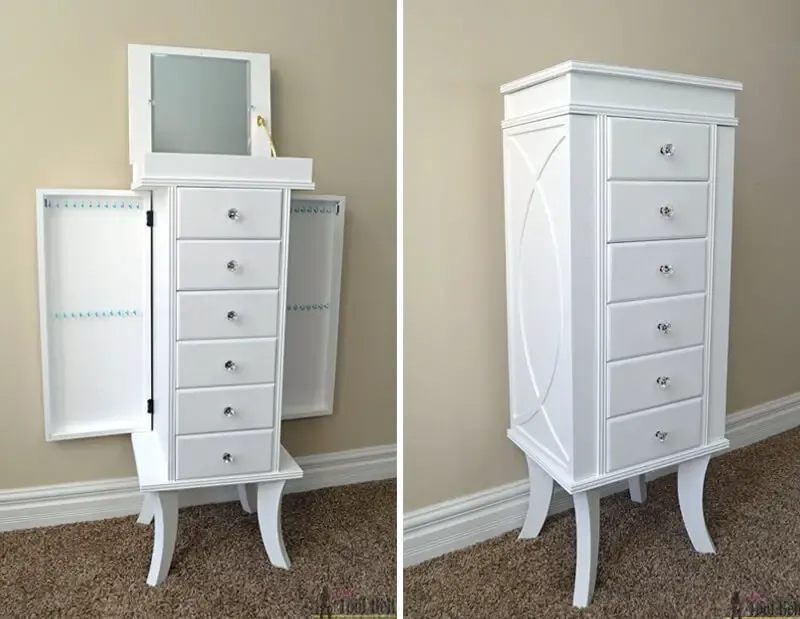
Out of all the projects on this list, this one is the most complicated and time-consuming to make. It’s not just a mere box that you can place on your vanity.
This one, as the name suggests, is an entire cabinet dedicated to storing all of your valuables.
The official dimension for this project (though you can change them as you see fit) is 49 ⅞ inches tall, 15 ½ inches deep, and 19 ½ inches wide. The cabinet has 6 drawers, can open sides and fold in.
This isn’t a simple project, so it’ll require you to gather many materials and tools. You’ll need multi-foot-long wood planks, saws, drills, and clamps.
To best finish the cabinet, you’ll also need to be skilled to engrave patterning and such onto the wood.
Overall, this project is for skilled DIY-ers with skills in woodworking. If you’re a beginner, try your hand at some of the simpler projects we mentioned earlier!
Project details: hertoolbelt.com
14. Jewelry Box With Secret Compartment
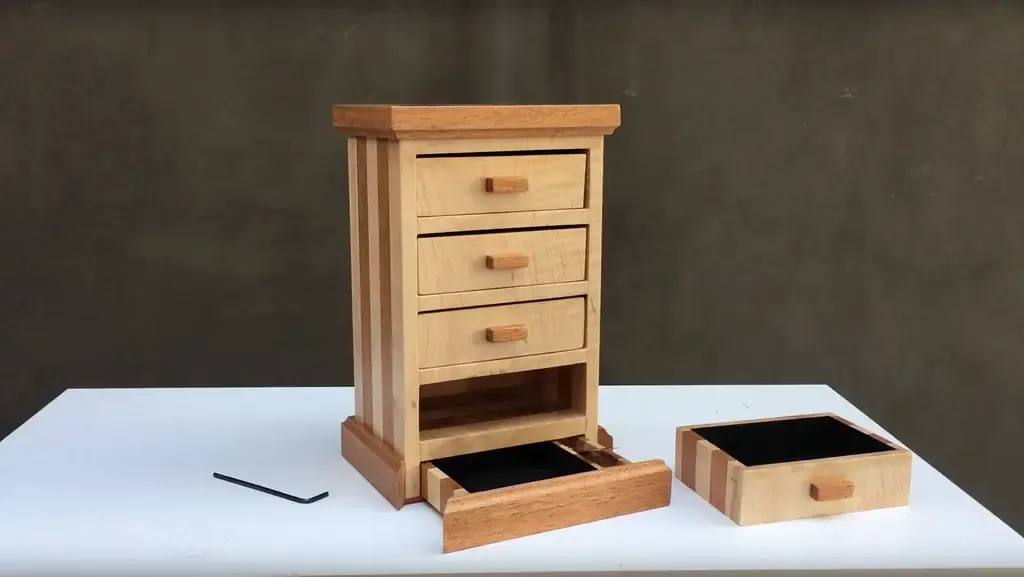
This project is the mini-closet-style jewelry box project that we introduced earlier.
However, there’s a twist: this one comes with a secret compartment at the base of the box. Here, you can store your most valuable pieces and cash if you’re feeling up to it.
It’s not hard to add a secret compartment to the design. The box in this project is constructed from glued wood, as always, but the base of the box is hollowed and has another pull-out drawer for it.
The drawer is painted to match the color of the rest of the base and has no handle. So, unless you know it’s there, it’s really difficult for anyone to know that there’s an extra compartment there.
Project details: instructables.com
15. Wooden Jewelry Box By WoodSkills
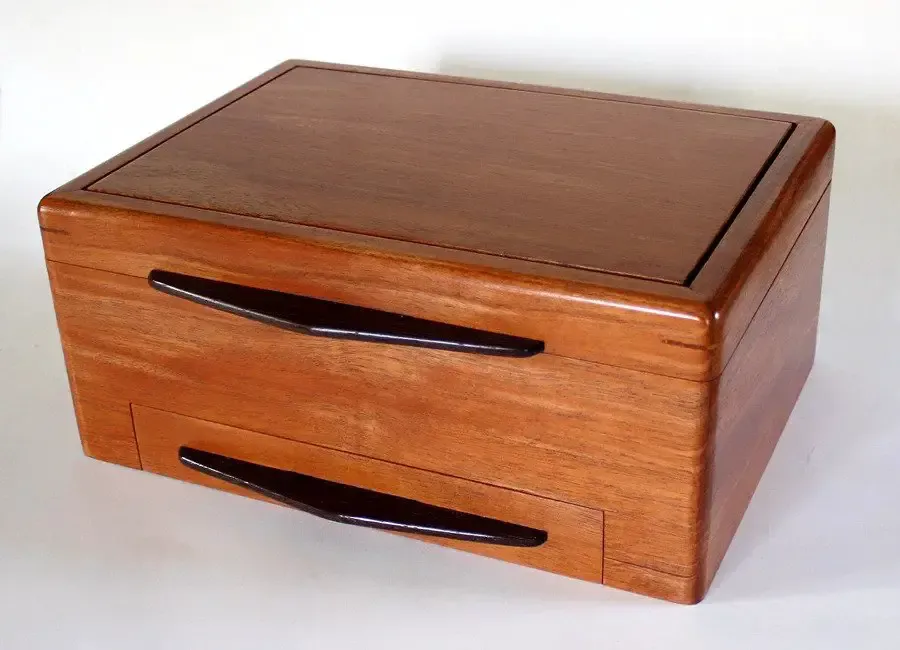
Lastly, this project features precious mahogany stained over with a warm wood tone to give it a luxurious, rustic look.
Besides a top lid which will give you access to a roomy main compartment, there’s a pull-out drawer down at the bottom where you can store your smaller trinkets in.
It’s a pretty complicated project that includes many kinds of tools and a lot of steps to follow. But ultimately, the beautiful box is worth it!
Project details: instructables.com
Conclusion
Crafting a DIY jewelry box can be a fun and rewarding project for you. It’ll save you quite a lot of money and give you the freedom to customize your box to your style and needs.
With these 15 DIY jewelry box plans, we hope you’ll find the inspiration to set out and build a unique and functional jewelry box for years.
Or you can make it as a gift unique to your friends, wife, or children.


![How To Start A Woodworking Business [Ultimate Guide]](https://handykeen.b-cdn.net/wp-content/uploads/2021/10/woodworking-business-1-300x200.jpg "How To Start A Woodworking Business [Ultimate Guide]")
![9 Best Pole Saws of 2023 [Ultimate Guide]](https://handykeen.b-cdn.net/wp-content/uploads/2021/03/best-pole-saw-300x200.jpg "9 Best Pole Saws of 2023 [Ultimate Guide]")

