Table saws can do a whole lot more than ripping and crosscutting. To make different cuts precisely, quickly and safely, you will need different setups.
One noticeable thing about table saws is they usually use many DIY jigs. Arent the rip fence and the crosscut fence good enough? What is the purpose of those complicated jigs?
Let us show you some other table saw uses and handy tips so you can get a more comprehensive picture.
Table of Contents
The 10 Table Saw Uses
1. Ripping Cut
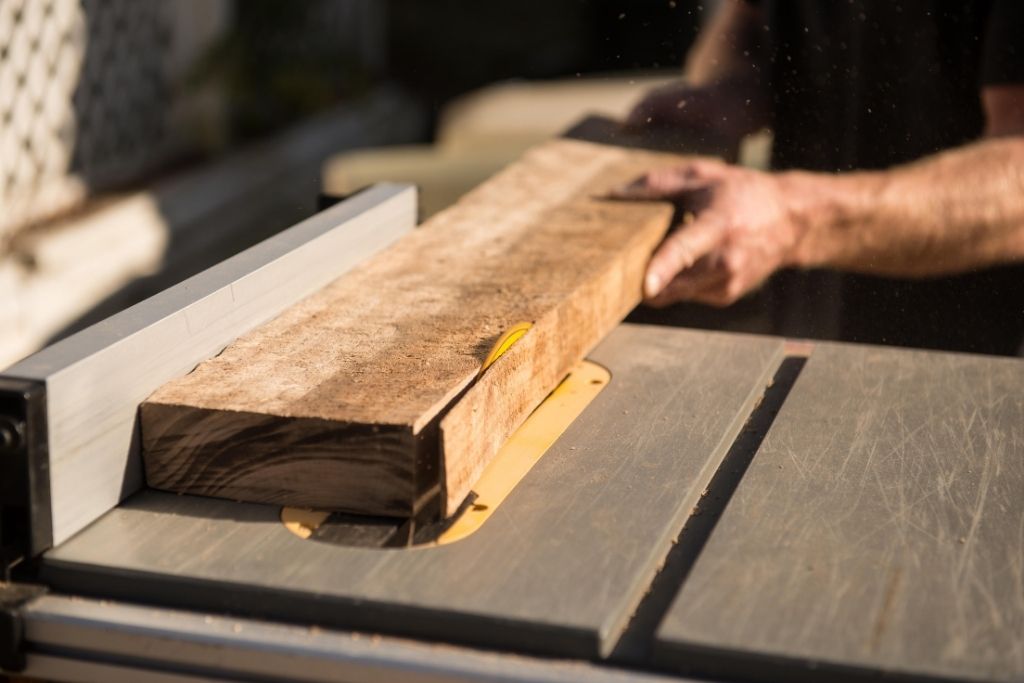
This is one of the two most common cuts. Ripping simply means cutting with the wood’s grain.
We are talking about face grain here. That is the grain on the wider side (the face) of your board, as opposed to the edge.
For precise ripping, the rip blade and the rip fence should be parallel with each other. You can use a square or set the fence right next to the blade and eyeball it. Below is our trick to make sure they are parallel.
First, measure the distance from the rip fence to the first blade tooth that sticks out from one end of the blade insert. Then, rotate the blade and measure again when that same tooth is at the other end of the blade insert.
Once the measurement is down, put your board against the rip fence and push it with your right hand. If the distance between the blade and the fence is less than six inches, you should use a push stick.
We do not feed the wood with our left hand but put it down on the table and use it as a secondary fence.
You should not follow the board with your left hand because it will make your board twist to your left at the end of the cut.
2. Crosscutting
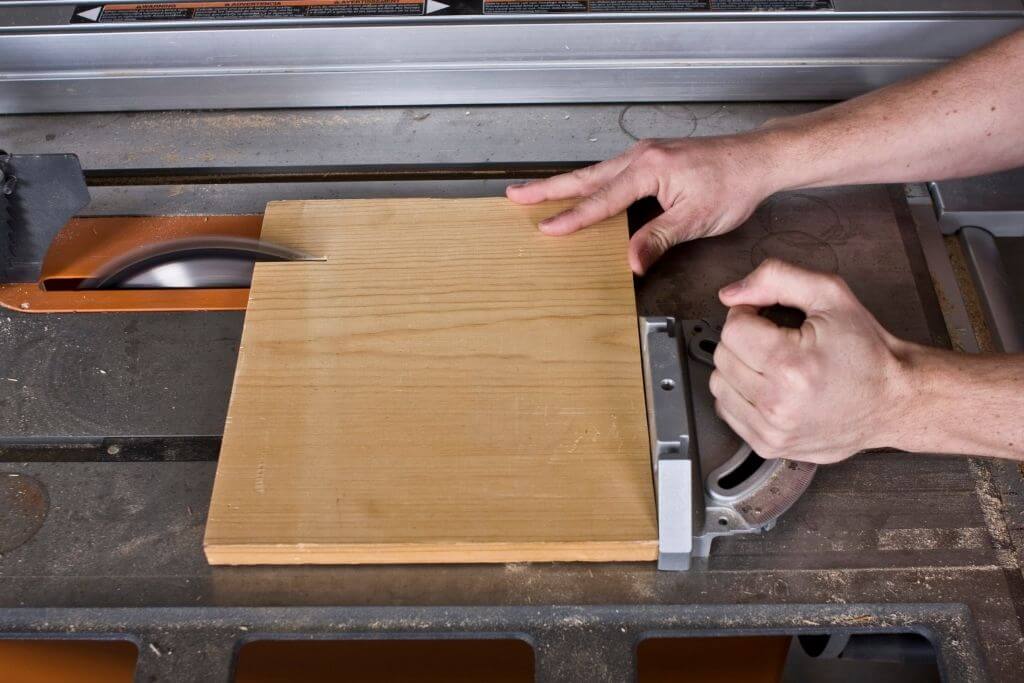
The second most important cut is the cross cut. It is for splitting your board across the wood’s grain.
With cross cuts, you should use a crosscut fence or jig that slides perpendicularly with the crosscut blade on the table.
Both of your hands can be pressing the workpiece to the crosscut fence and pushing it forward.
Never use your rip fence to guide your wood. If you press the off-piece right up against the spinning saw blade with the rip fence, the blade will pick up the off-piece and throw it back at you. That is what we call a kickback.
For safety and convenience, clamp a 1-inch stop block to the beginning of your rip fence.
In this way, your wood will not run against the rip fence. Now you can use the ruler of the rip fence to help set up multiple equivalent crosscuts.
3. Miter Cuts

It is very similar to cross cutting. The difference is the saw blade will cut across the wood face at an angle.
Most crosscut fences can double as a miter fence and have a miter gauge. The miter gauge helps you choose the cutting angle for your fence and your workpiece.
Other ways to make a miter cut are using a taper guide or a taper jig. A taper guide is like a pair of compasses. A tapering jig is like a sled.
The idea is to use these tools like a mobile angled rip fence. They help your wood stay at your desired angle and run with it throughout the cut.
4. Bevel Cuts
Bevel cuts are also angled cuts but along the wood depth. Instead of angling your workpiece in relation to the blade, you angle the blade in relation to your workpiece.
In most table saws, there is a bevel gauge with a 45-degree stopping point under the table.
However, they are not always trustworthy. Many table saws have faulty gauges, and dust can make the stopping point inaccurate.
What you should use are a combination square and a protractor. A digital angle reader is helpful as well.
Another important thing about bevel cuts is your saw blade should always tilt away from the fence. If it is not, the blade will trap the off-piece under it and may cause a kickback.
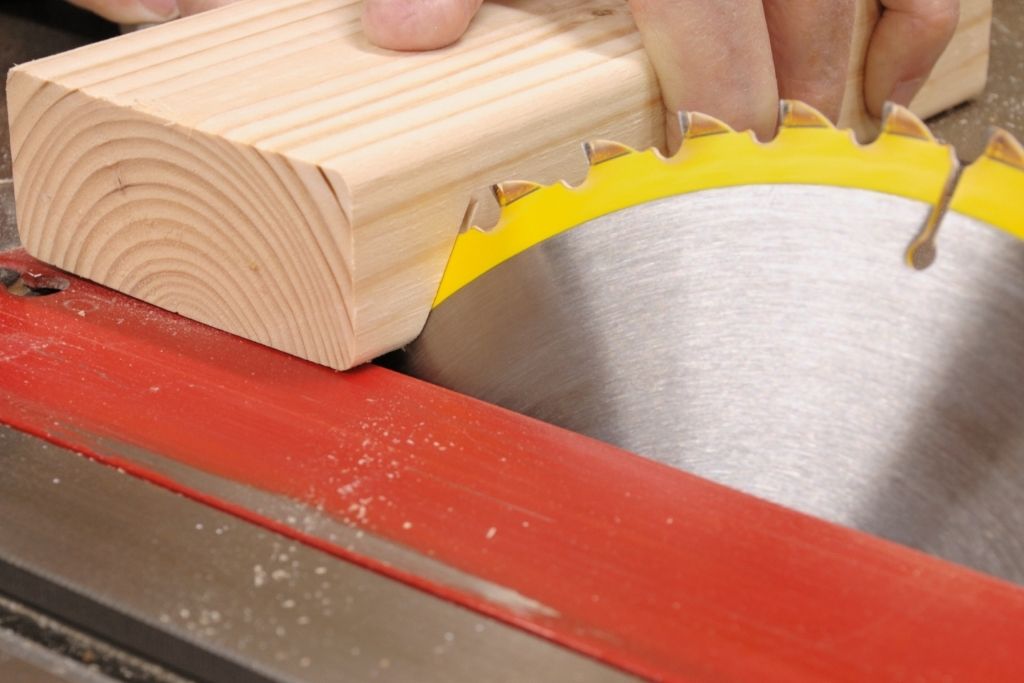
5. Rabbets And Grooves
These two cuts are the basics of all the joint cuts. Rabbets are L-shaped cuts into the edge of your board, while grooves are U-shaped channels.
A handy way to make these cuts is using a dado stack. A dado blade set has two saw blades on either side of the stack and chippers in the middle.
The table saw blades will cut out the channel walls while the chippers take out the waste.
Rabbets often require a sacrificial fence that sits parallel with your saw blade. This sacrificial fence has a semi-circle cutout in place of the blade, so you can put it right next to the blade without actually touching the blade.
If you do not have a dado blade set, just adjust the blade height to the desired depth and make two cuts to create an L-shaped channel.
To make a groove, cut the walls of the U shape first, then make multiple cuts to clean out the waste.
6. Lap Joints
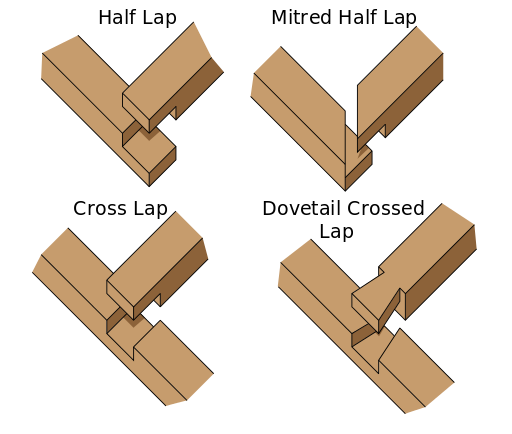
There are a handful of joints for any woodworkers to master with table saws. They all derive from rabbets and grooves in one way or another.
The first type of joint that we want to talk about is lap joints. Here, you join two members by overlapping them. Framing is the most common use of these joints.
You can have a half lap with a rabbet on each wood piece. If your rabbets are mitered rabbets, you will have mitered half lap. With a rabbet and a groove, you get a cross lap.
7. Tongue And Groove
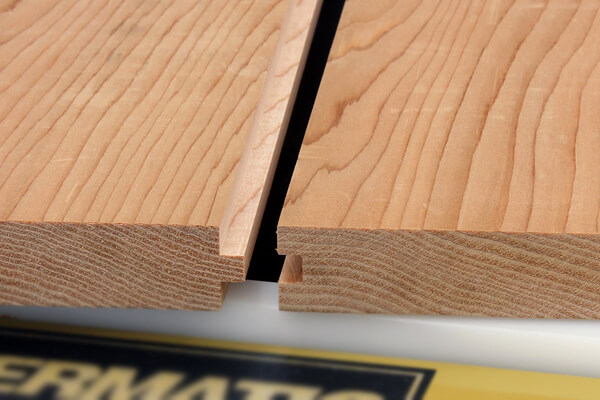
This joint is for connecting two similar board edge to edge together. One board should be able to slide through the other like a credit card. You often see this joint in flooring and paneling.
On one member, make a groove cut to create a slot that runs along the length of the piece. To create a tongue on the other member, make two rabbet cuts along the length of the piece. The result is a ridge that will fit neatly into the groove.
Dado cuts have the same principles. The difference is, with a dado cut, the receiving board is perpendicular to the inserting board.
8. Tenon And Mortise
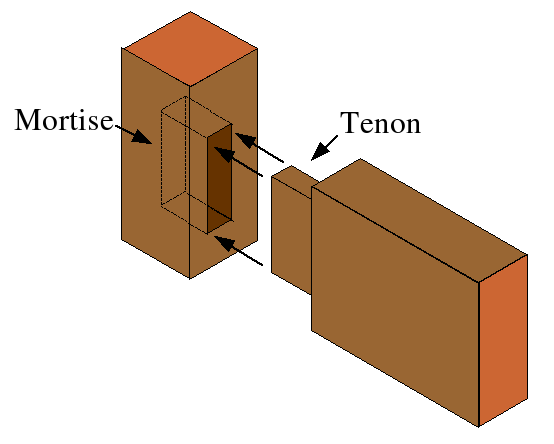
The above joint is for flat surface construction. Now, if you want to attach two pieces at 90 degrees, you can use the tenon and mortise joint to make a T shape.
It is stronger than the tongue and groove because there are two more contact surfaces.
A tenon is similar to a tongue but sits on the front edge of the member. Usually, it takes two more rabbet cuts on the long edges to make a tenon. Receiving a tenon is a mortise which is a square or rectangular hole on the other member.
You can cut a tenon like how you make a tongue. To create a mortise with table saws, you will need to perform two groove cuts on two pieces of wood and glue them together.
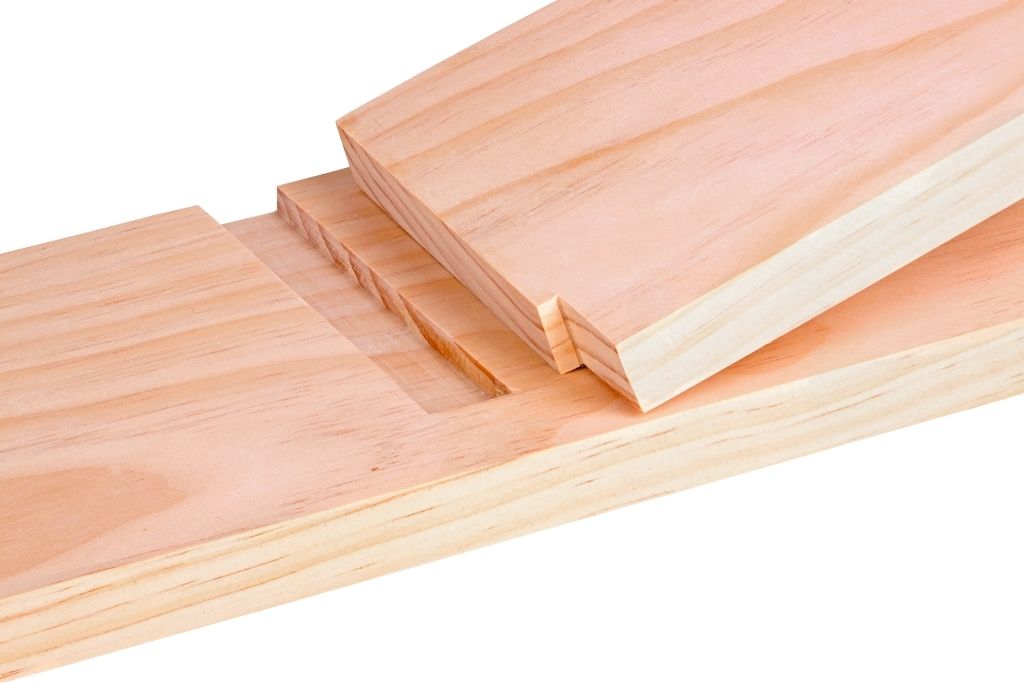
9. Dovetail Joints
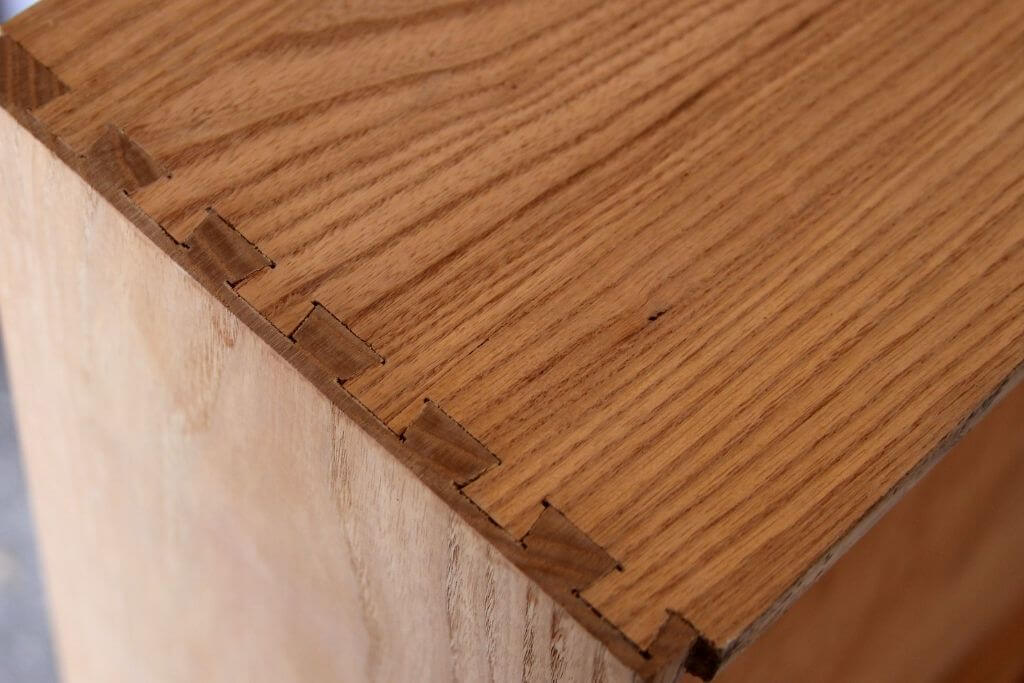
These are probably the most secured joints in woodworking. It is essential to constructions as drawers, cabinets, jewelry boxes, etc.
On one board, you have multiple pins, which are basically trapezoidal tenons. These pins will interlock with a series of trapezoidal tails on the other board.
Because the pins and the tails have trapezoidal shapes, your boards can stick well together without glue.
If you want to apply glue, there are plenty of gluing areas. It is virtually impossible to pull apart this joint when it is glued.
To make the pins, cut one board with a tilted blade and a cross cut fence. After that, cut the tails with a miter fence. Remember to cut the pins first and use them to mark out the tails on the other board.
If you’re still up in the air, refer to this video for clearer instructions:
10. Kerfing
Table saws can not only split your wood and make joinery but can bend a piece of wood as well.
By cutting out small and evenly-spaced portions of a board surface, you can create enough local flexibility for it to bend.
You will make a series of thin grooves with a single saw blade for this cut. These grooves should run through the width and leave a bit of the depth of your board.
The tutorial video below will help you get the hang of kerf bending:
Tips On How To Use Table Saw
Safety Tips
These are a few safety tips that apply to all table saws, whether they are mini table saws, jobsite table saws, benchtop table saws, contractor table saws, hybrid table saws, or cabinet table saws.
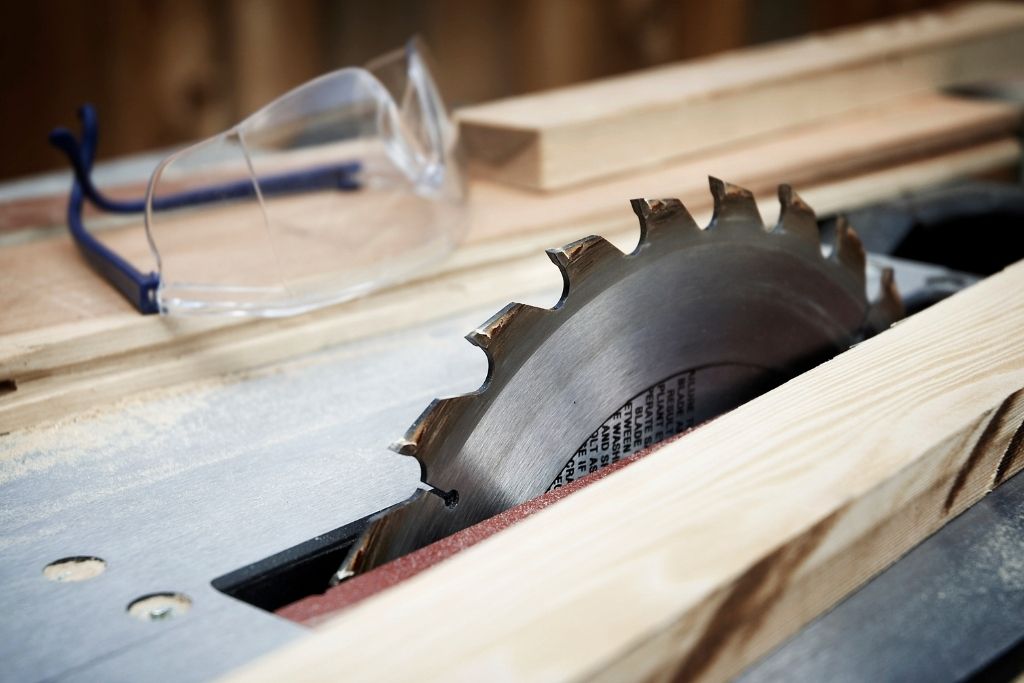
Personal protective equipment: Wear safety glasses/ face shield, ear protection, respiratory protection, etc..
Suitable attire: You should always wear fitting clothes, short sleeves shirts preferably. Loose clothing is a hazard in the waiting.
Clean machine: Clear out all the sawdust and other types of dirt in your sawing mechanism.
Clean table: Your saw table must be free from all kinds of blemishes. A small bump can cause your wood to twist and kickback.
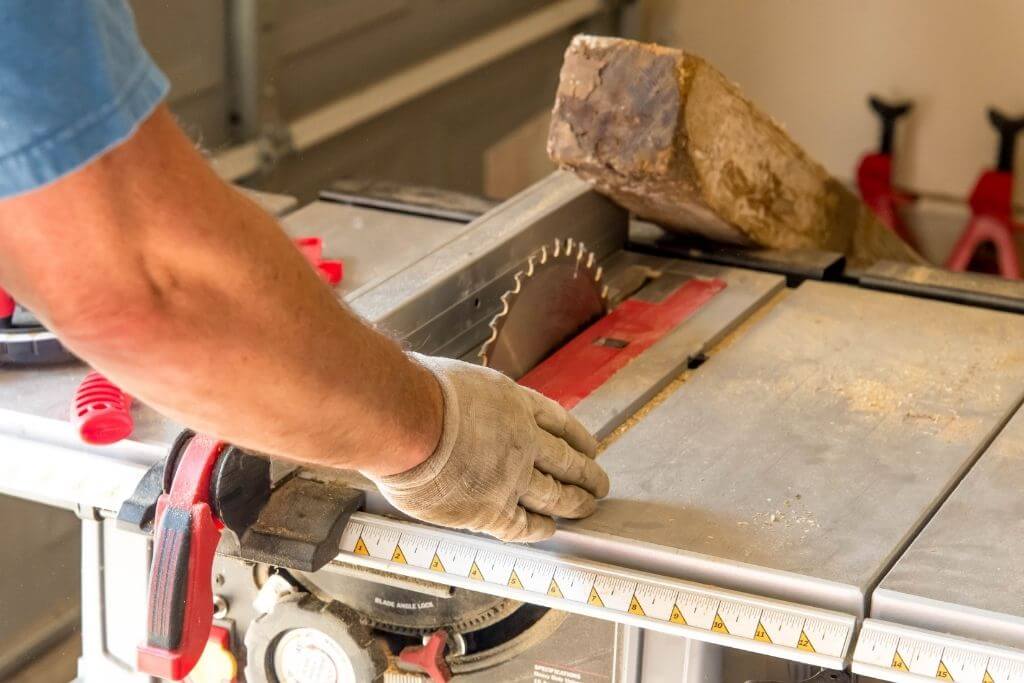
Use push sticks: You should use a push stick whenever the distance from your hand to the saw blade is smaller than six inches. More than 80 percent of stationary saw injuries are blade-contact incidents.
Use blade guard: Only remove the blade cover when it requires you to do so to make the cut.
Install riving knife: It prevents jamming and kickbacks.
Build a support jig: if your table saw does not have a table extension.
Basics Steps To Use A Table Saw
Here are some basic steps when use with all table saws:
Step 1: Fulfil all safety requirements of your workplace.
Step 2: Attach the appropriate blade to the blade arbor after unplugging the machine. Table saw blades spin toward you, so the teeth must be pointing at you as well. Now adjust the blade height.
Step 3: Adjust your fence, jig, miter gauge, and bevel gauge. Measure everything at least twice before cutting. A few test cuts may be necessary.
Step 4: Position the material. Clamps can help you secure your workpieces.
Step 5: Turn on the power.
Step 6: Cut slowly and steadily. Use push sticks or push blocks if necessary. Only remove the blade guard when cutting rabbets and grooves.
Step 7: Turn off the power and wait for the saw blade to stop before reaching for your wood.
If you are a first-timer, watch this video to visualize the process:
Conclusion
That’s the 10 most table saw uses. Ripping, cross cutting, miter cutting, and bevel cutting is for cutting wood into smaller pieces from four different angles.
With the rabbets and the grooves, you can create many joints, from a basic joint like a lap joint to an advanced one like a dovetail joint.
Most importantly, you always remember to protect yourself while operating table saws. Cabinet saws and compact table saws deserve equal caution.

")


![9 Best Pole Saws of 2023 [Ultimate Guide]](https://handykeen.b-cdn.net/wp-content/uploads/2021/03/best-pole-saw-300x200.jpg "9 Best Pole Saws of 2023 [Ultimate Guide]")
