Everyone knows how nice it is to work in a clean, tidy environment. Unfortunately, nobody wants to be the one to clean it up. If you get good use out of your workshop, it’s bound to become dirty and cluttered quite often.
You may even want to give up on maintaining a tidy workshop. Why make your bed if you’re going to sleep in it again at the end of the day, right? Well, that’s not quite right.
A clean workspace can help you be more productive and efficient, reducing the time you spend on each project.
Decluttering can be fun all on its own, and the results are going to be just as satisfying. Here are some tips and tricks to keeping your workshop tidy.
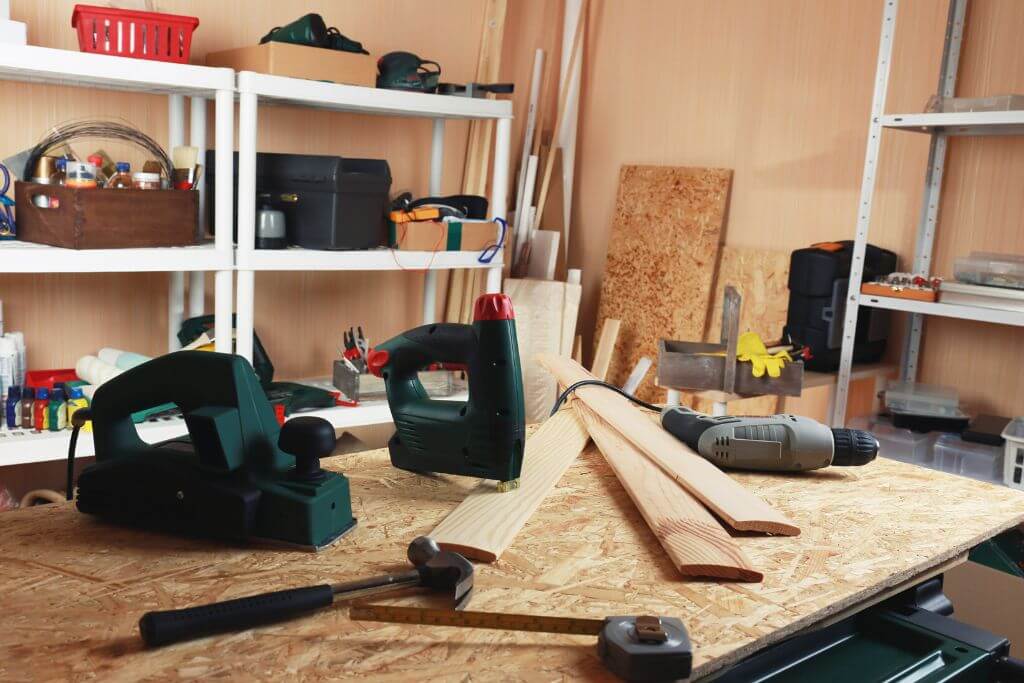
Sort Out Your Tools
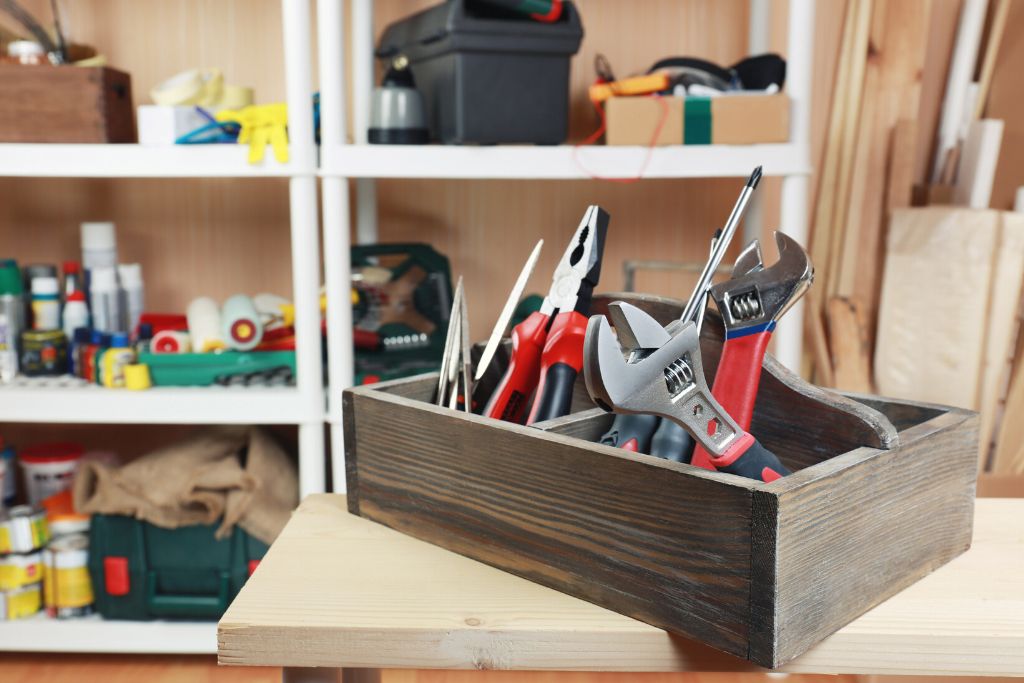
It’s not fun to spend 15 minutes looking for a specific tool just to get started on your project. It’s even less fun to do this several times during your work sessions.
It totally interrupts your work and breaks your concentration. If your tools are organized in a systematic manner, you’ll be able to find the tools you need faster.
One way of doing this is using different bins for tools that are similar to each other or tools that have a similar purpose.
You can also label them if you want to. Tools such as screwdrivers, wrenches, and sockets don’t differ enough to put them in separate bins.
So you can organize them according to their size. You can use small containers to keep track of small parts like nuts and bolts.
Once you’re done using your tools, don’t just leave them on your desk. Put them back in their designated spots, or your entire system’s purpose will be defeated.
Add Storage Units as Needed
If your workshop is cluttered and messy, it’s likely because you don’t have enough space for everything. If this is the case, consider installing new shelves and cupboards.
You can also install new drawers under your workbench to store your most frequently used tools. You can buy them or you could even make them your next project!
If your workspace is limited, consider utilizing the space on your walls. Pegboards are very popular and oftentimes used for this very purpose.
You can hang most tools and materials on a pegboard. You can also hang some hooks for whatever chords you might have lying on the floor.
Toss What You Don’t Need

There’s no reason to hold onto things that you have no use for. It’s tempting to keep everything “just in case you need it”. However, think about how long you’ve had that broken tool.
If you really want to keep an old item, seriously ask yourself if you’ll really use it and set aside time to fix it. If you can’t, it’s best to throw it away.
People hoard a lot more materials than they realize, so you can hire a skip bin to make things easier.
If you’re in the area, skip bin professionals in Browns Plains have got you covered. Give your workshop a complete overhaul and toss out the garbage.
Don’t Forget to Vacuum
Working for long periods of time in your workshop can damage your lungs, especially if you’re doing it every day.
Inhaling copious amounts of sawdust isn’t something you should just be complacent about. Not only is it terrible for your lungs, but it’s also a major fire hazard.
Do not take these risks. Invest in a powerful vacuum cleaner for your workshop, preferably with an elastic hose holder so that you can get to those hard-to-reach corners.
Clear Your Workbench after Every Session
Don’t leave your messes for future you to deal with. Take 5 minutes to put away all of your tools and materials in their proper places, dust off your bench, and clear everything else that you used during this working session.
You don’t have to deep clean every crack and crevice, but you should take the time to clear your workbench after every session so that your next session is just as productive.
This way, you’ll be able to jump right back into your work next time, instead of having to clean up before getting started. That mess might even dissuade you from starting another work session.
That’s why it’s best to wind down from your current session by doing future you a favor and clearing your workbench after you’re done.
Use a Workbench Cover for the Messy Jobs
If you’ve used your workbench for long enough, you’re definitely familiar with rosin paper and have some lying around in your workshop.
Rosin paper is typically used to line walls, roofs, and floors, protecting them against dust and wind. It’s a good material to have on hand for many types of projects.
Rosin paper can also be used as a type of bench cover. Just unroll some and fold it over your workbench.
That way, whatever paint or glue you’re using will not get to your workbench. Rosin paper can take quite a bit of wear and tear, but you can always replace it if it gets too dirty.
Final Thoughts
Having a clean and organized workspace really makes all the difference. You’ll notice how much more work you’ll be able to get done after the space has been decluttered.
If you take the time to set up these organization systems now, they’ll serve you for many years to come.
Now that you know what you can do to maximize your productivity, don’t just do nothing about it.
Take action! Set aside time to deep clean your workbench, and use some of these tips and tricks.


![9 Best Pole Saws of 2023 [Ultimate Guide]](https://handykeen.b-cdn.net/wp-content/uploads/2021/03/best-pole-saw-300x200.jpg "9 Best Pole Saws of 2023 [Ultimate Guide]")
