The DIY wooden box is unarguably the most basic form of woodworking. Once you can do one properly, you will master all the fundamentals of this interesting profession.
However, the number of guides on this subject is simply too high. Among them, there surely are genuine directions and more challenges, but none can argue that unprofessional ones are also numerous.
That is why we have put together a list of these 42 great DIY wooden box plans to keep something your necessary and precious.
Table of Contents
- 1. Basic Wooden Boxes
- 2. DIY Few Simple Boxes – Instructables
- 3. DIY Wooden Jewelry Box
- 4. DIY Wooden Box Centerpiece
- 5. DIY Wooden Crate
- 6. DIY Wooden Toy Bin
- 7. DIY Vegetable Storage Box
- 8. How To Build A Wooden Box For Beginners
- 9. DIY Dog Toy Box
- 10. DIY Book Bin
- 11. DIY Rolling Blanket Storage Box
- 12. DIY Scrap Wood Keepsake Box
- 13. Woodworking Storage Box – Man Made DIY
- 14. Scrap Wood Patterned Box
- 15. DIY Customizable Size Boxes
- 16. Pop Projects’ Wooden Boxes
- 17. Custom Box Dividers
- 18. DIY Snack Display Station
- 19. How To Make A Basic Box
- 20. DIY Mudroom Bins
- 21. Stackable Root Vegetable Bin
- 22. DIY Woodworking Decorative Wood Box
- 23. Wooden Toy Box
- 24. Fine Woodworking’s DIY Box With Two Ways
- 25. DIY Card Box
- 26. DIY Deck Box Plans
- 27. Family Handyman’s Keepsake Box
- 28. DIY Planter Box
- 29. DIY Pallet Centerpiece Box
- 30. Keepsake Wood Box Using Box Joints
- 31. DIY Reclaimed Wood Storage Box
- 32. DIY Wooden Pie Box
- 33. Life Storage Blog’s DIY Wooden Crate
- 34. DIY Wood Centerpiece Box
- 35. How To Make A Wooden Box By Jay Bates
- 36. DIY Industrial Wood Toy Crate
- 37. Wooden Box – My Creative Days
- 38. Clean And Scentsible’s DIY Wooden Crate
- 39. DIY Lego Bin
- 40. DIY Vintage Pallet Wood Crate
- 41. Pottery Barn Knock-Off Bulk Bin
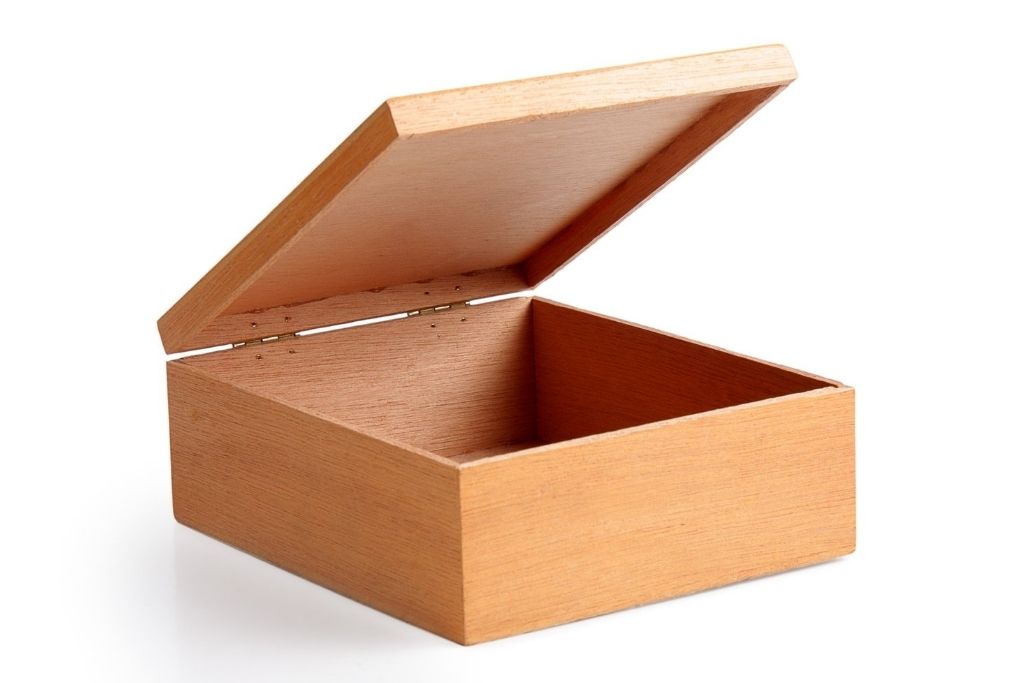
- 42. DIY Simple Wooden Box With Mortised Hinges
- Conclusion
1. Basic Wooden Boxes
To start things off, we would like to introduce to you an easy enough project. This basic wooden box plan fits the requirement perfectly, as there is nothing complicated about it.
This box is lightweight enough to be attached to the wall with 2 studs. Or you can put them anywhere in the home
All you need to do is cut all the boards to length, give them a proper sanding, and assemble them with nails. Each box should not take you more than 1 hour.
Project details: lowes.com
2. DIY Few Simple Boxes – Instructables
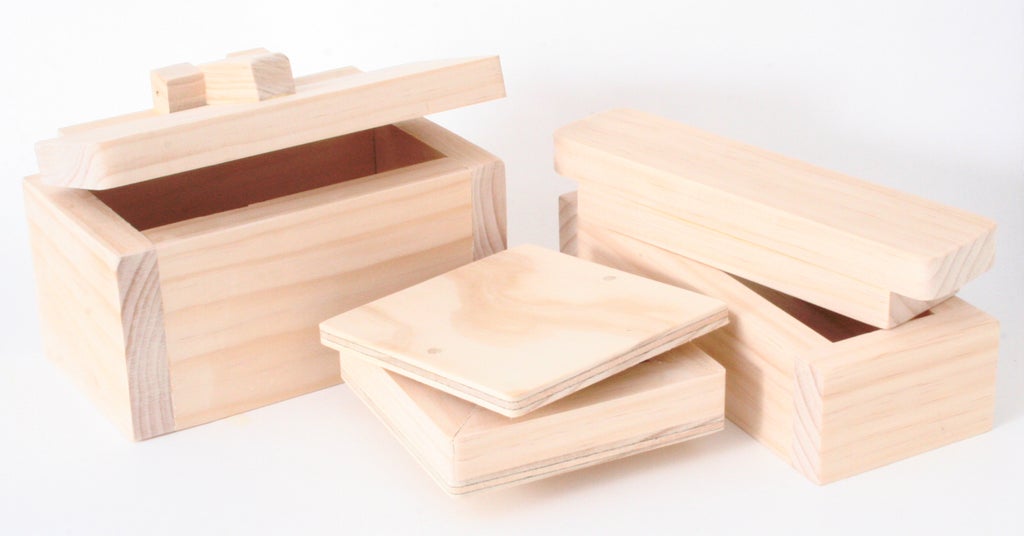
You will learn to make a basic box with a lid, a box with integrated hinges, and a mitered corner box. Each box is gradually more difficult and demanding to make.
You can make the first box and the second with no special tool. However, the last one requires a miter saw to cut all edges at 45 degrees
We believe this project is the best learning experience possible for you.
Project details: instructables.com
3. DIY Wooden Jewelry Box
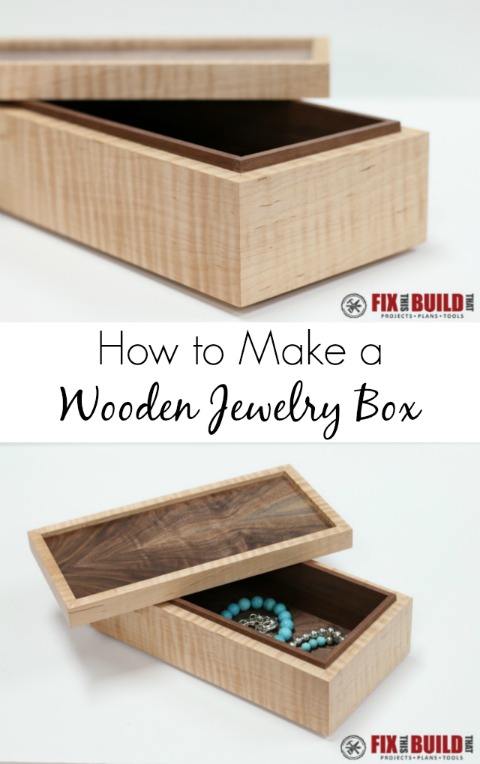
The special thing about this DIY wooden jewelry box plan is that it does not require any special hardware. You see, instead of adding in complicated mechanisms like locks or hinges, you will be making use of friction fit.
As a result, this project does not require you to be very familiar with woodworking. It’s also a great gift for your girlfriend or wife.
Project details: fixthisbuildthat.com
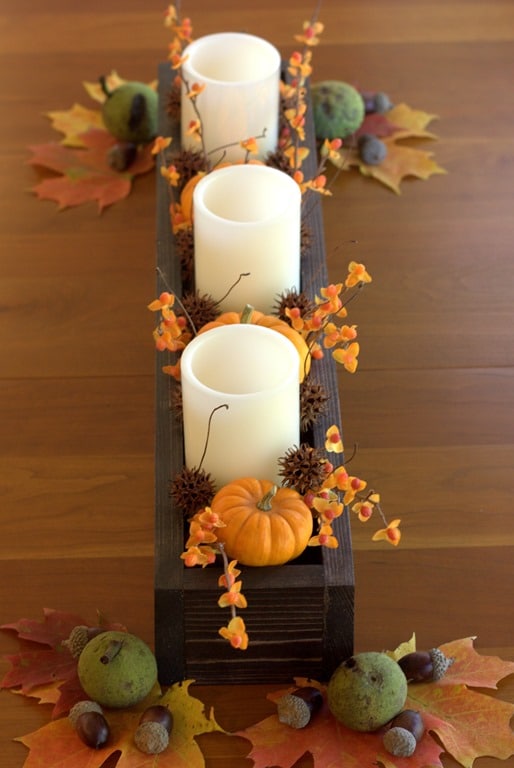
4. DIY Wooden Box Centerpiece
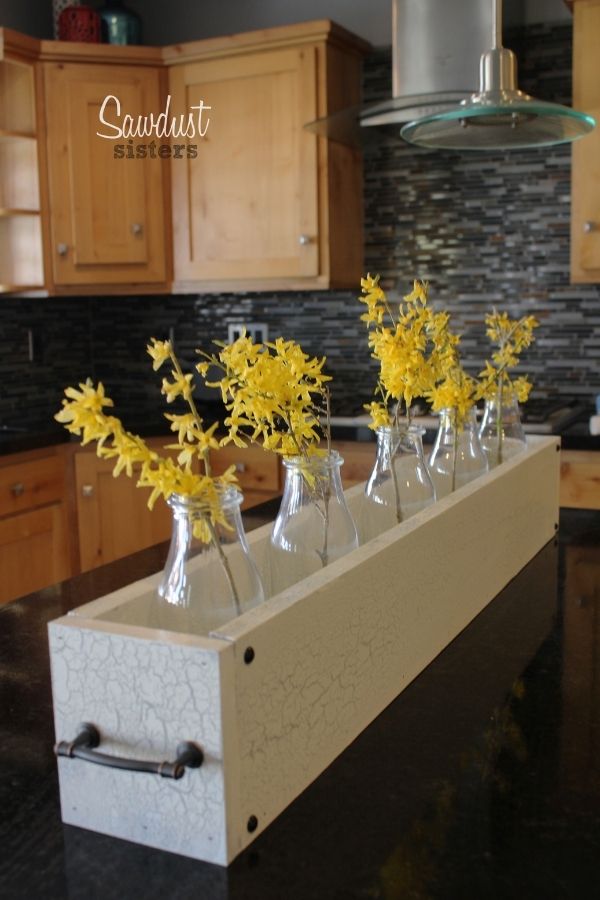
The first thing that you will notice about this centerpiece wooden box is its crackle finish. It will make space your kitchen that looks more attractive and fun.
To attain this special look, you have to spend quite a bit of time and effort.
Before assembling the boards to build the box, give them a coat of grey paint and crackle glaze and let it dry. Then, saturate a roller with the whitest paint you can find and roll it over the boards twice.
Project details: sawdustsisters.com
5. DIY Wooden Crate
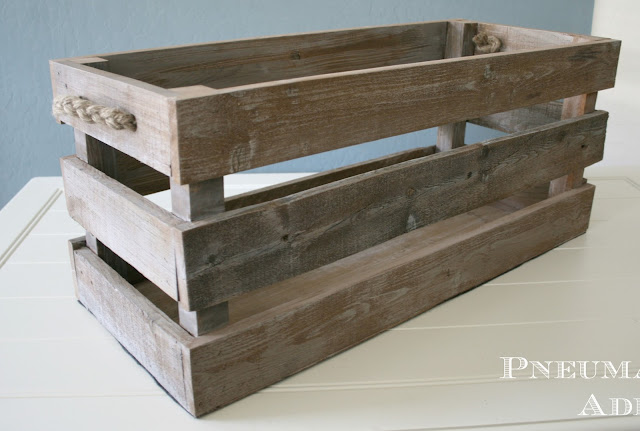
Instead of the usual bulky and awkward boxes, this DIY lets you build a vintage reminder of the old days in the form of crates. You can also customize how big or small your finished product will be.
You may either plan for a rectangular or a perfectly squared crate and gather materials accordingly.
Also, this wooden crate has rope handlebars so you can easy move them.
Project details: pneumaticaddict.com
6. DIY Wooden Toy Bin
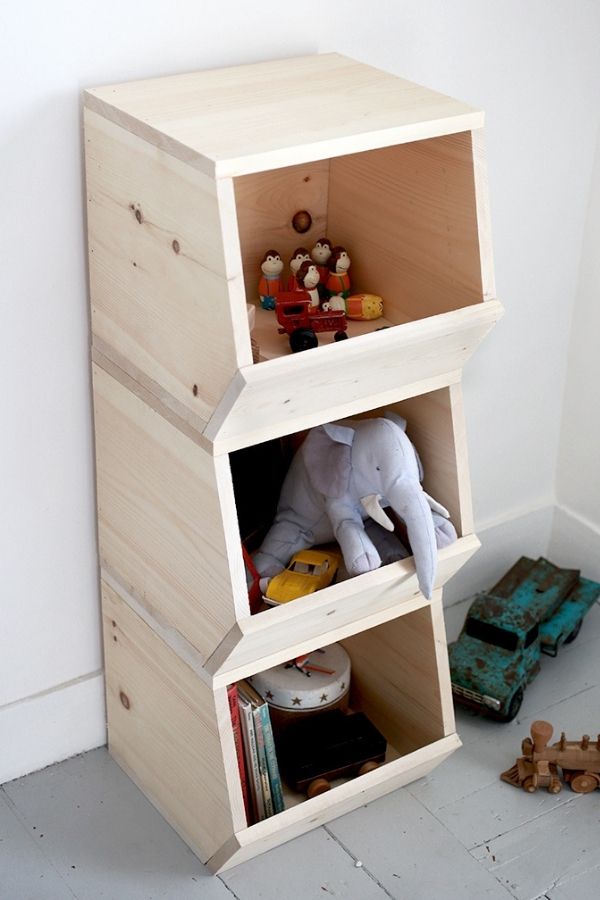
Anyone who has a kid knows just how incredibly messy children can be with toys. With this project, it will help your efficient way to store and classify these things.
We love the fact that the box itself comes with 3 smaller compartments, instead of the usual single huge box.
This design means that the Your child will have a much easier time finding a specific toy without messing the whole box up.
Project details: themerrythought.com
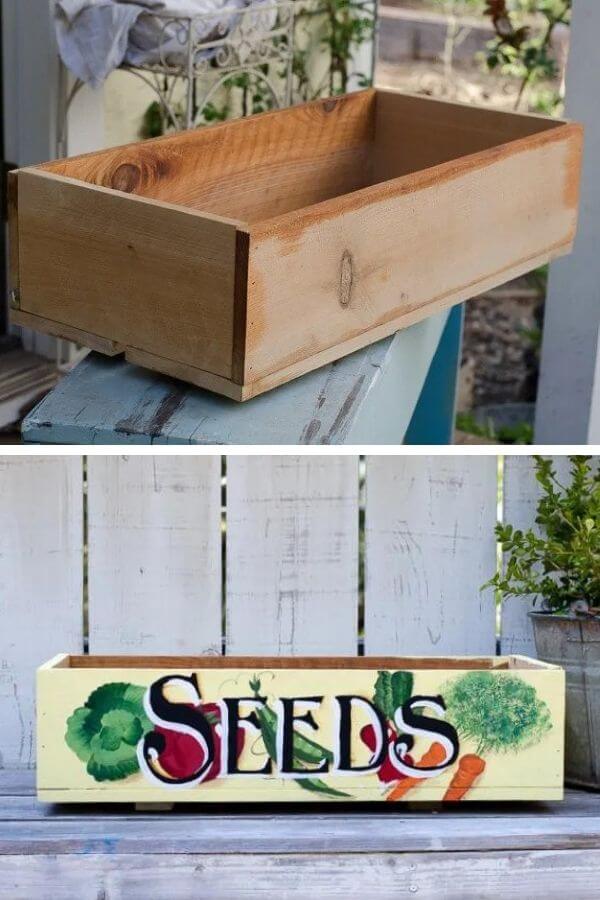
7. DIY Vegetable Storage Box
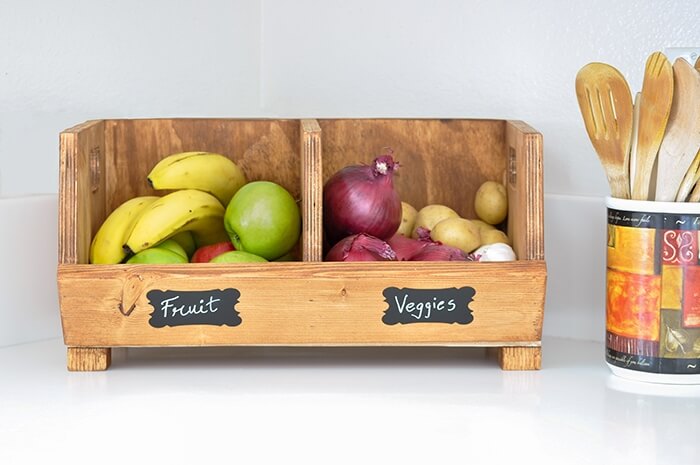
The Vegetable Storage Box is arguably one of the cheapest projects on this list. After all, it is the first one to require nothing more than scrap wood as the main material.
You can spend close to nothing on this project, a jigsaw to cut wood, some wood nails, and wood glue. Ready to go!
Project details: anikasdiylife.com
8. How To Build A Wooden Box For Beginners
This wooden box is a quick and easy project that can complete in about 10 – 20 minutes.
The dimensions and instructions are included details in the video. The box can paint, stain, or left raw depending on your preference.
This project is perfect for beginners as it is easy to do. It is also a great way to get into woodworking.
By following the simple instructions and using only a few basic tools, you can create a beautiful and useful wooden box.
9. DIY Dog Toy Box
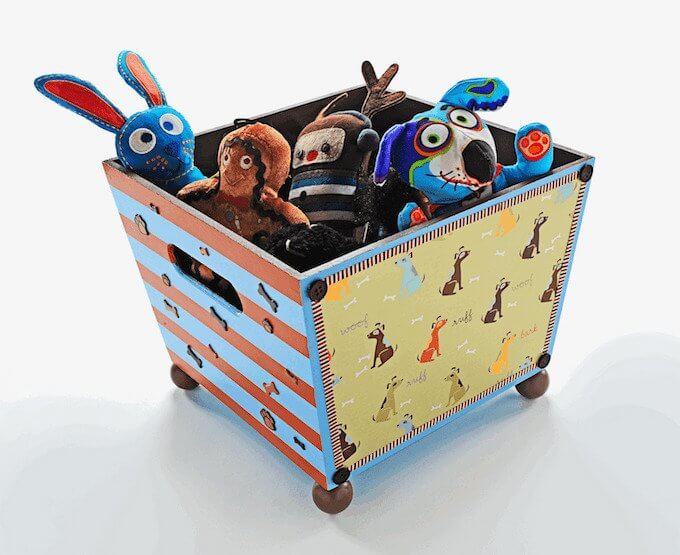
This toy box’s frame is fairly simple to make, but the painting process is a lot more complicated. First, you must basecoat both the inside and outside of the box, then make side stripes with stencil tapes.
Paint over the exposed area with Terra Cotta, then remove the stripes. Finally, coat the whole bin at least twice with Mod Podge. You should wait half an hour between each step.
Project details: modpodgerocksblog.com
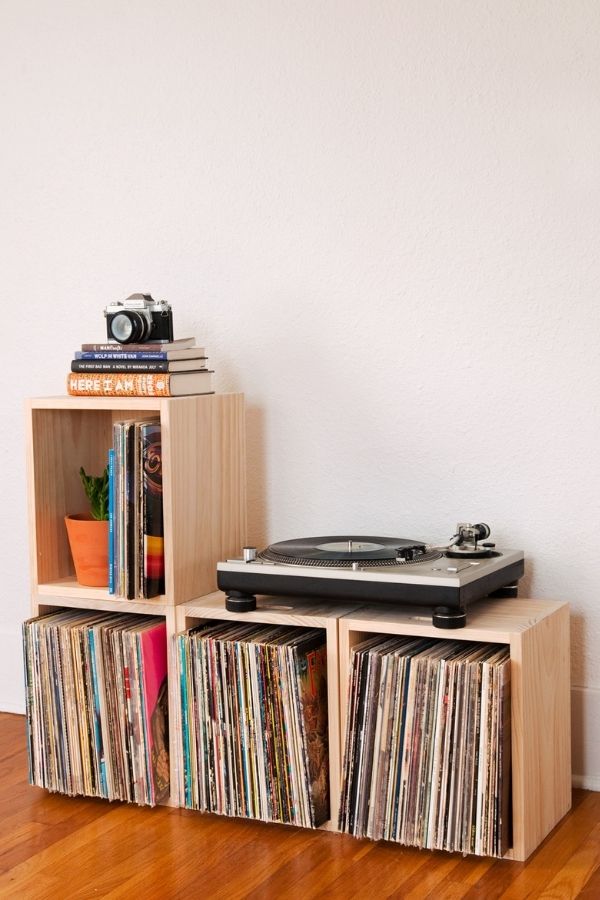
10. DIY Book Bin
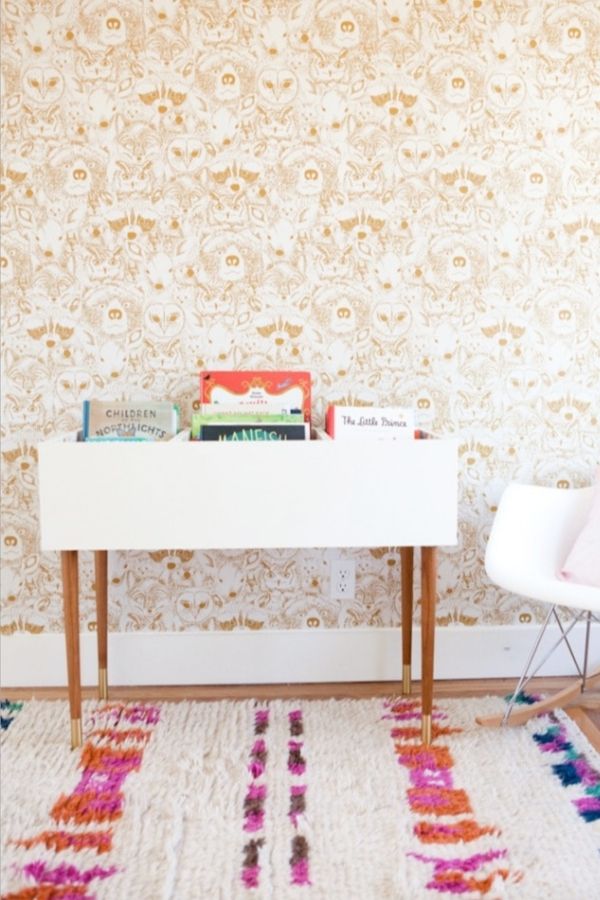
The book bin itself is nothing too special, having the usual 3-part construction to help with classification.
However, it has 4 customizable legs to keep the books away from the floor, preventing dust buildup and decay.
You can either build your own wooden legs or buy them from specialized stores.
Project details: thislittlestreet.com
11. DIY Rolling Blanket Storage Box
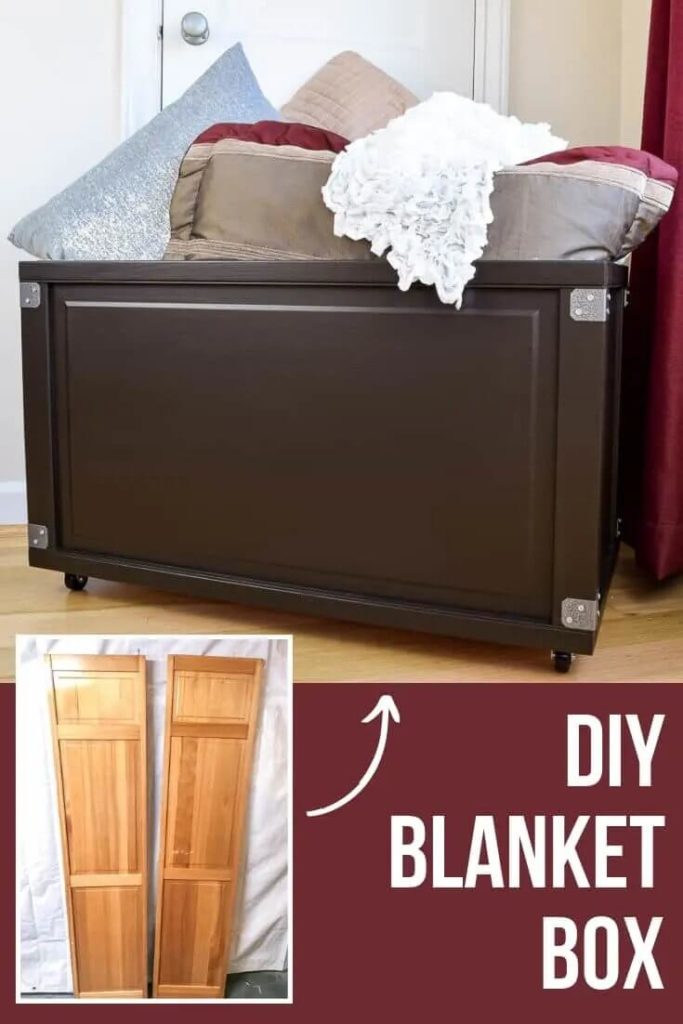
This blanket storage box is more of a recycling method, making full use of your old bi-fold doors. Instead of throwing them away wastefully, you can break them down to build blanket storage boxes.
Due to the door panels being much lighter than solid wood of the same size, the boxes are easier to move around. If you can put them on small casters, their portability is even superior.
Project details: thehandymansdaughter.com
12. DIY Scrap Wood Keepsake Box
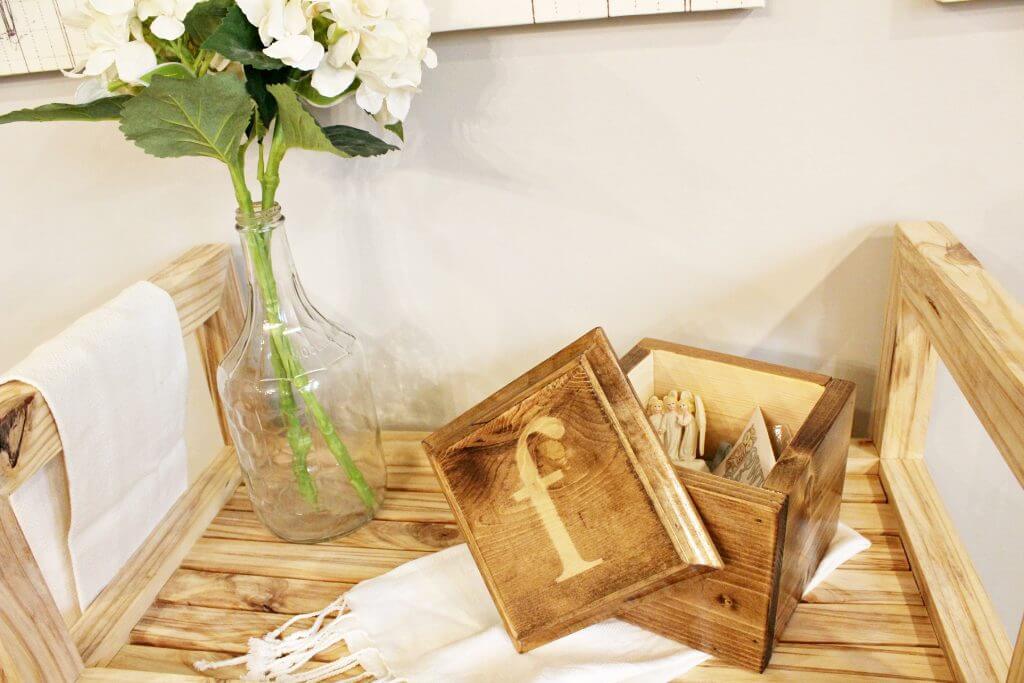
Everyone almost has some small things that they want to store as keepsakes. With this Scrap Wood Keepsake Box, you have a better storage method than some old Nike cardboard boxes.
You only need 5 square wooden planks of exactly the same size. Put 1 as the base and the other 4 around it. Then, “fold” the side pieces up, glue, or nail them together.
Depending on your keepsakes, you may want to make a top piece.
Project details: woodshopdiaries.com
13. Woodworking Storage Box – Man Made DIY
The most interesting thing about these storage boxes is, of course, their stackable nature. You can use any side, long or short, as the base, without worrying about them not being able to handle the pressure.
Due to this advantage, you might mix and match your stack of boxes, making it much less monotonous. For example, you can put 3 boxes standing as the base and 2 boxes lying as the top.
Project details: manmadediy.com
14. Scrap Wood Patterned Box
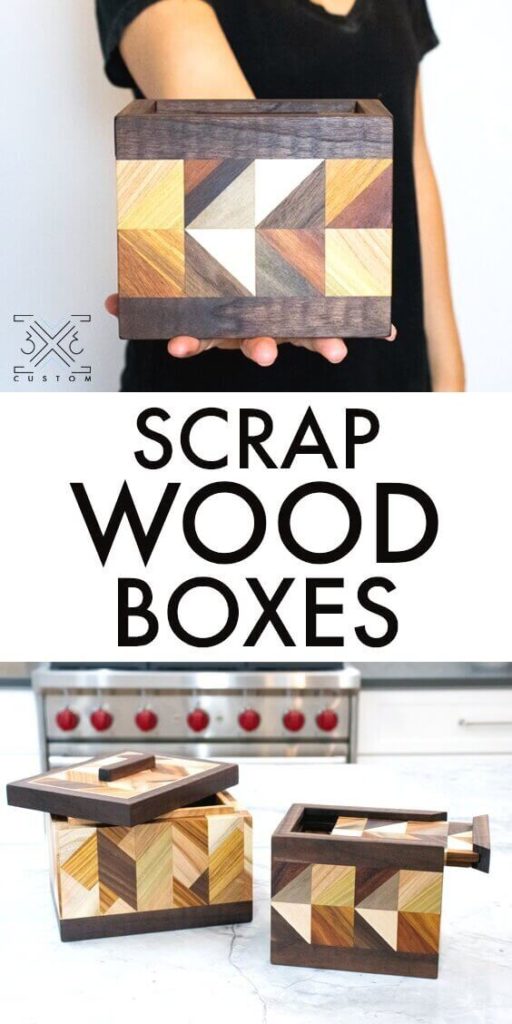
You don’t need to buy materials for these boxes; just raid your scrap bin for 3/4″ thick boards. The selling point of these scrap wood boxes is the chevron pattern. It looks cool as a jewelry box.
To get this pattern, you need to first cut the boards into 1-1/2″, 45-degree strips. Then, you glue them all back, flipping every other piece. The last step is to cut the whole thing into 5 parts of equal size and assemble the box.
Project details: 3x3custom.com
15. DIY Customizable Size Boxes
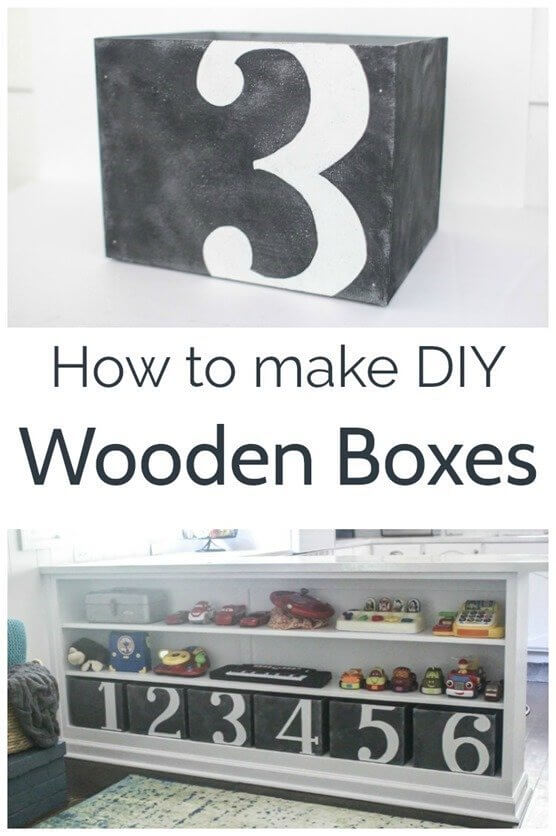
Sometimes, it is nearly impossible to find a box of the exact size that you need. This plan will show you exactly how to make boxes of any size.
You need 5 wooden panels, with the 2 front and back planks being 1/2″ longer than the 2 side pieces. As for the bottom piece, its length and width should be 1/2″ shorter than the other 4.
You can make a lot of boxes if you want. Just mark for numbers or even your special characters with each box to easily store more different items.
Project details: lovelyetc.com
16. Pop Projects’ Wooden Boxes
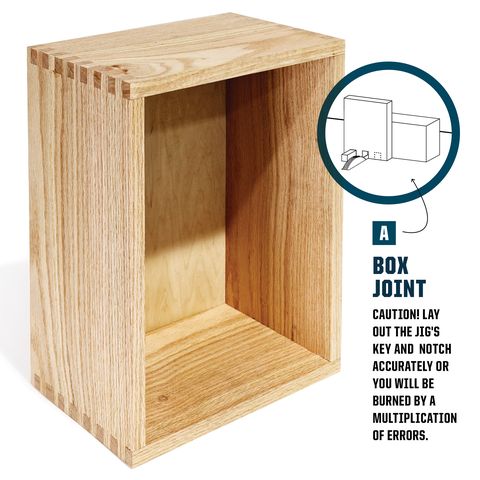
There are 3 styles of box-making involved in this plan. The first one is the box joint; next is the spline, and finally the rabbet.
The box joint has a look similar to a dovetail, and you don’t need any nails to fix it in place. On the other hand, the spline box requires you to trim splines on the corner boxes and fit the side pieces into them.
The rabbet box, staying true to its name, needs you to mill a bunch of 2-sided channels (rabbets) into the boards’ edges.
Project details: popularmechanics.com
17. Custom Box Dividers
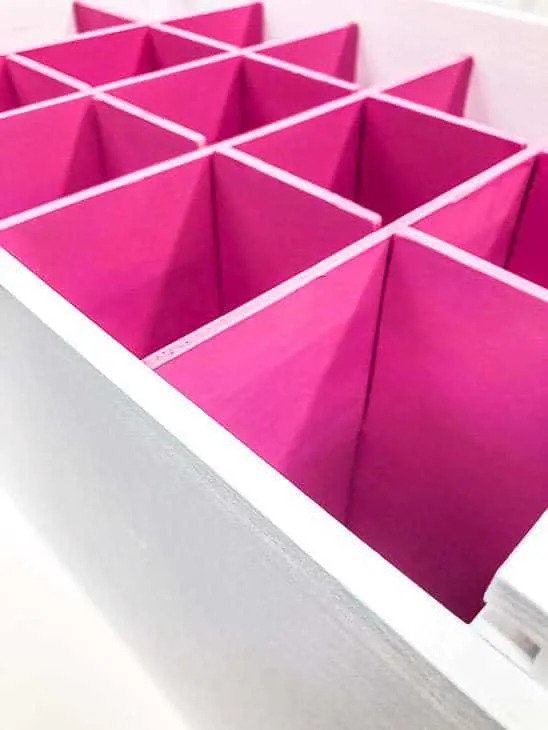
This plan is not about making a box. It makes a divider to get the most storage out of any box. After all, just shoving everything into a single storage area is both inefficient and space-wasting.
You need 4 pieces as long as the box’s width and 2 as long as the box’s length. Their width will be the same as the box’s height.
Cut a notch half the box’s height where 2 dividers will cross. Slide them together to form a grid and fit it into the box.
Project details: thehandymansdaughter.com
18. DIY Snack Display Station

The projects we have introduced until now have all been relatively easy to build. That is why we want to challenge you a little bit with this project.
The first thing to do is build 3 boxes from 3/4″ MDF. Remember to ensure that the size stays the same, or else the screws will be exposed.
The most challenging part is to build the stand and fit the boxes at an angle. When you build the stand, remember to cut the top at the same angle you plan to install the first box.
Line the box according to the stand’s box, screw it in with 2 wood screws. Do the same for the other 2.
Project details: 100things2do.ca
19. How To Make A Basic Box
In this video, the author describes how to make a box using rabbet joints.
A rabbet joint is a type of joinery where two pieces of wood are joined together at a right angle, with one piece of wood flush against the other. The rabbet joint creates by cutting a recess into one of the pieces of wood.
To make this box, first cut four rabbets, one in each corner, into the two pieces of wood that will form the sides of the box.
The rabbets should be ⅛ inch deep and should be cut so that the piece of wood that will form the bottom of the box will fit snugly into them.
Next, glue and clamp the two pieces of wood together so that they form a square. Be sure to apply glue to both surfaces of the rabbet joint.
Let the glue dry, then use a saw to cut the two pieces of wood to their final size. Finally, sand the edges of the box smooth.
Rabbet joints are strong and provide a lot of surface area for glue, making them ideal for boxes. They’re also easy to assemble, making them a good choice for beginner woodworkers.
With a little practice, you’ll be able to make boxes with rabbet joints that are both strong and beautiful.
20. DIY Mudroom Bins
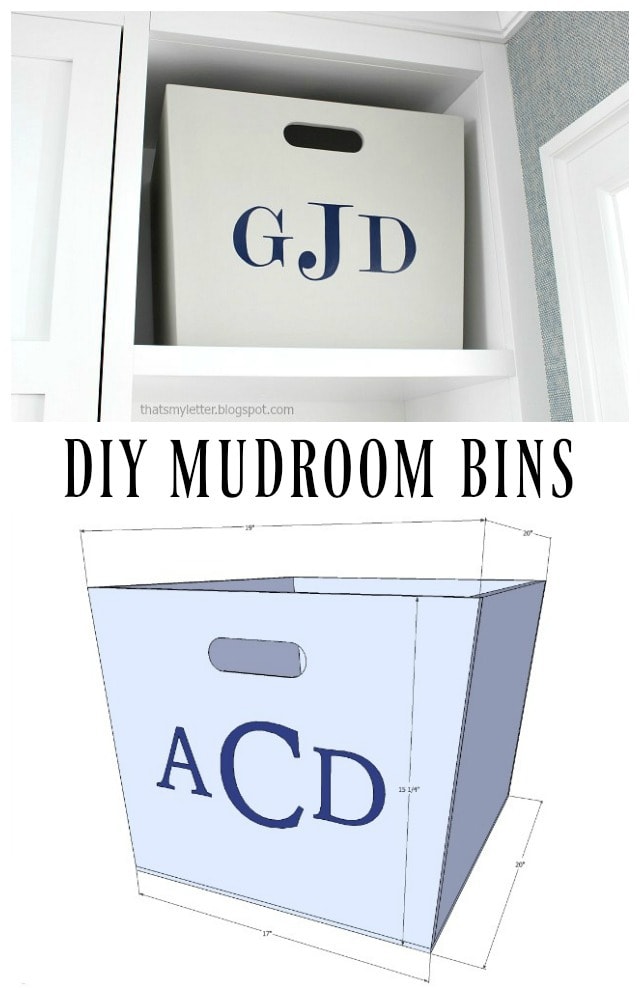
Mudrooms are often messy, especially during the rainy season. With this project, you can store your hats, gloves, or shoes in neat boxes instead of the usual shoddy baskets.
Each box has a clearance space of 1 inch on both sides, and the top of the boxes also has a small breathing room if the box is higher and bigger off the ground. You can mark labels for each box to easy organization.
Project details: jaimecostiglio.com
21. Stackable Root Vegetable Bin
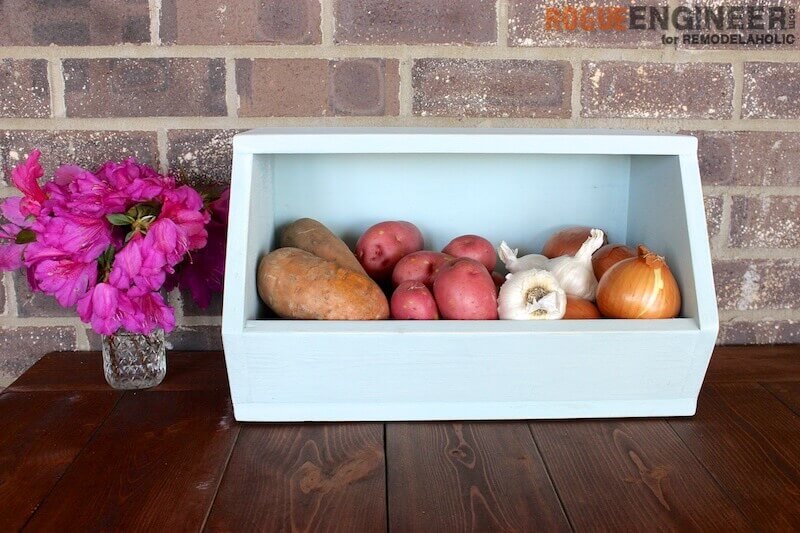
If you find storing potatoes or tomatoes in large bowls too space-consuming and overflowing, you will like this project. These Root Vegetable Bins offer a presentable way to store any vegetable.
Moreover, with this way of building, you can theoretically stack them on top of each other infinitely. As such, you can store an impressively huge amount of vegetables without taking up too much space.
Project details: remodelaholic.com
22. DIY Woodworking Decorative Wood Box
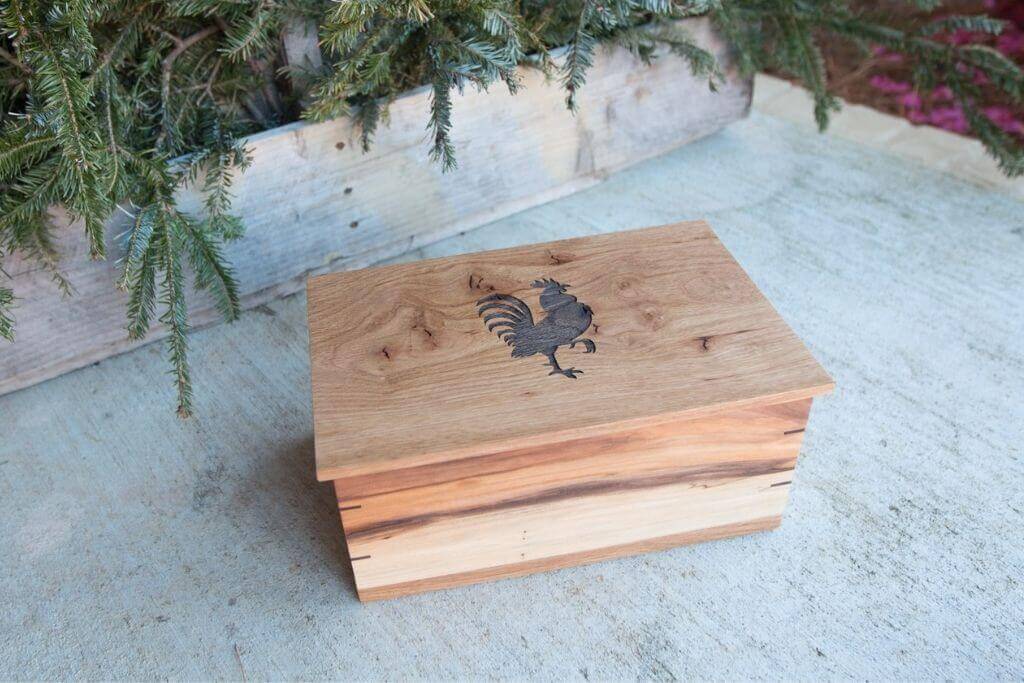
Due to it being more of a decorative piece, this wood box’s main material will be something high-quality like white oak and red gum.
The decorative rooster on top of the box is engraved by laser, ensuring its sharpness and longevity. This also is a great gift for your friend if they like roosters.
Project details: bruceaulrich.com
23. Wooden Toy Box
If you like to jazz up your child’s playing ground a little bit, this totally whimsy project will satisfy you. The box looks like a miniature toy chest with a simple design, coming with a lock and hinges.
This box needs 1 big wood panel to act as the base, 4 smaller panels as the sides, and 4 posts to support the whole thing. Finally, you have to build a lid with hinges and hasps.
Project details: woodworkingcorner.com
24. Fine Woodworking’s DIY Box With Two Ways
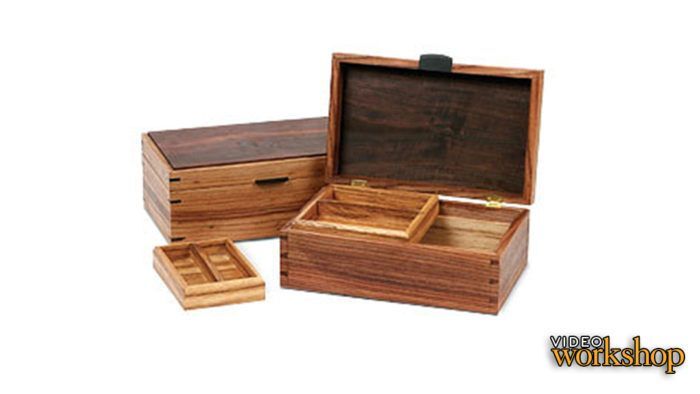
This DIY box is divided into 2 parts, 1 for a woodworking beginner and 1 for an experienced builder.
The newbies can try their hands with the mitered spline box and learn more about how to resaw boards for perfect 4-corner matches. They will also learn groove cutting, a technique necessary for most advanced skills.
Meanwhile, the pros can challenge with the mitered dovetail box. As such, they will be able to familiarize themselves more with some cut techniques or test skills.
Project details: finewoodworking.com
25. DIY Card Box

We are talking about material-saving. Well, we doubt there is any plan better than this DIY card box. It is the first one that you can build from 1 single board.
Cut the board into 5 parts. Of them, the 2 side panels should be of equal size, while the front should be a little lower than the back panel. Doing so will create a small slit to accept the cards.
Project details: build-basic.com
26. DIY Deck Box Plans
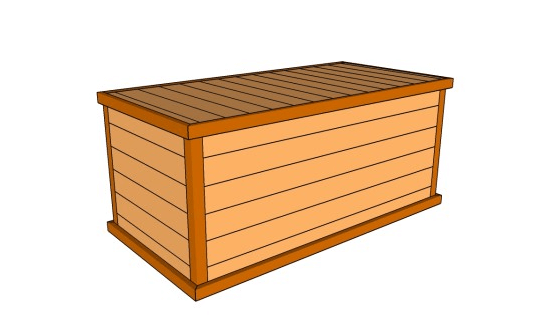
Despite the way it looks, this deck box plan is actually a medium challenge for woodworkers.
You need to make a sturdy frame for the whole box, use a spirit level for plumbing the legs, and ensure the right angles for the corners.
Only after you have completed the steps above can you move on to attaching slats over the supporting frame. To make sure that there is no water leaking in, use waterproof glue between each slat.
Project details: myoutdoorplans.com
27. Family Handyman’s Keepsake Box
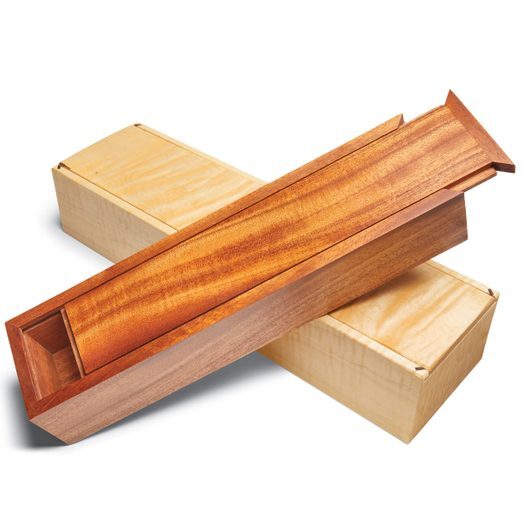
As you can easily see, the most appealing aspect of this Keepsake Box is its sliding lid. Obviously, this look and the useful lid are not easy to do, but it is absolutely worth your effort.
The hardest part is to correctly cut the rebates. They need to be small enough to fit into the gap, but big enough to hold the lid in place. If you are not confident, test if it fits with a grooved offcut.
Project details: familyhandyman.com
28. DIY Planter Box
As it is a planter box we are talking about, of course, there must be a gap at the bottom. Otherwise, the excessive water will not be able to escape, leading to your crop failing.
To get this gap, you must remember to cut 2 bottom boards less than the width of your intended box. Only by doing this can you obtain a gap enough for water to escape without losing too much dirt.
Project details: flowerpatchfarmhouse.com
29. DIY Pallet Centerpiece Box
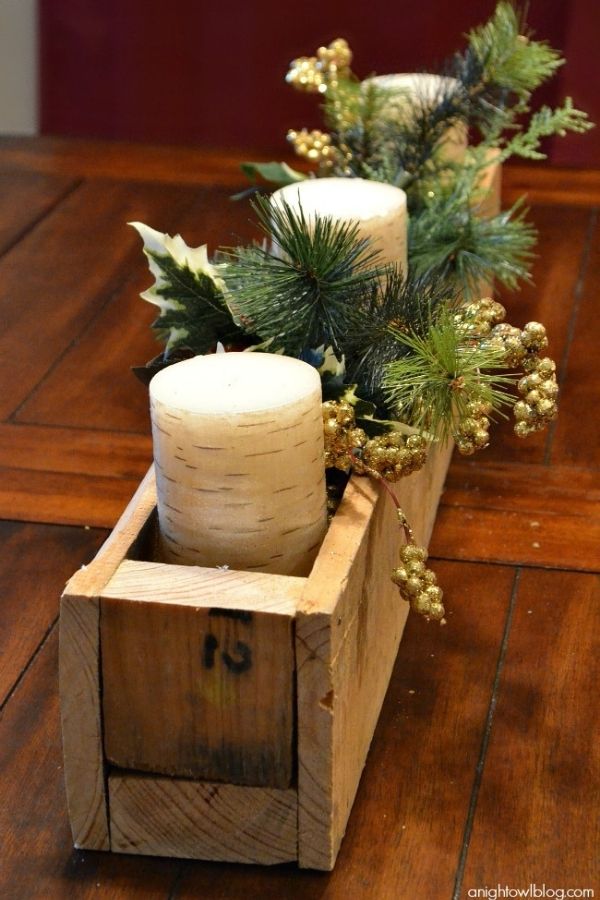
Pallet woods are well-known for their rustic and vintage look. Making use of that nature, you can turn an otherwise thrown pallet into a perfect centerpiece for your dining table.
This project is very basic to do, you only need to few wooden pieces.
Pallets are also readily available at a dirt-cheap price, so you can save quite a bit on the material budget. To decorate it, you can put in some candles and greens.
Project details: anightowlblog.com
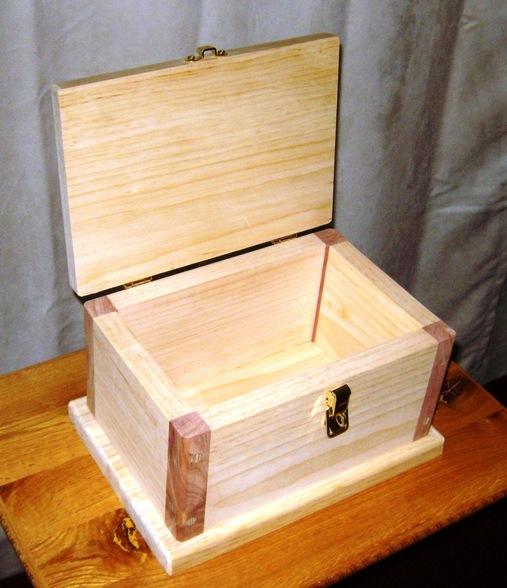
30. Keepsake Wood Box Using Box Joints
Making a finger-jointed box is a great project for any woodworker. With this project, the author shows you how to make a tight-fitting finger-jointed box, using some basic tools.
The box makes from Sapele wood, which is a beautiful wood with a red hue. The hardware for the project is also antique brass, which gives the finished product a nice, refined look.
You can easily find hardware (hinges and latch) on online stores such as Amazon. The installation process is simple, and no mortising is required.
Overall, this project is a great way to learn how to make finger joints and produce a beautiful box.
31. DIY Reclaimed Wood Storage Box
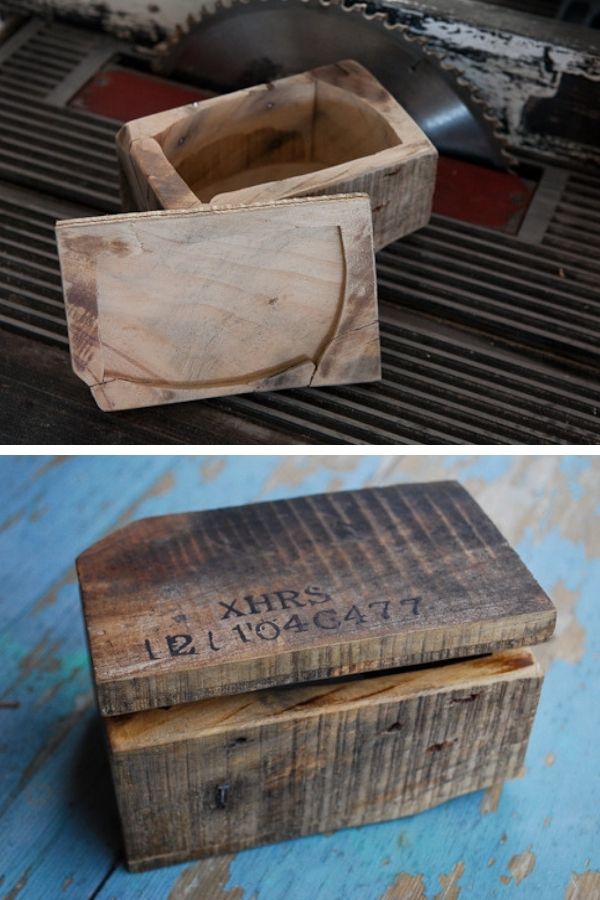
A good way to expand your woodworking skill is to make a bandsaw box. It teaches you how to be efficient with materials, as you need to turn 1 single wooden block into a box.
The hardest part of this project is, of course, to use the bandsaw properly. You want to cut with the bandsaw through the block according to a pre-drawn line, hogging all the materials out.
Project details: manmadediy.com
32. DIY Wooden Pie Box

The other projects require you to work almost all the steps with your hands, but this one is a little different. You will be using the Inventables’ X-Carve and Easel to design and cut the pieces.
Once they have been cut, all you need to do is put them together, add in some glue to get a fully functional wooden pie box.
Project details: addicted2diy.com
33. Life Storage Blog’s DIY Wooden Crate
The draw of this project is recycling, as you will build the whole crate from the reclaimed wood of a pallet.
Go to a local woodworker and ask them nicely. There is a high chance for them to give you a pallet for free.
Next, disassemble the pallet and cut the wood into 8 30-inch planks and 8 15-inch planks. Fix the longer boards together to form the sides and the shorter boards to make the ends.
Also, you only need to make 2 side handles from rope instead of solid metal, thanks to the integrated casters for better mobility.
Project details: lifestorage.com
34. DIY Wood Centerpiece Box
The focus of this Centerpiece Box is quick, easy, and affordable. True to this focus, you don’t need to spend too much on the material, as 3 bed slats are more than enough.
The quick part lies in the cutting process. As you need the same size for both sides and the base, you can stack the 3 slats on top of each other for 1 single cut.
As for the easy nature, the final steps of this plan only involve putting the cut parts together and sliding in the end pieces.
Project details: virginiasweetpea.com
35. How To Make A Wooden Box By Jay Bates
This video provides a detailed, step-by-step guide on how to make a walnut box with a miter joint.
The process starts with cutting the pieces to size. Next, the miter joint is glued and clamped in place. The pieces are then trimmed flush with a hand plane. Finally, the hinges are installed.
One important note is to use a router to cut the mortise for the hinges, making sure not to damage the layout lines. Screws are then used to attach the hinges.
After a bit of sanding, the project is finished with a coat of shellac. The box looks professional and sturdy.
36. DIY Industrial Wood Toy Crate
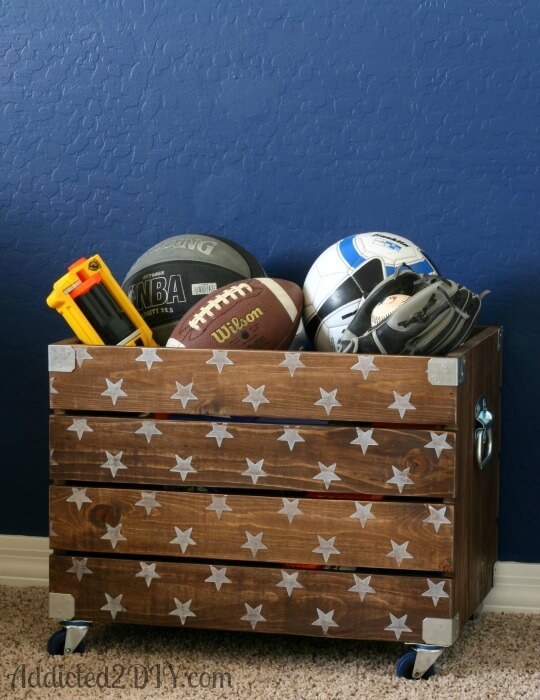
The box-making process itself is not that different from all the crate ideas we have shown you. Nonetheless, this time we can spice things up with an industrial yet still sporty look for the wooden crate.
To do so, stain the crate with the Special Walnut edition of Minwax Stain after finishing its assembling process. Then, you start to stencil it with white-colored stars.
Project details: addicted2diy.com
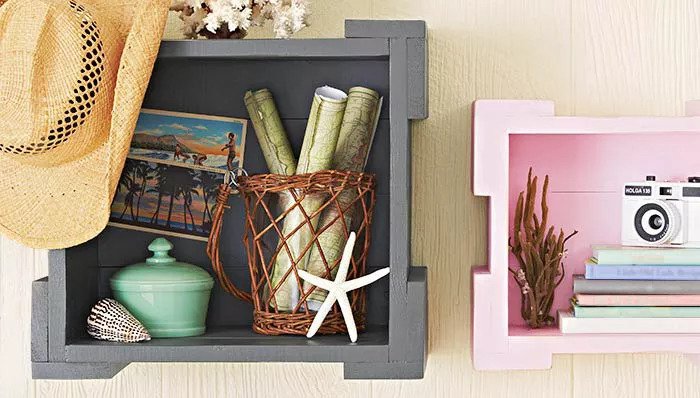
37. Wooden Box – My Creative Days

With just one look, you will quickly realize that these wooden boxes do not have any lid. That is because they will serve as drawers.
You need a template piece to make sure that everything is right to size. You can easily fit all the pieces together and nail them down with a nail gun.
After you have finished attaching the sides to the base, you will fix the hardware to the boxes’ front. Otherwise, how else will you pull them out?
Project details: mycreativedays.porch.com
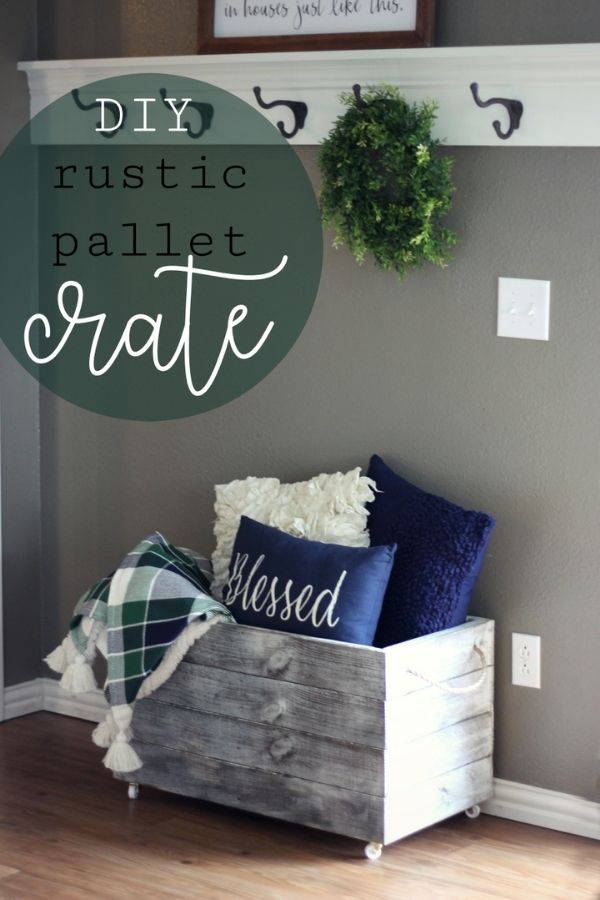
38. Clean And Scentsible’s DIY Wooden Crate
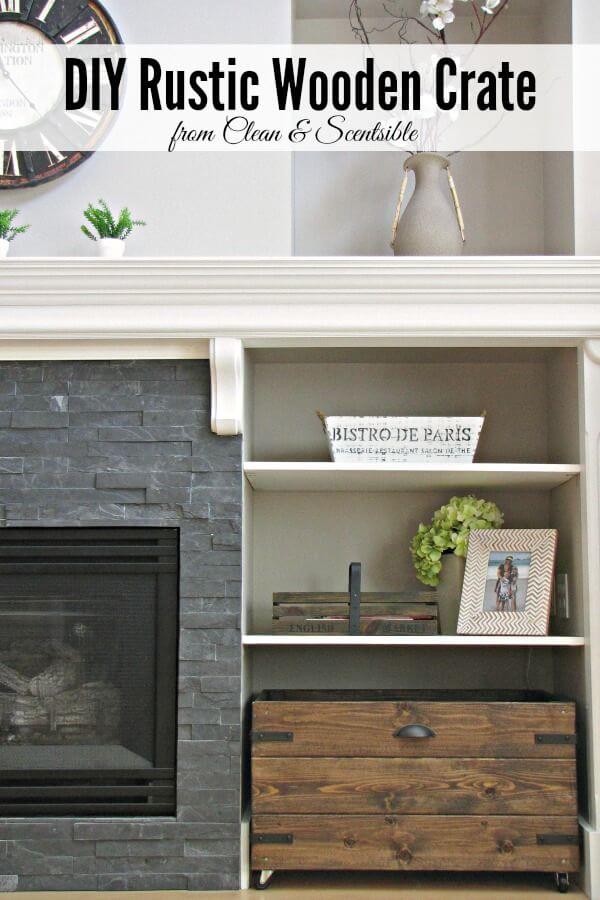
Most boxes, no matter how big or small, tend to be stationary. This disadvantage makes it quite a challenge each time you need to move them for cleaning purposes.
That is not the case with this project, as it is the first one in this list to sport a set of fully functional wheels. Both the tongue and base of this box are also made from lightweight plywood, improving its portability even more.
Project details: cleanandscentsible.com
39. DIY Lego Bin
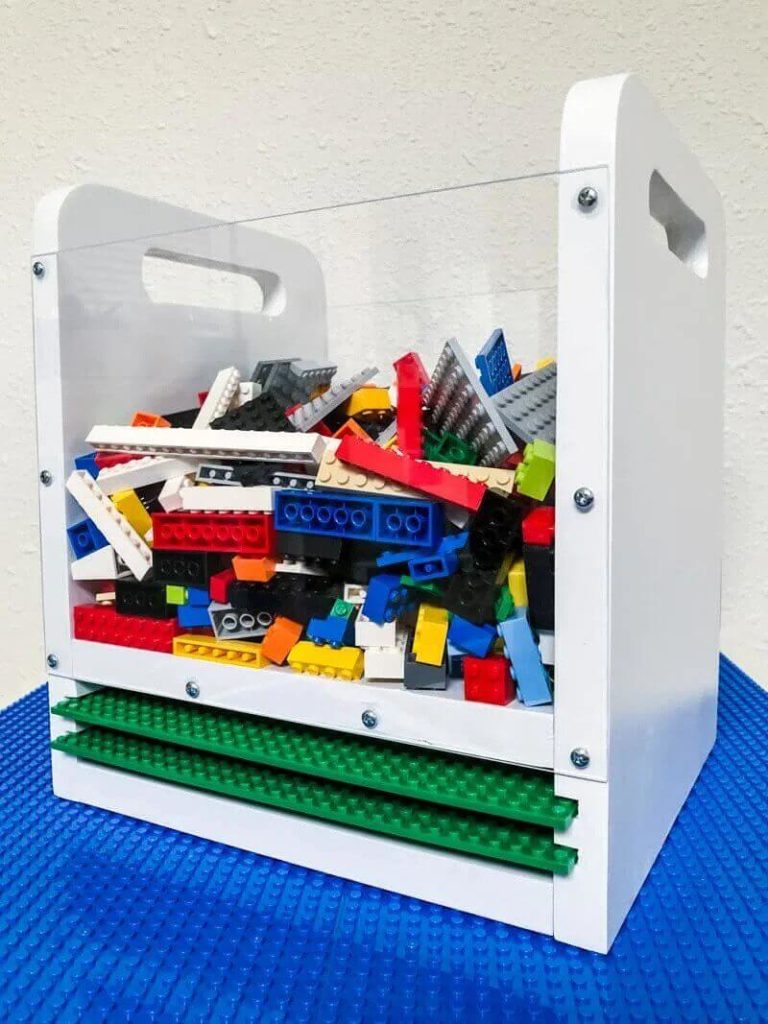
There’s no fun in storing Lego in a simple box, as there is no creativity and the box is stationary. This plan offers your child away to still be able to build Lego while moving around.
Its top compartment is huge, serving as the place where most of the loose pieces are stored. Its front and back sides are made of clear plexiglass so that kids can see which piece they need easily.
The bottom has 2 slots to store the baseplates, which is the backbone of any Lego construction.
Project details: thehandymansdaughter.com
40. DIY Vintage Pallet Wood Crate

One of the main reasons for the pallet love comes from their naturally rustic looks. It’s not easy to have interesting patterns and cracks while still retaining strong construction.
This Vintage Pallet Wood Crate makes use of this advantage to imbue a special vintage feel onto the crate. To do so, you must not make any change to the pallet externally.
Just give it a gentle sanding before dismantling it. It’s quite fun at final step is to transfer images to the wood crate.
You also need to keep in mind that not just any pallet is enough for this project. It must be either chemically treated or heat-treated, so look closely for an HT stamp.
Project details: apieceofrainbow.com
41. Pottery Barn Knock-Off Bulk Bin
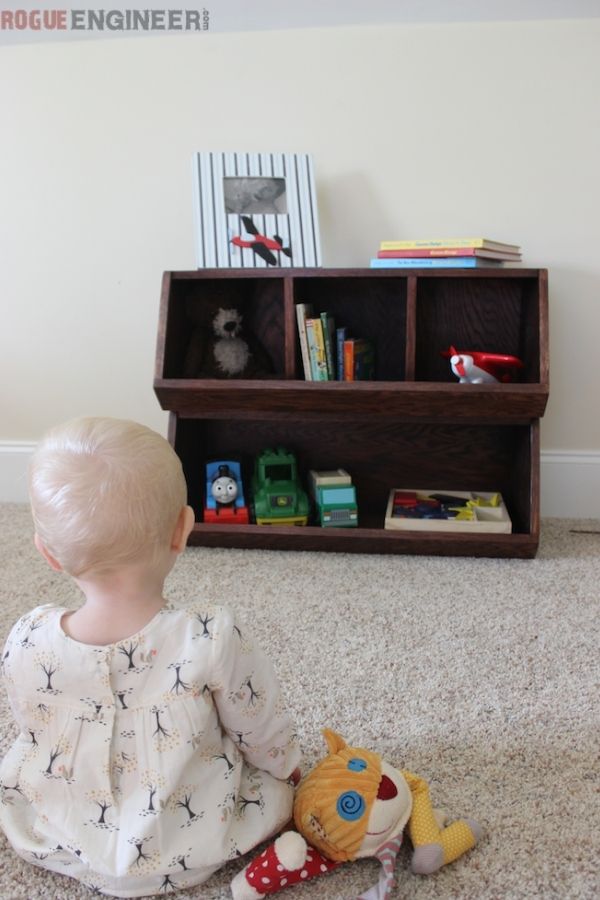
Pottery Barn just introduced some really interesting bulk bins for toy storage. Nonetheless, the price is not low at all, so we figure you will enjoy this knock-off DIY version.
As the focus is on saving money, you should buy a full 3/4″ plywood sheet measuring 48″ in width and 96″ in length. With this sheet, you will be able to build the whole bin and have some leftover material for the next project.
Project details: rogueengineer.com
42. DIY Simple Wooden Box With Mortised Hinges
This video walks you through the steps of making a beautiful wooden box that would make a great gift or addition to any collection.
Overall, the video is clear and concise. It covers all the important steps in building a wooden box with miter joints.
The process begins with cutting the panels to size, then assembling the box using wood glue and clamps. The edges are then sanded smooth and chamfered.
Lastly, the hinges are attached and the box is finished with three coats of shellac sealer to protect and enhance the wood’s natural beauty. The final product is a beautiful box with unique wormholes.
Conclusion
With these guides, you can now easily make a DIY wooden box that fits even the most peculiar taste.
No matter how picky you are, at least one idea out of these 42 can satisfy you. Some of them are easier to make, some are made with special materials, and some are challenging.
We hope that these plans can inspire you with some creativity. If you find any project enjoyable, you can follow the details guide each step to make the whole thing. You can even come up with an upgraded version from those instructions.

![9 Best Pole Saws of 2023 [Ultimate Guide]](https://handykeen.b-cdn.net/wp-content/uploads/2021/03/best-pole-saw-300x200.jpg "9 Best Pole Saws of 2023 [Ultimate Guide]")
![How To Start A Woodworking Business [Ultimate Guide]](https://handykeen.b-cdn.net/wp-content/uploads/2021/10/woodworking-business-1-300x200.jpg "How To Start A Woodworking Business [Ultimate Guide]")


