Should you make a DIY guitar stand? Let us guess! You are putting the guitar against the wall? This exposes the gear to a high risk of sliding, falling, and breaking.
Or, you might prefer accommodating your guitar in a hard case? It is a safe storage place, but it discourages you from accessing the guitar quickly to play or practice.
A DIY stand fixes both problems. It put or hangs the instrument in a proper position to prevent damages. And the stand is convenient for on-demand use and showing off your collection to others.
Let’s look at 35 of these DIY guitar stand plans, and you will love them!

Table of Contents
- 1. DIY Simple Guitar Stand From A Single Board of Wood
- 2. Build A Folding Guitar Stand From Pretty Handy Girl
- 3. DIY Wooden Guitar Stand By Instructables
- 4. DIY Guitar Hanger By Crafted Workshop
- 5. Scrap Wood Guitar Stand and Stool
- 6. DIY PVC Multiple Guitar Stand
- 7. DIY Wooden Guitar Stand With Essential Power Tools
- 8. Guitar Stand Plan With A drawer
- 9. DIY Cheap & Easy Guitar Stand Plan
- 10. Inexpensive Guitar Stand From PVC Pipe
- 11. DIY Hanging Guitar Stand
- 12. Build A Custom Guitar Stand
- 13. Easy Folding Guitar Stand
- 14. Smallest And Cheap DIY Guitar Stand From PVC
- 15. Knockdown Cherry Guitar Stand
- 16. Multi Guitar Rack By 3×3 Custom
- 17. DIY Modern Guitar Stand
- 18. Homemade Guitar Stand Built From An Old Amplifier
- 19. Build A Multi-guitar Guitar Stand
- 20. Wooden Guitar Stand Plans From My Outdoor Plans
- 21. DIY Multiple Guitar Stand By Instructables
- 22. DIY Guitar Stand With Elegant Curves
- 23. DIY Guitar Wall Mount With Cheap Price
- 24. DIY Wall Mount Guitar Holder
- 25. Make A Guitar Stand Out Of Wood
- 26. DIY Winged Guitar Stand
- 27. DIY 3D Printed Guitar Stand
- 28. DIY A PVC Guitar Rack Stand Plan
- 29. Make A Multi Guitar Stand By I Like To Make Stuff
- 30. DIY Wall Mount Guitar Holder
- 31. Easy DIY Guitar Stand By Guitar Talk
- 32. A-Frame Wood Guitar Stand
- 33. DIY Guitar Stand From PVC Pipe
- 34. DIY Plywood Multi Guitar Stand
- 35. DIY Multiple Wood Guitar Stand By Instructables
- Conclusion
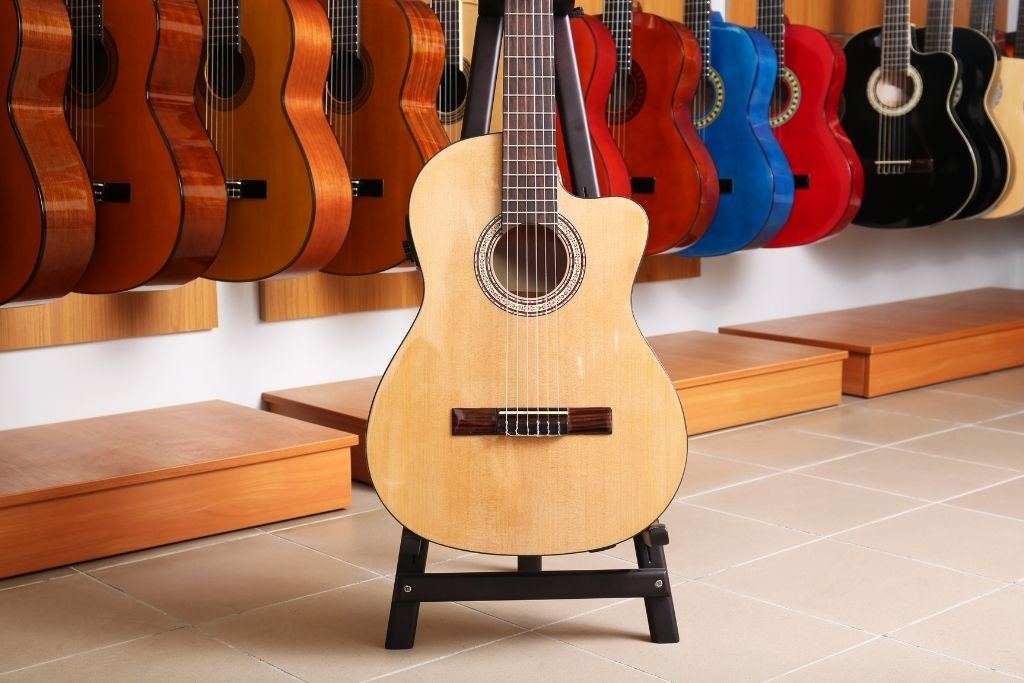
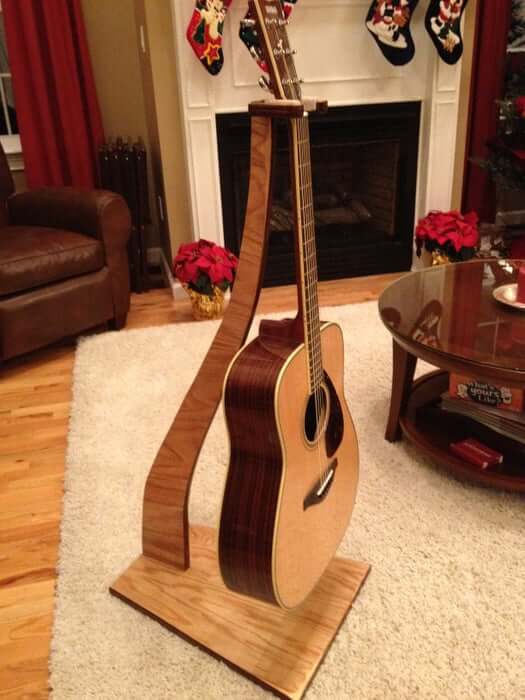
1. DIY Simple Guitar Stand From A Single Board of Wood
Some might think of guitar stands as a bulky design with many bars. It is not the case with this plan. The stand combines two L-shaped lumbers that you can make with several jigsaw cuttings.
Simply draw two L-shapes on only one board and cut. No material is wasted. Then, drill two 25mm holes to fit two parts together. The holes are round and off-center to ensure a snug fit.
The plan is straightforward to make. One important thing is to sand the two parts into a perfect interlock. When finished, the stand will have a nice contrast with your polished guitar.
Project details: makezine.com
2. Build A Folding Guitar Stand From Pretty Handy Girl
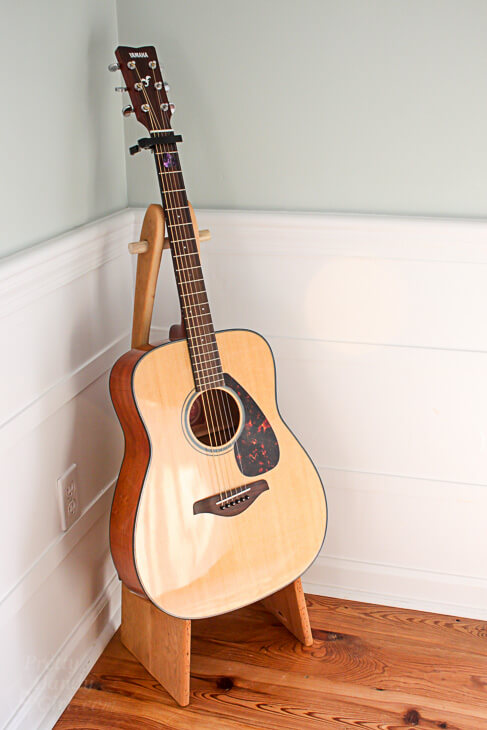
This stand will not take up much space and portable as it can be foldable. You can bring both the guitar and the stand when traveling.
The idea is to drill the holes through the top of the sides and snugly fit a ¾-inch dowel rod through. Make another two holes six inches the backside above the floor where you will assemble a liftable latch between.
This project is also pretty high – 35 inches. It can support almost the guitar’s neck for more stability with adjust sides on the dowel rod.
It sounds easy, but this project also involves pocket holes and curving cuttings on the top of the stand. You must have some woodworking experience to get the job done.
Project details: prettyhandygirl.com
3. DIY Wooden Guitar Stand By Instructables
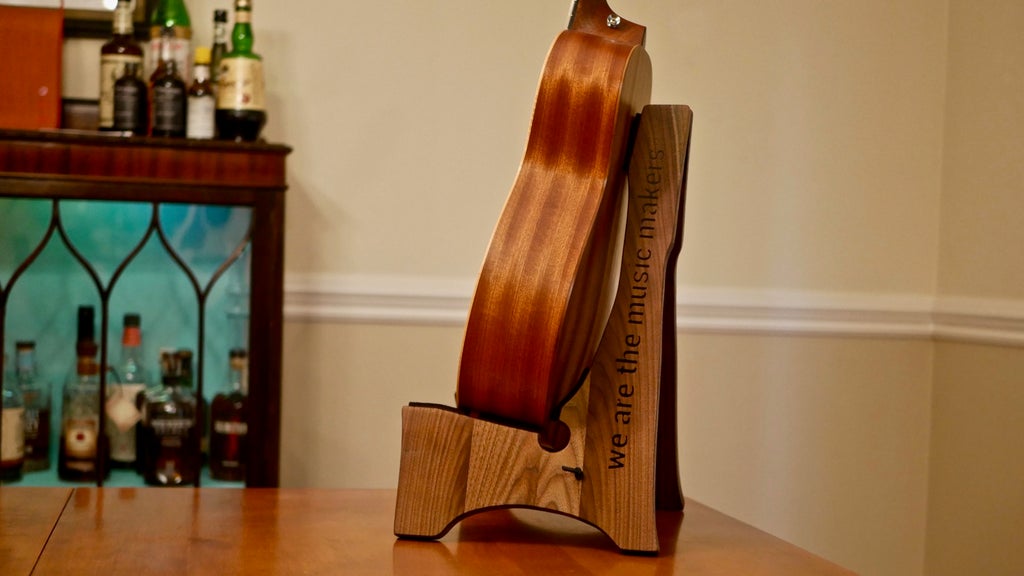
Get a 1×12 wood board that is two feet long so you can start this compact DIY guitar stand. Then, cut it into two L shapes cut to the same size.
It would be helpful to print the template and adhere it to the wood. Cut the shape with a bandsaw or jigsaw, following the drawing line as closely as possible.
It is optional, but you can drill a hole in the side of two legs so that the flush trim of the router can get into this tight corner and cut more accurately.
To beautify the stand, you can engrave your favorite quote on the stand with a CNC router. Moreover, you can custom size to suitable with kind of your guitars
Project details: instructables.com
4. DIY Guitar Hanger By Crafted Workshop
It is not a floor guitar stand like others, but a wall bent-lamination hanger where you can hang your instrument at hand and take it off to play whenever you want.
First thing first, make the form using 5 pieces of plywood and sand them smooth.
You will need to use 2-ply wood veneers and shape them following the form to get the wonderful curve out of the hanger.
In the project, eight pieces of veneer are clamped and glued together to ensure the weight capacity.
There is a curved opening on one end of the hanger to attach your guitar. It is two inches wide and one ¾ inch deep.
Finally, you should pad the whole hanger with soft leather so the guitar’s neck is not scratched.
5. Scrap Wood Guitar Stand and Stool

Imagine the wood stand and stool as a performance stage to sit down and take the guitar out for an acoustic song.
Accordingly, you first need to build the stool and stand separately. The chair has three 12-inch lumbers screwed together with Kreg jig techniques, cross seat support, and a shelf for books.
The stand, meanwhile, is made out of two small wood pieces in the L-shape. Directly screw the stand onto the stool, and you are done with this project.
Project details: woodshopdiaries.com
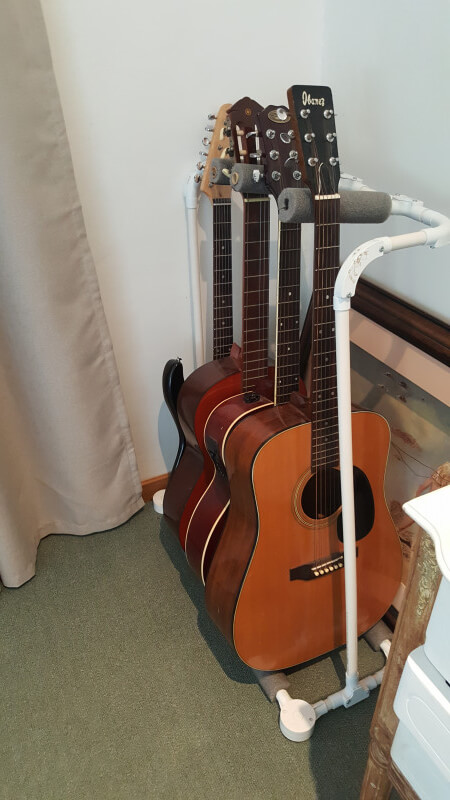
6. DIY PVC Multiple Guitar Stand
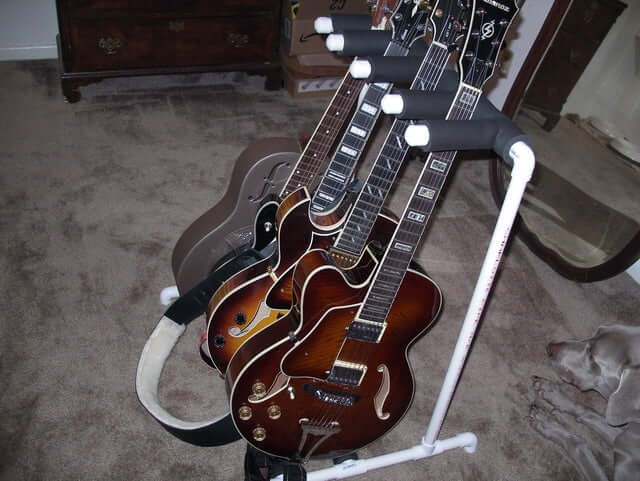
Supposing that you have multiple guitars, take a look at this PVC stand that is easy to make like a piece of cake.
It is made out of ¾-inch PVC pipes cut in half and assembled with T connectors, elbows, caps. The dimensions are 32 inches high, 27 inches wide, and 32 inches in the front and back.
Attach rubber insulation foam to the stand where it touches the guitars. That way, your instrument is protected from scratches and humidity.
Project details: instructables.com
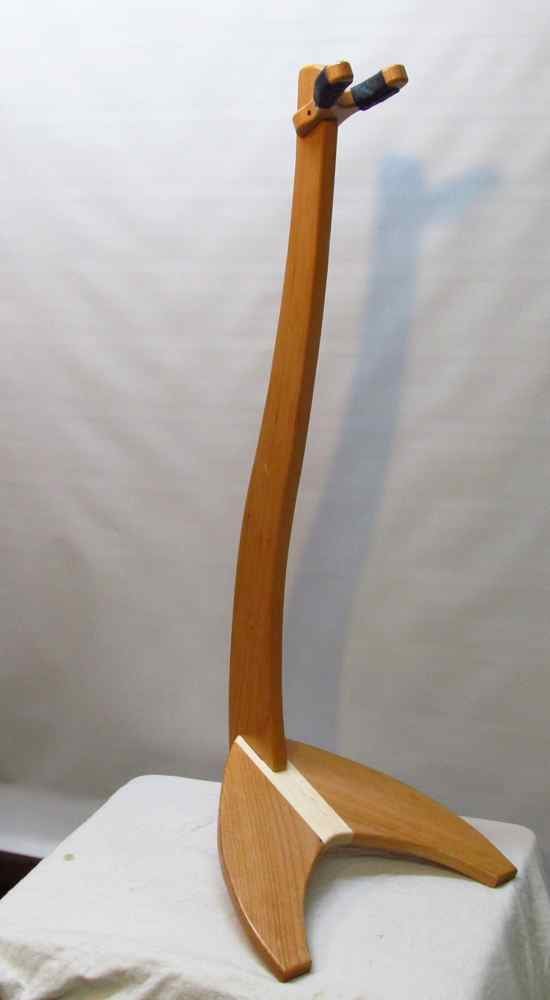
7. DIY Wooden Guitar Stand With Essential Power Tools
We like the shape of this guitar stand – very elegant thanks to its curved neck and the boomerang base. On the top is a U-shaped cradle plot to hook your guitar.
The plan comes with a free download template so that you can print it and apply it to the wood piece for strategically curved edges.
Your main task is to sand all parts as smoothly as possible, assembly with chipboard screws.
We also recommended fitting rubber studs to the base’s bottom to enhance the sturdy foundation and adding a buffer to the cradle to prevent scratches.
Project details: woodworkjunkie.com
8. Guitar Stand Plan With A drawer
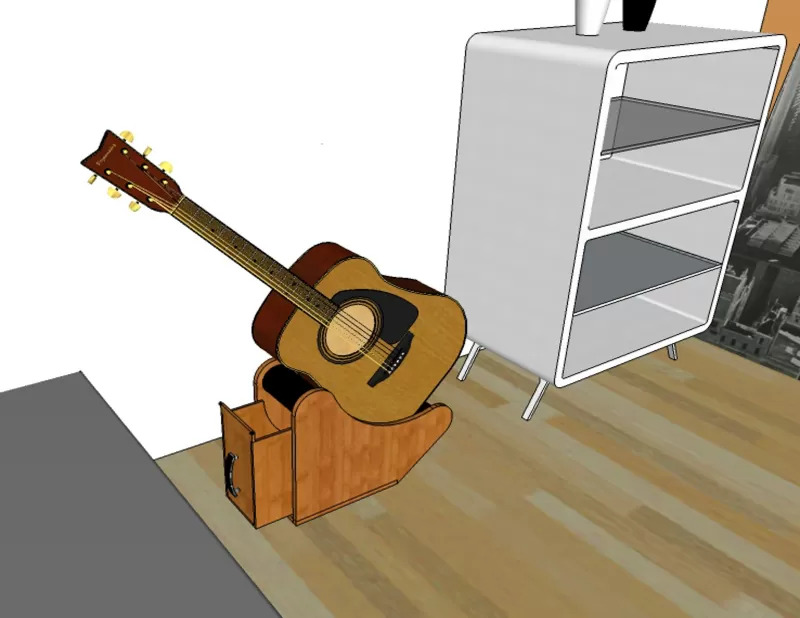
Some guitarists do not want to hang their instruments, saying that hanging causes tension on the neck and strings.
You can refer to this free-standing plan if you have the same concern.
The main design is two wooden boards that are curved and sands, following the bouts of your guitar.
The distance between the two boards is equal to or a little smaller than the width of the gear’s body.
Interestingly enough, the stand sports a drawer on the side where you put all the necessary tools so that your guitar is tuned and ready to rock at all times.
Project details: guitar.lovetoknow.com
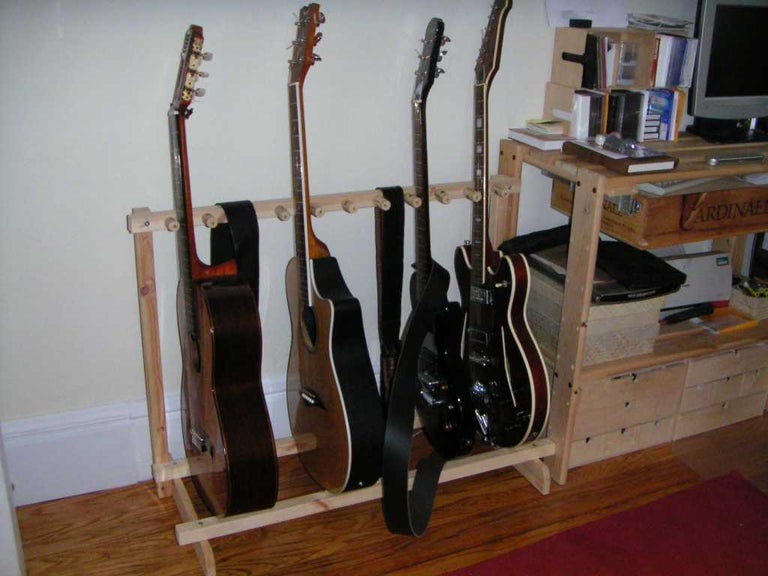
9. DIY Cheap & Easy Guitar Stand Plan
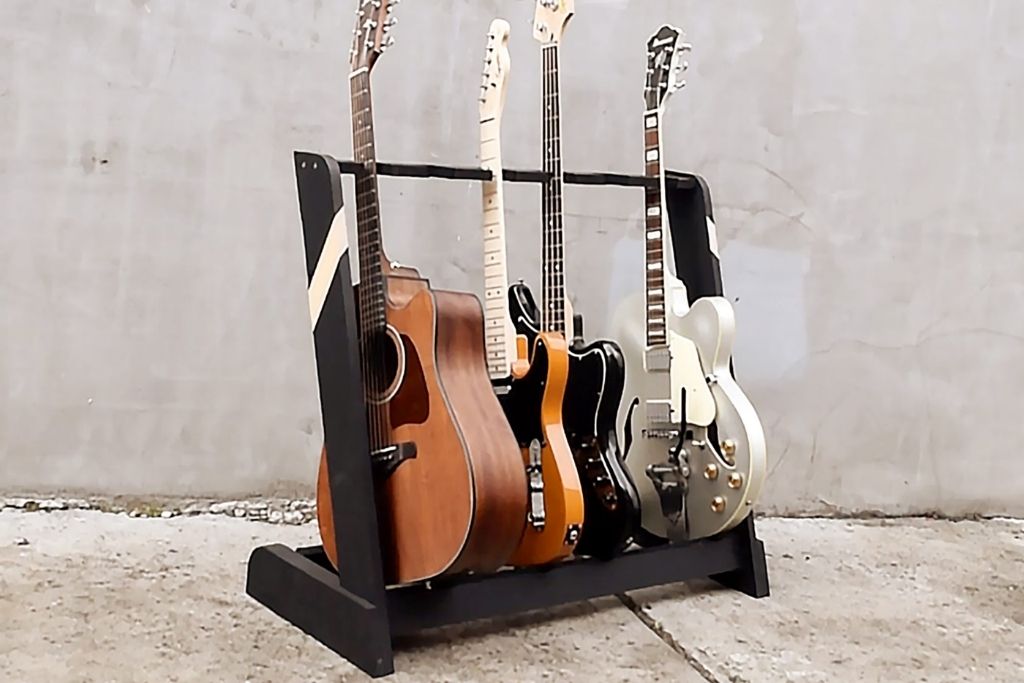
If you do not desire to hang your gear, another option is to build a stand with neck cutouts and resting pieces. You can simply place the guitar on the cutout and support their body.
Some notes while making this plan:
- Do not drill neck cutouts too closely. There are holes for six guitars; each is 4 inch far away. That way, you never bump guitars on each other.
- Rotate the resting pieces where the guitars’ bodies will rest to increase stability and rigidity.
- Pain the stand all black and add a white strip with tape. As such, your DIY project looks more stylish.
- Add padding foam to the neck cutouts and resting bars where they contact your guitars.
In this case, you have fewer guitars, consider reducing the cutouts accordingly.
Project details: rookiediy.com
10. Inexpensive Guitar Stand From PVC Pipe
There are many interesting DIY projects made out of PVC pipes rather than wood stocks. This guitar stand is an example.
With some simple cuts from one-half-inch ¾ pipe and tees available, the stand is ready to assemble.
You need 3 Ts to make the middle of the base with one facing up at the center. Then use 2 elbows for the back and 2 Ts for the front of the base.
The next step is to assemble the top made of 1 12-inch straight pipe and 1 T connector. Finally, just cap off all the open parts, including the 4 feet and the T on the top.
You can sand all components to make it smoother when contacting the gear. On the base, cause it to be a little crooked when you install the PVC pieces so that the guitar can hook on it.
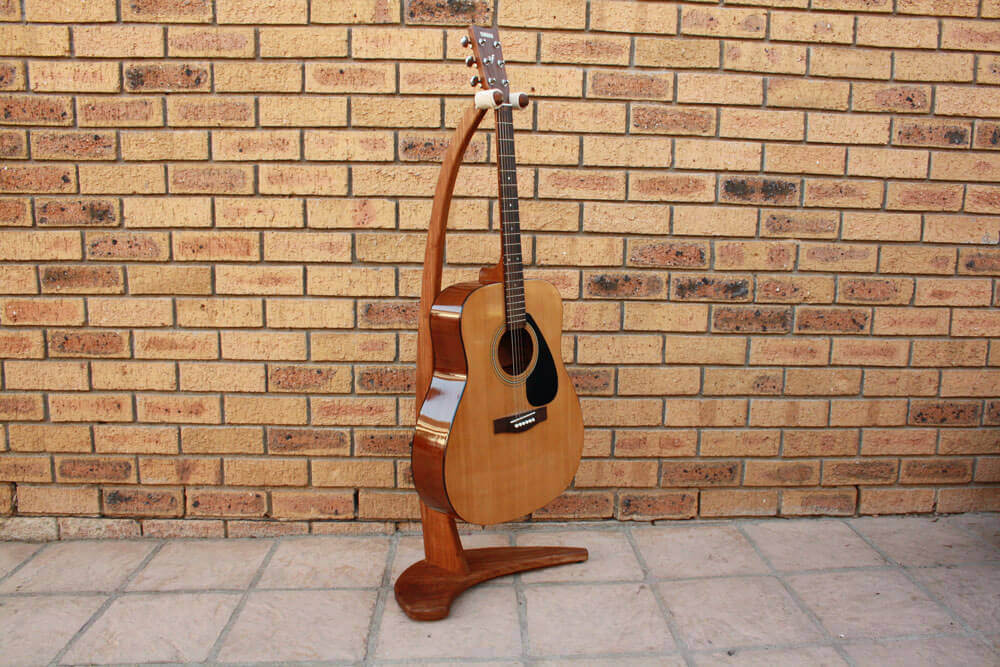
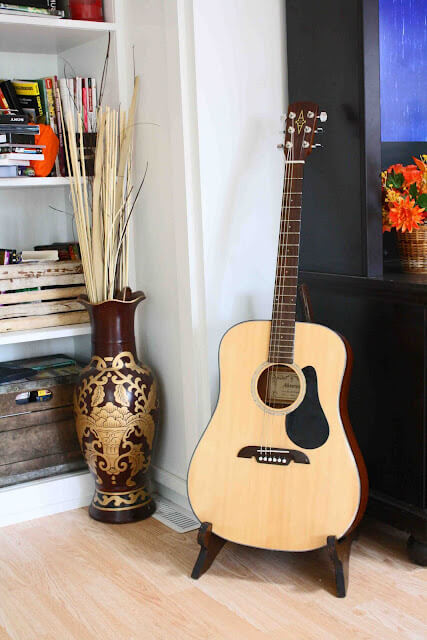
11. DIY Hanging Guitar Stand
The curved free-standing is preferred by many guitarists when it comes to storing and displaying an individual guitar – for two reasons. It looks artistic and saves space room.
This project is no exception. It is made of three components: a flat base, an upright arm with perfect curves, and the cradle hold.
Excitingly enough, you can build this stand with a rule of dimensions – The size of the arm is 2x the depth of your guitar. And the height is longer than the gear.
Meanwhile, the base front to back should be three times wider depth of the guitar.
As such, the stand is stable enough to hold even a heavy guitar without flipping over.
Project details: instructables.com
12. Build A Custom Guitar Stand
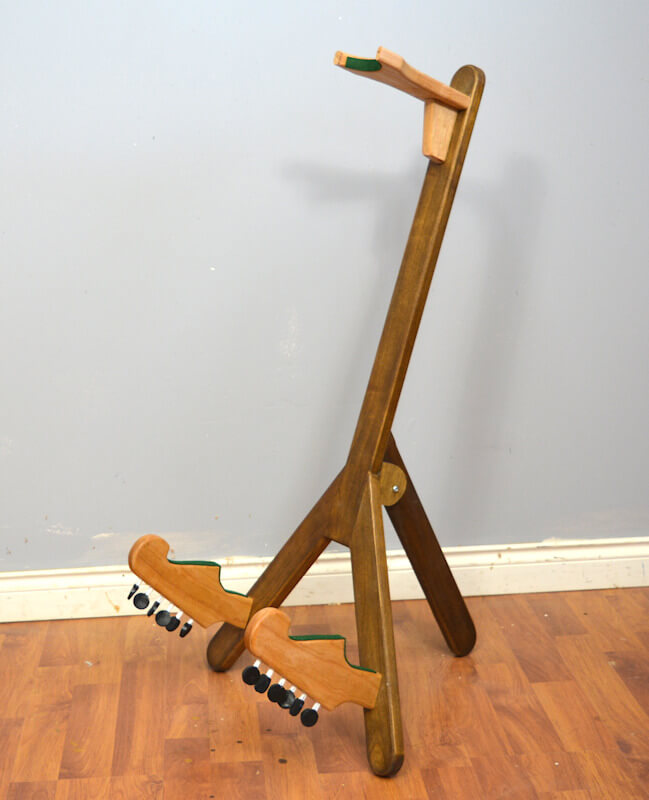
This stand is not only a place to store your guitar; it is indeed an eye-catching accessory to your room.
We like its inverted “Y” shape. It allows a strong foundation for your heavy gear. Three legs are attached to the upright piece at 30 degrees.
And can you see two arms that support the body of your guitar? – They are creative.
Curve two angles on the top of arms where to hold the guitar’s body. The curves are also for decoration purposes. On the other sides come some tuning pegs painted in black and white.
Project details: woodworkweb.com
13. Easy Folding Guitar Stand
Although the plan looks small and easy to make, it requires a lot of cutting, measuring, and sanding. You also need many woodworking tools to get the job done.
Back to the plan itself, this guitar stand has two identical legs screwed tightly on the top but can fold in the middle with dado cuts and pivot joints. When expanding, it looks like an A shape.
You should use a long screw rather than a bolt and a nut in the pivot. That way, the two parts can move freely.
On the back of the legs is a brass stock. It has a diagonal hook on one side to make a fixed stop or unhook it when the stand is not in use.
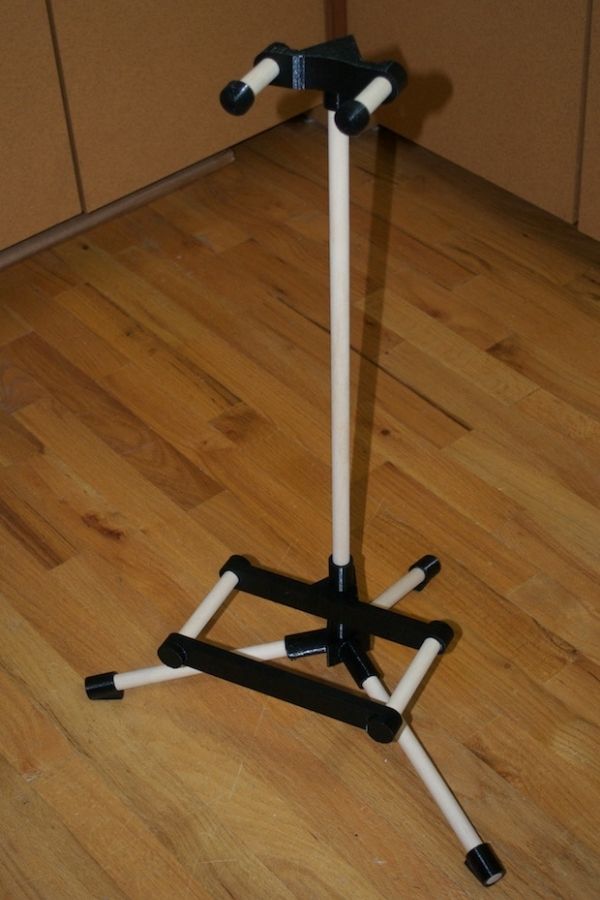
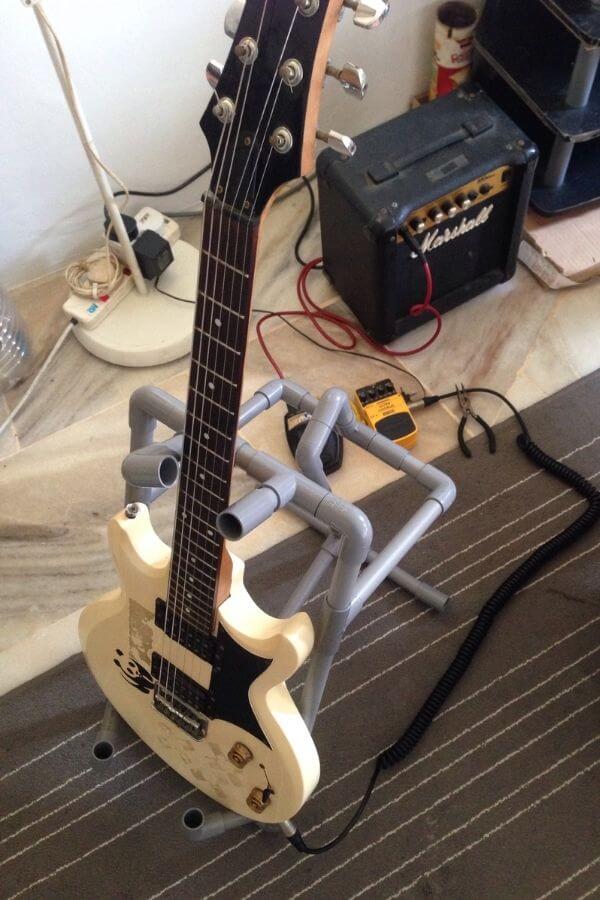
14. Smallest And Cheap DIY Guitar Stand From PVC
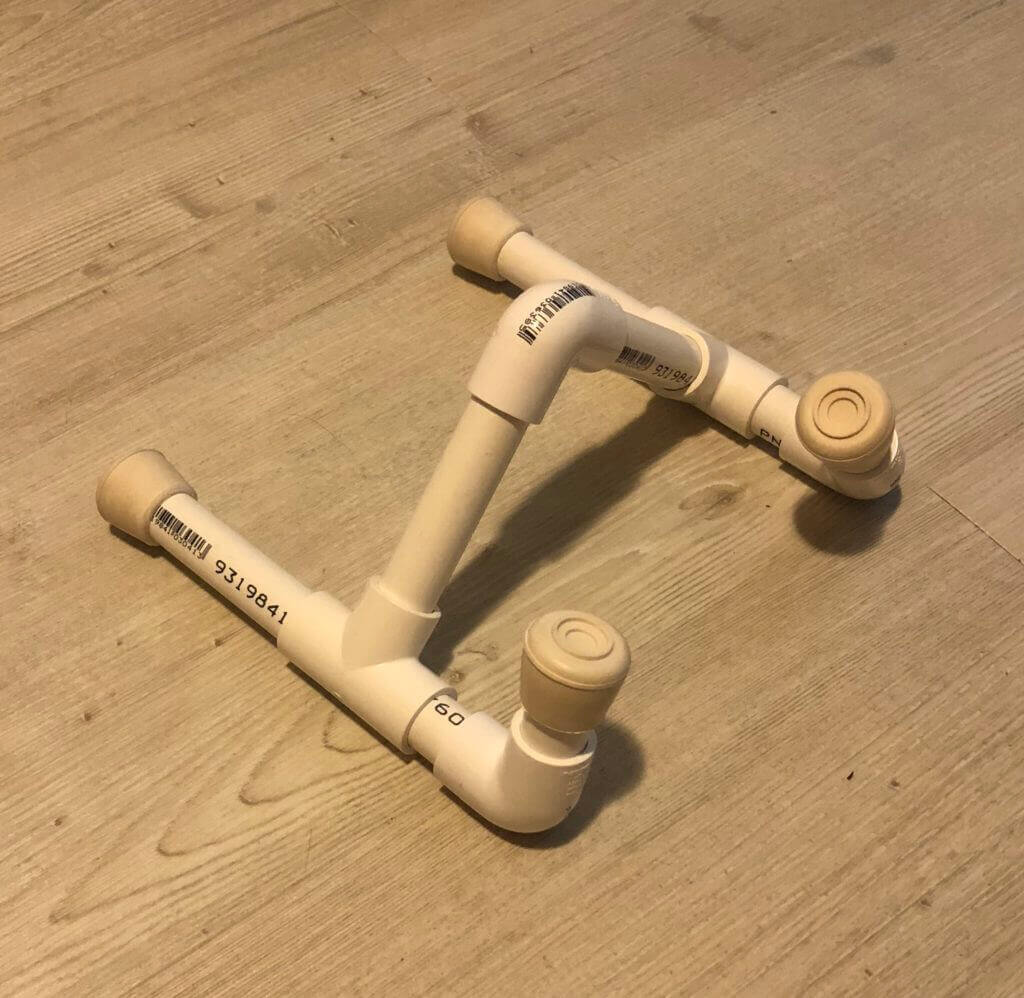
Built from PVC pipe, this stand is very cheap and straightforward.
You can get to the hardware store to buy a piece and ask the store owner to cut it into four 4.33-inch and four 1.96-inch parts. Buy three right-angle, two T connectors, and four rubber feet.
It’s easy to install all pieces together. Since there is no glue used on the front feet, you can rotate them to fit different guitars’ bodies.
Easy as it is, this stand is not as solid as the wooden projects.
Project details: thecavanproject.com
15. Knockdown Cherry Guitar Stand
The project is for bass guitars to store and display when you do not want to play music. It looks quite beautiful and does not take up a lot of space.
There are interesting similarities between the top notches and the base. They all expand towards two sides.
You need to do lots of sanding and shaping to create uniform and smooth edges at this part. Plus, the base is a little above the floor.
Without building it properly, you might end up with an easy-to-tip base. You should add a third notch behind the bottom that the base fits the floor and create a stable and stock rock.
Project details: instructables.com
16. Multi Guitar Rack By 3×3 Custom
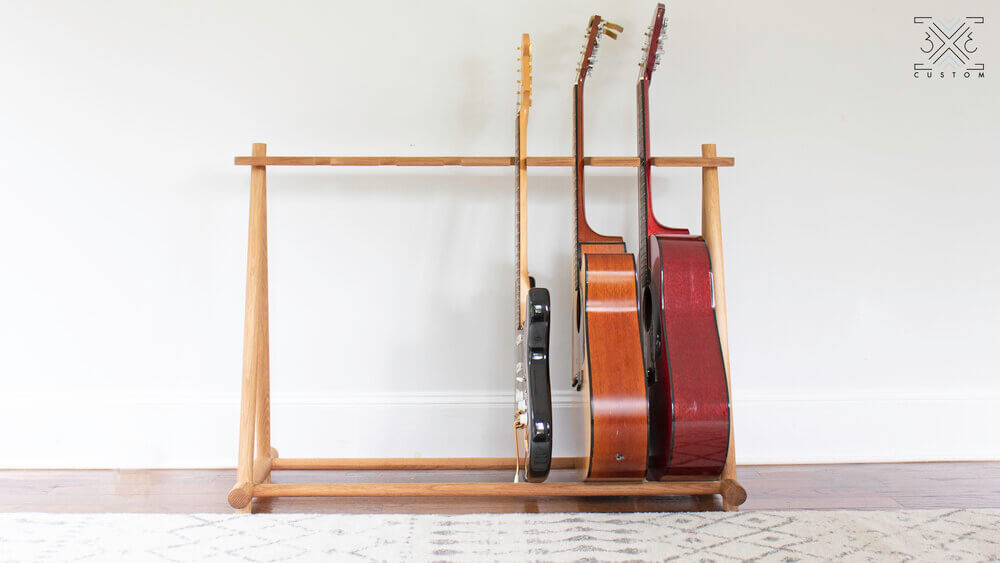
If you plan to buy more guitars in the future, you should consider making multiple guitars stand in the first place.
Please make sure that the stand is solid and balanced enough to load multiple gears in different sizes and weights.
In this project, almost every part from the dowel rack to the A-shape legs and the resting bars are snuggly connected with tenon joints rather than using screws.
It requires extra woodworking techniques, but tenon is the strongest wood joinery, so the stand will not flip over quickly.
Speaking of the rack, you should drill dowels in different sizes to accommodate various types of guitars in the necks.
Project details: 3x3custom.com
17. DIY Modern Guitar Stand
This guitar stand looks neat, sturdy, and extra balanced. You will need maple wood for superior hardness and uniform color.
The key to success is cutting all parts perfectly equal. You can cut the templates first. Then use the tape to stick two parallel bases and arms and go through band saw and sanding machines.
Set up the shape as in the video and drill them together. Also, you use glue on holes to enhance the sturdiness.
You can store three or four guitars that simply lean to the crossing bar on the top with this plan. So, it can suitable with different size guitars.
18. Homemade Guitar Stand Built From An Old Amplifier

It is rare and unique, but if you plan to throw an amplifier away, you can turn it into a guitar stand instead.
Remove all internal components first, and you will have an empty frame as a sturdy base for the guitars.
On the top side of the amplifier, cut some rectangular holes to rest the guitars’ necks. You should keep a suitable space between the holes so that your gears will not bump together.
On the bottom, attach a box and add boards to divide it into spaces for the guitars’ body. Cover the boards with a thick vinyl cloth and add rubber foam on the neck cutouts to prevent damages.
Project details: imgur.com
19. Build A Multi-guitar Guitar Stand
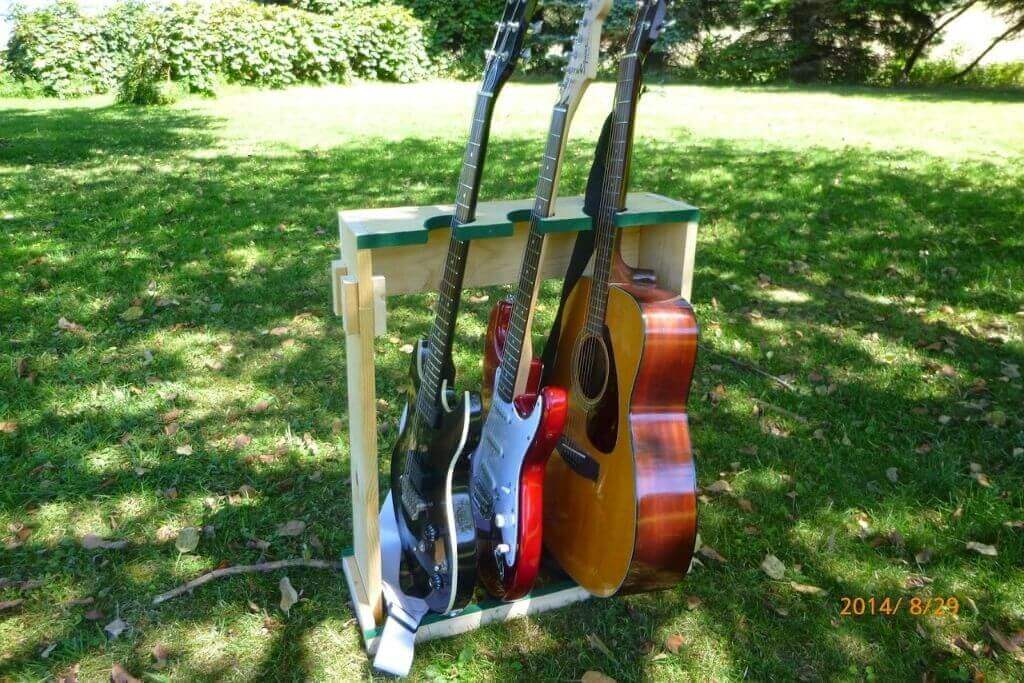
No worries if you have little experience with woodworking projects, as this stand is straightforward to build.
The stand is 26 inches high. And, there are two side pieces of the base, which are 7 ½ inches – it is a good width for small electric guitars and big acoustic wooden versions.
Decide the number of guitars you want to accommodate on the stand and adjust the sizes of asterisks accordingly. Remember to leave three or 4 inches between each slot and from the board’s corners.
Plus, make a curve so that the slots look like hooks that will secure the guitar’s necks and make your plan fancier.
Project details: diyguitargear.blogspot.com
20. Wooden Guitar Stand Plans From My Outdoor Plans
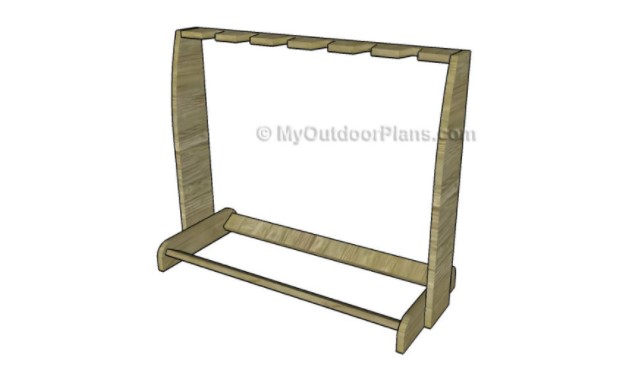
The plan has crowded neck supports in the 33-½-inch rack: six notches (trapezoid shapes with a 2-inch top and a 1-inch bottom) and 3 inches apart from each other.
It would suit small and thin guitars such as electrical or bass ones.
You can reduce the number of dowels or increase the length of the rack or the space between dowels.
In the base, cut two 1×4 lumbers and round them at the corners. Attaching two bottoms supports having the same length as the dowel rack. Place them at 30 degrees so that they will embrace the guitar bodies.
The final step is to fit the top rack and the base into two 28-¾-inch sideboards. We recommend curving the boards a bit to increase the beauty of the stand.
Project details: myoutdoorplans.com
21. DIY Multiple Guitar Stand By Instructables
This plan is unique and simple. you can reuse some wine corks to keep your guitars by using drywall screws to attach them to the top.
As such, you can reduce the cutting and sanding efforts.
There are two legs that are 28 inches long. They have two functions: creating the solid foundation for the stand and handling two support bars for the body.
Adjust the distance between two bars according to the width of your guitars. In this project, the distance is around 12 inches.
Project details: instructables.com
22. DIY Guitar Stand With Elegant Curves

For this project, it’s an art. We feel like we will see this stand in a professional guitar gallery.
At a glance, the rear leg and the rest section look like a complete bar which might be challenging for beginners. In fact, there are two parts aligned and combined with a dowel.
Also, the legs have beautiful curves that imitate the shape of your guitar’s body. You need to draw the template and sand the edges smoothly and carefully.
Project details: woodarchivist.com
23. DIY Guitar Wall Mount With Cheap Price
Wall is a generally accepted place for a guitar besides a hard case or a stand. Nonetheless, a commercial wall mounting is not heavy-duty enough to prevent falling.
Half of this project is already-made. Accordingly, you will need to buy a sturdy utility hook, a scrap 2×4, four 3-inch screws, and drywall anchors. Paints and stains are optional.
Cut a 2×4 square board and draw an X in the middle. The screws will come in the X line and one inch from each stock corner. Drill a hole in the center to assemble your utility hook after.
Next, spray paint on the board and screw it onto the wall. Finally, you attach the hook, and you are done with a wall mount to hang out your guitar.
24. DIY Wall Mount Guitar Holder

You have guitar collections and want to easily access them. This plan is for you.
First, prepare a spacious wall for your guitar collection. The next step is to purchase solid utility wall hooks, screws, anchors, and some sort of wood. You can cut the wood into rectangular pieces.
You should paint the wood pieces with the hook’s color before drilling two holes one inch from each end: one spot to screw the wood part onto the wall, and the other is to assemble the hook.
The wall hook looks simple. And the wood pieces are small enough to be hidden behind the headstock to give all the spotlight to your guitars.
Project details: houseandcanvas.com
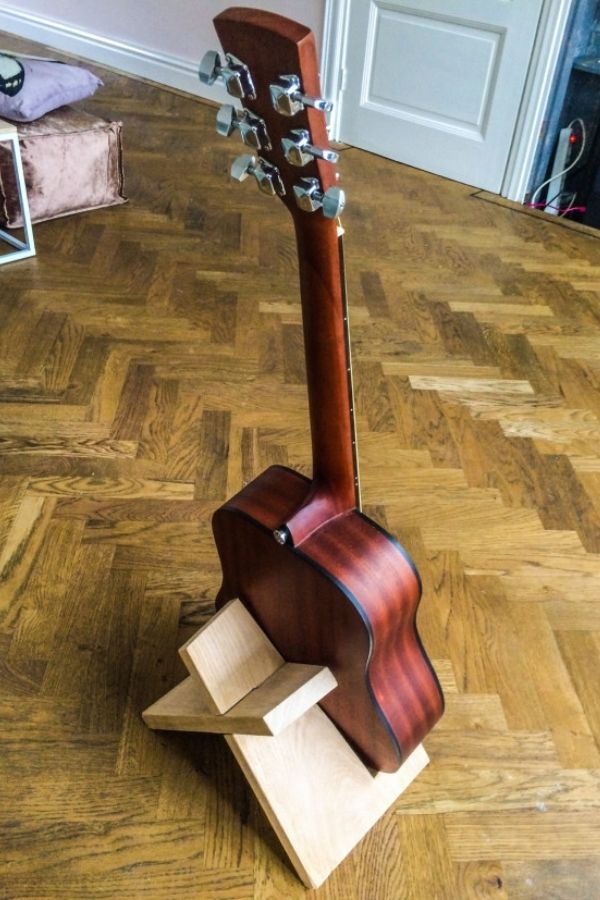
25. Make A Guitar Stand Out Of Wood
Can you easily build this plan just by quickly looking at it? We guess you can. This guitar stand is very basic.
The stand is formed with two L-shaped wood pieces. Do not like straight lines? How about adding some curves on the legs and the body.
A bandsaw will help curve the wood quickly, but you should still sand the edges as smoothly as possible.
Install a hinge on the top of the pieces. Finish the project by drilling two holes on the bottom of the legs and getting a string through the holes.
You had better choose the string that is not elastic over time. When you expand two legs, the string will be tense and put a sturdy and stable stop to keep the guitar.
26. DIY Winged Guitar Stand
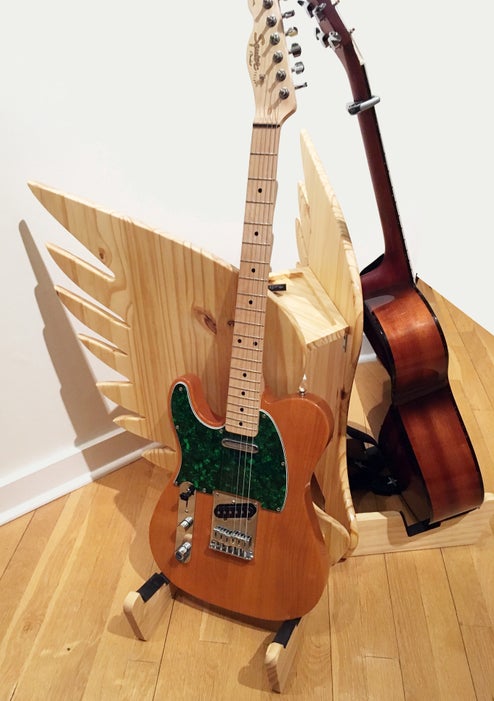
Spoil your artistic soul and let your creativity flow with this winged stand.
The plan has a flat lower resting stably on the floor and two slightly curved legs to support the guitar.
On the back of the guitar are two angel wings. They should be visible without dominating the room.
You can draw wings that swoop very high to show the scalloped feather shape and have a narrow sweep down. Apply the template on the wood piece and cut the curve with a jigsaw or xCarve.
Behind the wings is a shelf to hold them at a constant angle and prevent the stand from tipping over. The shelf is also suitable for storing picks, capos, tuners, and other odds and ends.
Project details: instructables.com
27. DIY 3D Printed Guitar Stand
You can build a rock-solid guitar stand from affordable ⅝-inch dowels cut to desired sizes.
You need one long piece to support your guitar’s neck, three pieces for the legs, two legs for the cradle hole, and another two for the lower base.
Install the legs nice and tight, then insert them into the centerpiece. If you find any dowels loosen, you can use glue to tighten the whole thing up.
We like this stand because the guitar can stand freely on the lower base without suffering any tension.
Project details: kevinrye.net
28. DIY A PVC Guitar Rack Stand Plan
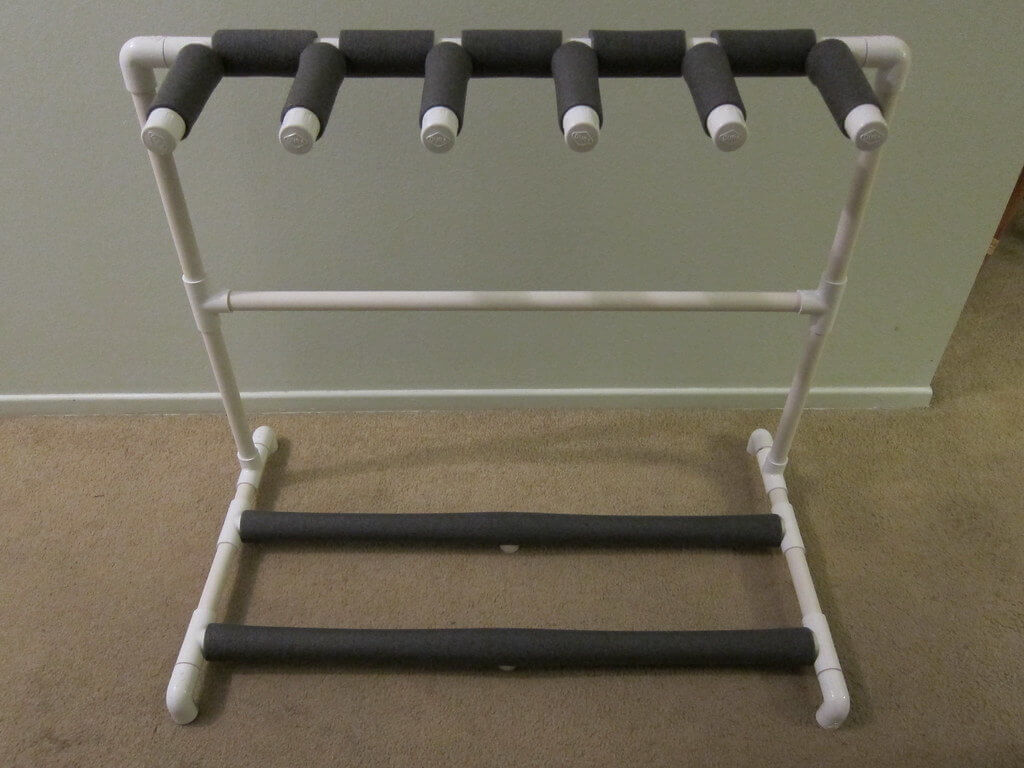
Buy a ¾-inch PVC pipe of 20 feet, 16 pieces of T connectors, six elbows, and six caps. Then, you are ready to make this guitar stand in less than two hours with less than $20.
Since the PVCs are not as heavy-duty as wood pieces, you need to have a crossing bar between the two sides to be sturdier.
On the top, you can create a rack with six slots, each four inches away from the other, to form 5 rest sections.
Install two resting bars to support the guitars’ bodies on the bottom. Complete the plan by adding glue around the connection parts, covering the top and the bottom bars with padding.
However, the legs are too close to the ground, and your guitars can reach the ragged floor and get scratches. You should add rubber feet or use longer caps to the four legs.
Project details: howtomakeaguitarrack.wordpress.com
29. Make A Multi Guitar Stand By I Like To Make Stuff
This plan combines both wooden pieces and aluminum extrusion to increase the convenience of the stand.
The legs feature a wooden rectangular having two 70-degree angles. It creates the balance for the stand and is wide enough for the bars to go through.
When all assembled, the bars are a bit close to the ground, so we would suggest you add four rubber pads under the legs to lift the stand a bit above.
There is an extrusion on the other end. The idea of extrusion instead of the wood rack is that you can get nuts to go in between the extrusion, and you can move the nuts based on the number of your guitars.
Cut and install the prototypes into the nuts, where you can rest the guitars. It is recommended to cover the prototypes and the supporting bars with leather to prevent tears and wear.
30. DIY Wall Mount Guitar Holder
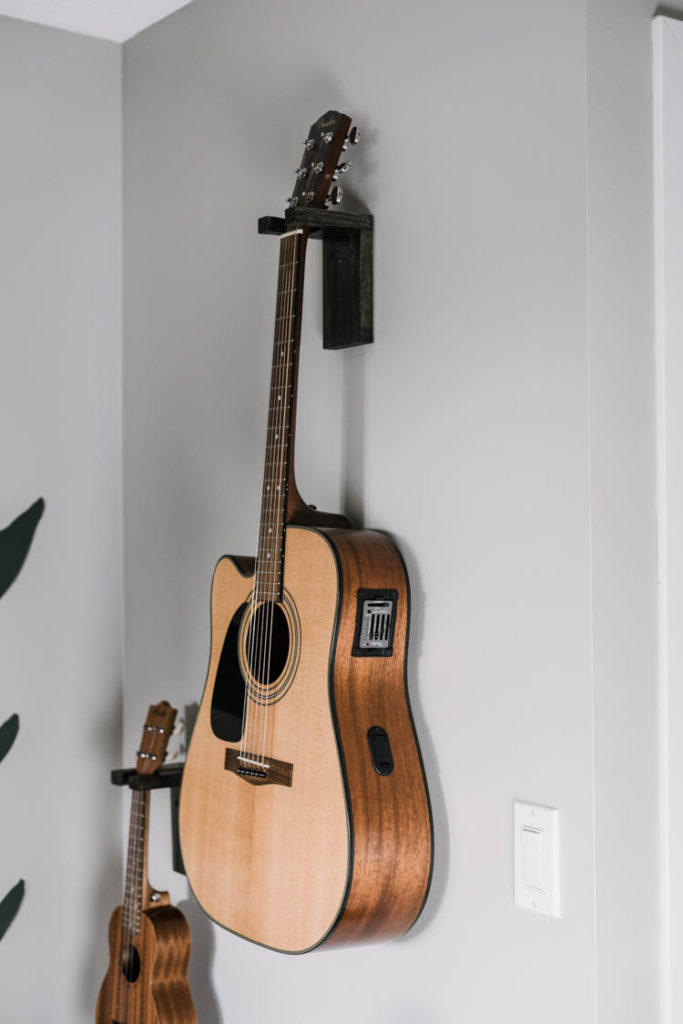
Without having a space for standing racks, you can consider a wall mounting holder built with two simple parts.
One part 4 ½ holds the guitar and a 5 ½-inch board will be screwed on the wall. Make two Kreg Jigs on this board to connect the other holding part.
You need to measure the guitar neck for suitability. The slot of headstock should be smaller than the base of headstock, but larger than the neck’s top guitar. As such, the guitar can be hooked securely on the holder.
Project details: lemonthistle.com
31. Easy DIY Guitar Stand By Guitar Talk
Hobbyists will not get bored with the PVCs when it comes to DIY projects. Take this stand, for instance.
Its design is for four guitars to lean against the rack and the supporting frame. The stand’s arms are a bit bigger on the top.
You will need to help of 90-degree inspection bends and round inspection covers on one end of the arms so that they look inward and more secure.
Remember to cover the connection parts with padding to protect your valuable gears.
Also, we suggest adding rubber feet under the legs so that your guitars will not touch the humid ground and get unwanted damages.
Project details: community.guitartalk.co.za
32. A-Frame Wood Guitar Stand
As its names suggest, this stand has an A-shape when it completely spreads. However, two legs are flexibly connected with a collapsible hinge and hanging basket chain.
When it comes to such a foldable guitar stand, the importance is to create two legs that are the same. Otherwise, the stand is not stable enough, having the guitar on.
You can make a little curve on the legs to look attractive. But if your guitar is big, you had better leave them flat so that legs stand more stably on the ground.
Project details: sprwmn.blogspot.com
33. DIY Guitar Stand From PVC Pipe
We have to admit that this PVC stand looks unnecessarily complicated and space-wasting on the back. However, its design is to improve the sturdiness.
There are two frames on the upper and lower, connected by a straight pipe in the middle. This creates a natural leaning position against the floor so that your guitar can rest securely.
You should spray the stand and add foam where the guitar touches the stand; it would look better.
Project details: imgur.com
34. DIY Plywood Multi Guitar Stand
At a glance, this guitar stand gives off a balanced and well-calculated dimension in every part. In fact, it uses many woodworking tools to finish this project.
Accordingly, the stand has two A-shaped legs cut out from a pre-built template. Those legs not only look beautiful, but the spreading base is also more balanced than common straight legs.
There are two rotating bars on the legs to support the guitar body.
On the other end of two legs is a rack made by drilling six equal holes on a big board and cutting off one edge. Screw that board onto another rectangular board to increase the overall sturdiness.
The whole stand, then, sits on a castering foundation, though. Accordingly, create a frame which is a bit larger than the two legs and screw four moving wheels at its corners.
In the end, you will get a sturdy and portable guitar stand to move the instruments from room to room.
35. DIY Multiple Wood Guitar Stand By Instructables
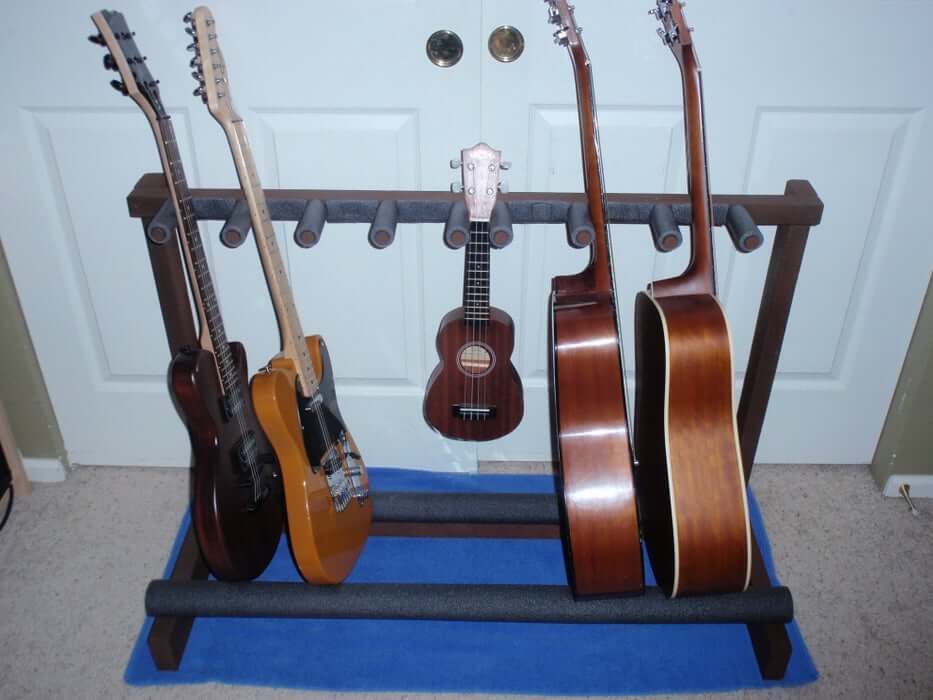
The last stand is for multiple guitars from the ukulele to electric guitars. It has a ubiquitous construction: one dowel rack, two sturdy sides, and two wide legs along with two support beams for guitar.
Nonetheless, you should remember to bring at least one dowel closer than others on which you can hang your small ukulele.
With two support beams at the bottom, the one lies above the two legs and the other is in between. Such non-parallel positions allow the guitars to recline backward naturally. It would prevent falling.
Project details: instructables.com
Conclusion
We hope you can find your right DIY guitar stand plans from the list above.
A frame stand allows storing your guitars in a limited space. Also, they can foldable so that you can bring them on trips.
Tubular stands having three legs or sturdy bases. They are suggested to hang and display individual guitars to the eyes of guests.
Wall-hanging stands are ideal when you do not have much room on the floor. It also keeps your guitars from foot traffic, children, and pets.
Obviously, guitar racks make it convenient to organize a set of guitars.
Whatever the design, the stands must always keep your instrument from the mercy of scratches, knicks, spills, or gravity.
Let’s start building your DIY guitar stand today and enjoy it!


