Are you contemplating whether or not you should buy a dining chair combo to replace your old ones?
Don’t waste your precious money! Read through these interesting DIY dining chair plans that we prepared just for you.
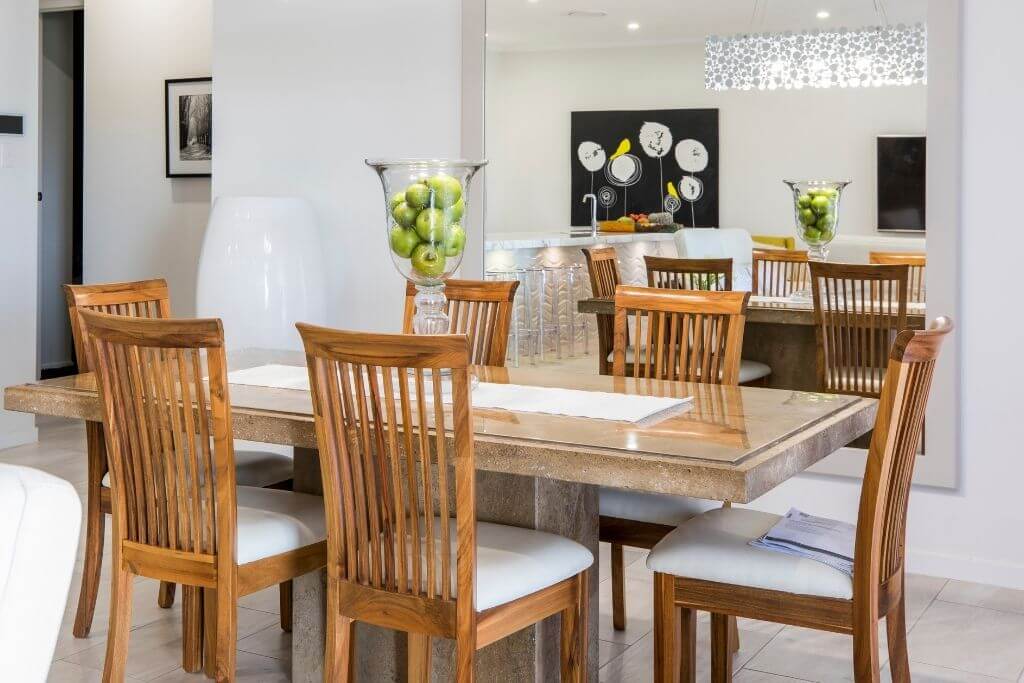
Dining chairs are something that is so familiar that we simply can’t imagine living without them.
None of us want to enjoy our meals uncomfortable chairs at the end of the day. Aside from comfort, dining chairs also provide your dining space with a touch of personality.
Building your own chair not only saves your money but also lets you learn something new and have fun while doing so.
That is why we have collected these 23 plans for you. Let’s dive into it!
Table of Contents
- 1. DIY Dining Chair From A 2×4
- 2. DIY A Francine Dining Chair
- 3. Farmhouse Dining Chair
- 4. DIY Wingback Dining Chair
- 5. DIY Kitchen Chair Plans
- 6. Simple Classic Chair By Ana White
- 7. Build A Dining Chair From Designs By Studio C
- 8. DIY Dining Chair By The Wood Whisperer
- 9. DIY Easy Dining Room Chair By Instructables
- 10. DIY Dining Chair Using OSB
- 11. DIY A Farmhouse Chair
- 12. DIY Modern Plywood Chair
- 13. DIY Upholstered Dining Chair
- 14. The Daniela Dining Chair Plan
- 15. DIY Simple Wooden Chair
- 16. Elegant Pallet Wood Dining Chair
- 17. Building A Midcentury Modern Dining Chair
- 18. DIY Rustic Dining Chair
- 19. Make A Dining Chair From Home Dzine
- 20. DIY Modern Dining Chair By Chris Salomone
- 21. DIY A Baltic Dining Chair
- 22. 6 DIY Rustic Dining Room Chair
- 23. Harriet Outdoor Dining Chair
- Conclusion
1. DIY Dining Chair From A 2×4

The most special thing regarding this project is that it uses only one 2×4 piece for the frame. As a result, you will save quite a bit on the material budget and learn how to plan carefully ahead.
The wood will be cut into three sections, measuring 50 cm, 90 cm, and 100 cm, respectively. The 50 cm piece will serve as two 2×2 front legs, while the 90 cm piece will turn into the two back legs and also the back frame.
The rest of the back supporting pieces comes from the 100 cm plank. They include the stretcher, the seatsides, the back spindles, and rails. Now you just need a piece of plywood for the seat.
Project details: instructables.com
2. DIY A Francine Dining Chair

This project starts with a special challenge: ensuring that the two back legs have the exact same curve and size. Only by doing so can you ensure that the chair is stable and artistically pleasing to the eye.
To do so, you need to invest a whole 2×4 piece at 8’, which will be ripped in half, to make the back legs. Draw the shape first on one piece. Remember that a 6-1/2” portion is still straight.
Then, trace this drawing with a bandsaw or a jigsaw and gang-sand both results to ensure they are virtually identical.
The other parts are pretty standard: two front legs, six stretchers, five back slats, and a plywood seat.
Project details: thedesignconfidential.com
3. Farmhouse Dining Chair
This chair follows the classic design with pure-white glossy frames. It is a prime example of “beauty lies in simplicity”.
The chair’s legs are akin to an Adirondack chair, meaning they are much shorter than the backrest. To be exact, the legs are about 2/3 the length of the back frame. That is why the chair feels much sturdier than it should.
It also has a seamless seat, allowing you an easier time cleaning. Use only pocket hole screws to connect the seat slabs to obtain this seamlessness.
4. DIY Wingback Dining Chair
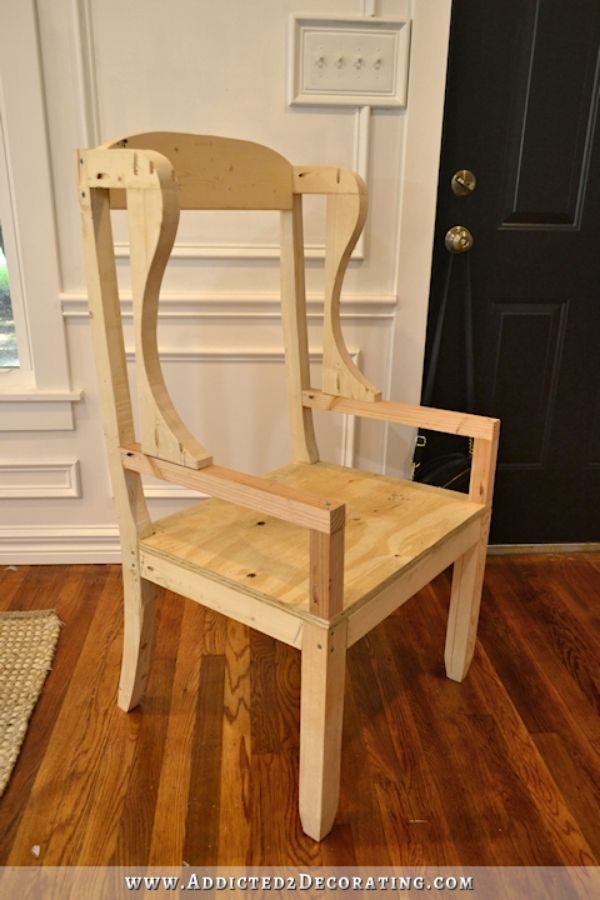
You can immediately tell the differences between this chair and normal dining chairs with just one glance. It does not have any back slab, and 2 strange wing-like pieces are attached to its armrest.
These peculiar designs are because this chair is built as a frame for foam/fabric covering. Every single detail, aside from the legs, is built so that the foam can have something to wrap around.
As it will serve as a frame, the chair needs to be stronger than other chairs to carry huge foam. That is why you will see loads of pocket screws and 2.5” screw holes.
Also, you must read part 2 of the guide about how to upholster the frame to finish the project.
Project details: addicted2decorating.com
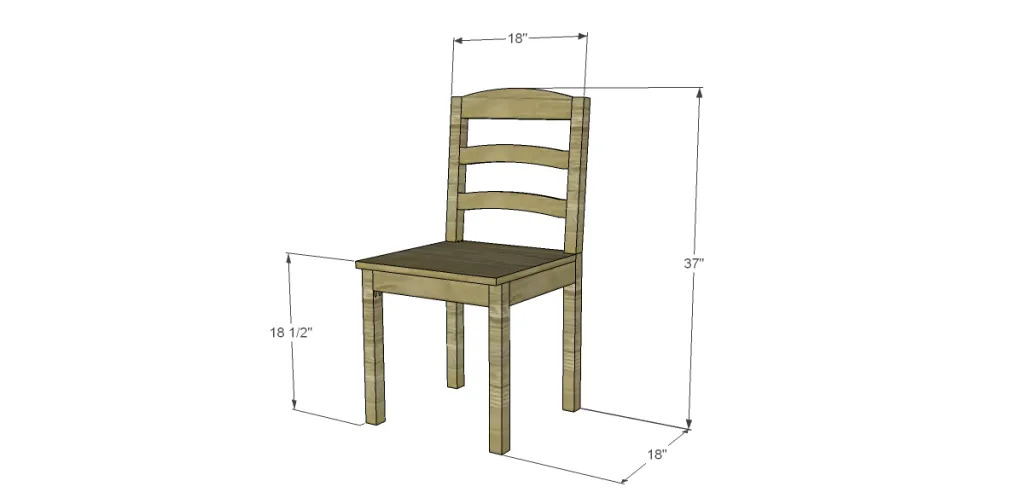
5. DIY Kitchen Chair Plans
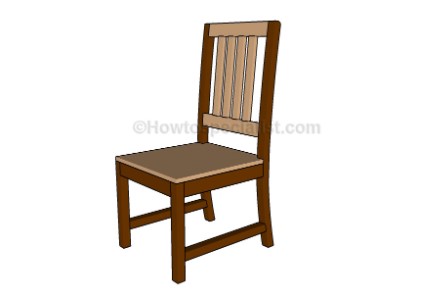
This project’s back leg building process is the same as the above dining chair plan. Things differ, however, when it gets to the backrest.
The supporting pieces of this part closely resemble a miswritten Roman numeral for four. After all, you would secure two 1×3 lumber pieces and then add four 1×2 vertical slabs.
This design is sufficient strength that lets you drop your whole weight onto it without having to worry about it breaking.
The plan is easy to build with illustrative images and figures details. Moreover, you can customize the design and size to fit your needs.
Project details: howtospecialist.com
6. Simple Classic Chair By Ana White
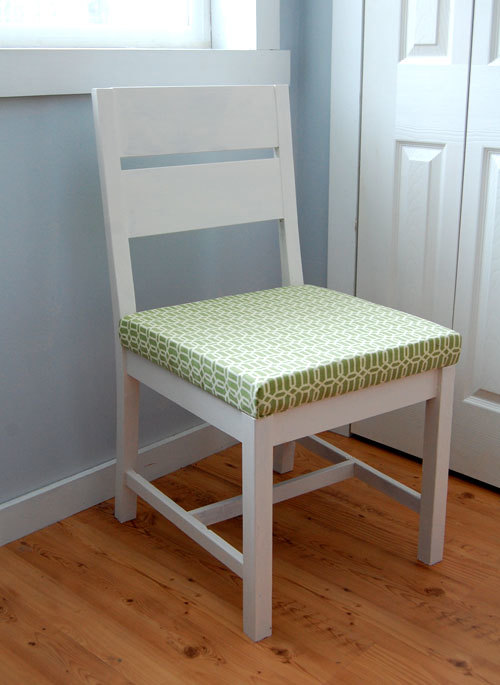
This chair focuses on being as comfortable as possible with an upholstered seat and strong base supports.
You would assume that the back legs are curved at first glance, but they are actually cut straight. As a result, they are capable of taking more pressure.
Helping these legs are the supporting pieces, which are angled 8 degrees off square along with a base center between 2 sides. So they won’t struggle to stand upright and keep the whole chair balanced.
Project details: ana-white.com
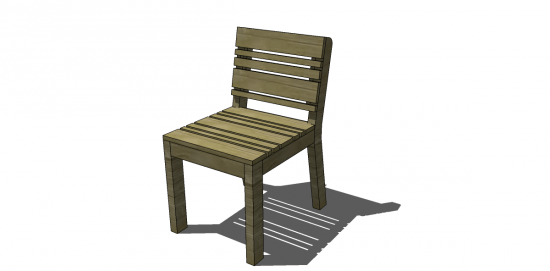
7. Build A Dining Chair From Designs By Studio C
Most DIY chair plans focus on 2x4s, but this one adds in some 1x6s. You can save quite a bit on material costs.
This chair has a “recline” back, so we need to start with the back legs. Cut from the 2×4 a 17-1/2” long piece, then cut a 5-degree bevel from its middle point. Trace the second leg according to this result.
This back lets you have the most relaxing posture while sitting.
It is also simple to assembly rest with pocket hole screws. The part challenge of this project is to create curves for the back apron and back slats.
Project details: designsbystudioc.com
8. DIY Dining Chair By The Wood Whisperer
The overall design of this chair plan has a modern aesthetic feel and classic. For example, the backrest has the same curve as the back profile of the classic Maloof rocker.
You will immediately feel comfortable with this curve the moment you put your whole back down.
The back legs are also angled out at a 6 or 7-inch degree. As a result, you can observe that this chair has a slightly wider top. Aside from improving the aesthetic aspects, this choice also increases the backrest area.
9. DIY Easy Dining Room Chair By Instructables
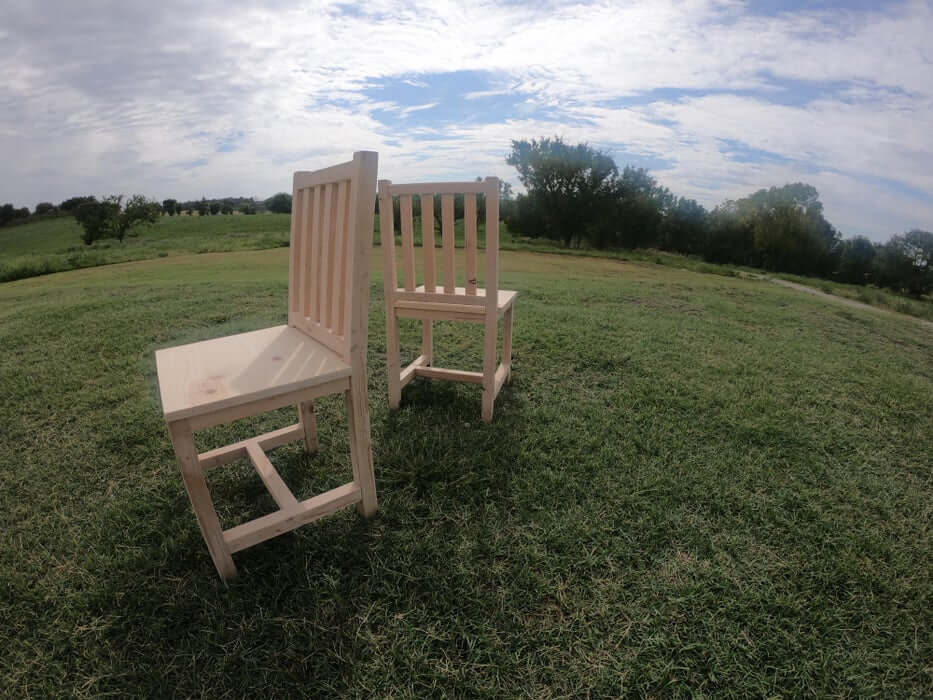
Some of us are no experts at woodworking, so we need plans that are easy to follow. That is exactly what this plan proposes without losing its visual appeal.
All in all, you only need two 2x4s. One of them will be turned into five 14-inch long 2x2s and eight 14-inch long 1x2s.
The other will be cut down the middle at 35-3/4” long to form the 2 back legs.
Afterward, you simply fix all parts together screw and pocket holes.
The chair itself is much sturdier than its appearance suggests, thanks to the base support.
Instead of the usual 2 side-pieces, the base support here is an “H” shape. This shape ensures that the legs never buckle under heavy weight.
Also, this plan fill out all nail holes with the dowel rod and sand them. As a result, the finished product will look very clean and aesthetic with no screw holes.
Project details: instructables.com
10. DIY Dining Chair Using OSB
Most of the time, DIY dining chairs are built either from oak or cherry wood. This plan is different, as it uses OSB, a cheap but strong material commonly used in construction.
As OSB arrives as a huge panel with a thickness of 3/4 inch, you need to design the shape of the chair first. Then, you can cut the parts out of the OSB panel from the template.
This chair with the backrest is cut at a specific 45-degree angle offcut. Doing so both give it a unique pattern, breaking the chair’s boring design and bringing a look really nice.
11. DIY A Farmhouse Chair
This project gives you the taller and more comfortable dining chair back, measuring a total of 27”.
This height is perfect for a full backrest but not too much taller than the 17-inch legs. As such, the chair will not lose any stability.
Another different thing with another project about this chair is the cross rail in the backrest. This piece is made from 2 rails joining together in the center with a notch.
Thanks to this notch and some glue, the cross is very strong without needing any screws.
Otherwise, you can download the pdf file with a detailed plan to easily use and follow instructions.
Project details: thediyplan.com
12. DIY Modern Plywood Chair
Plywood is affordable, strong, and flexible. However, not many people think of using it as the sole material for building chairs until this project.
With just 1 sheet of 3/4 inch thick 4×8 birch plywood, you can build 2 chairs modern and unique, not just one.
You will regularly need to glue things together to make them thick enough as it’s plywood.
Just follow the instructions from the video to build these stylish chairs for your dining room. You should have the necessary tools to easily finish this project.
13. DIY Upholstered Dining Chair
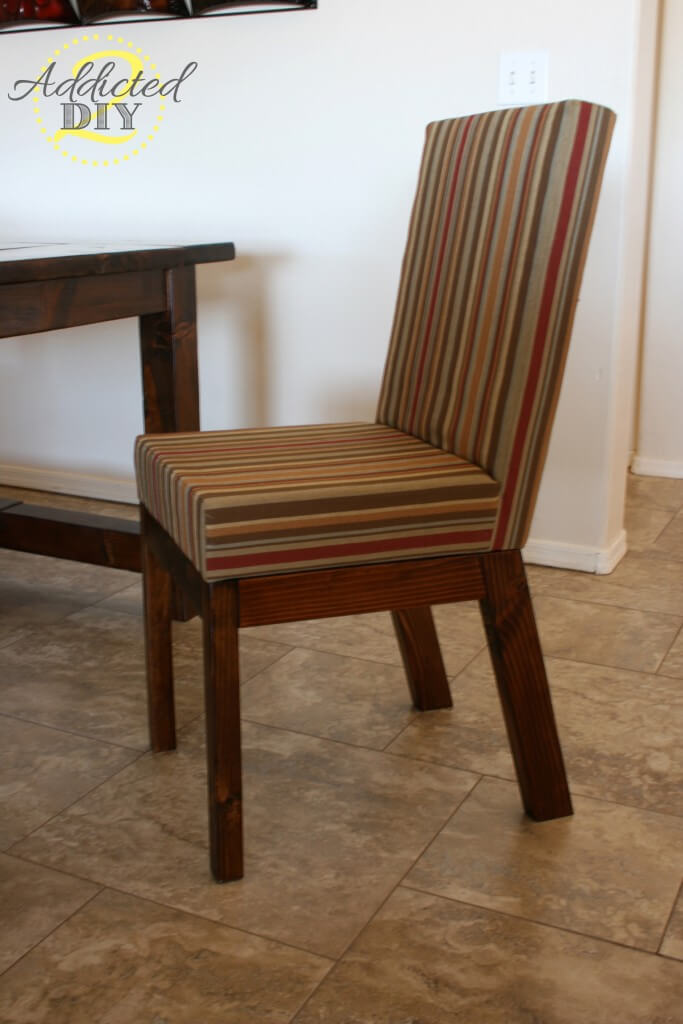
Sometimes, we need formal dining chairs with upholstered, so the usual 15-degree backrest angle just can’t satisfy. This plan offers a good alternative with a 5-degree angle and a 22” tall back.
As it’s upholstered, the skeleton needs to be strong. That is why the whole backrest and seat were built uniformly. This choice allows the foam to stick to the skeleton easily.
For the seat and the backrest, you can use two pieces of 1/2″ plywood. Covering the back is a thin layer of foam batting, while the seat has a thicker foam pad. Both of them stay on thanks to spray glue.
The last step is making the fabric cover. Staples help you put the cover in place, but they cannot give you a tidy appearance. For that, you need to employ the whipstitch method to keep the side seams hidden.
Project details: addicted2diy.com
14. The Daniela Dining Chair Plan
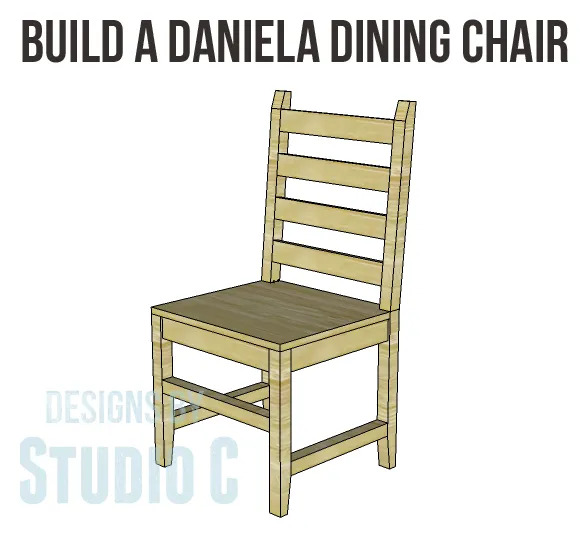
This chair plan requires that you connect the back legs with the back supports, not cutting them from a single piece.
That is why it’s easier for you to change the backrest’s angle, as you just need to change the bevel cut in the top pieces.
This kind of customizability means you can be sure that the chair will fit your back snugly.
As this chair follows the Daniela style, remember to cut a slope in the lower part of the legs at 4” height. Leave 1” of contact area to ensure that the chair will not topple.
Project details: designsbystudioc.com
15. DIY Simple Wooden Chair
The most special part about this chair is clearly its back legs. Despite each having not one, but two cuts, these legs are still capable of handling great weight.
The back legs can bend at 2 different angles. To attain this result, the plan requires make the necessary angles, and reconnect them with dowels. The dowels will disappear into the legs, yet it provides more strength than screws.
The back rails are connected by mortise joints, which are both strong and practically invisible.
The seat is done with upholstery, but it’s not glued into the chair. Instead, you upholster the seat separately, then attach it into the chair with 2 little L-brackets.
Of course, you should take the above step after the finish sanding, staining, and applying polyurethane the frame chair.
16. Elegant Pallet Wood Dining Chair

One of the biggest weaknesses of chairs made from pallets is that they are very bulky.
If you can fix this issue, then pallet wood is literally the perfect material due to how cheap it is. That is exactly what this plan promises.
The secret to the elegance of this chair is to saw a lot, but remember to only use the thickest stringer parts. You must also make sure to remove all the screws or other steel parts in the pallet.
The whole frame will be 2 “h” shapes connected together by 1 stringer piece. If you worry about the chair’s strength, don’t.
Once you start adding in the planks, they will also act as connectors and balance things out.
Finally, you can stain it with dark brown or any of your favorite colors.
Project details: instructables.com
17. Building A Midcentury Modern Dining Chair
If you are a fan of uniqueness and modernity, you will surely love this plan. It, after all, uses only solid wood to make the chair, ensuring its absolute strength.
Adding to this is the fact that the front legs and back legs are fixed together through only wood joineries and glue. Once they are in position, these joineries are even stronger than screws without risking destroying the inside.
The seat has a special curve, which can be obtained by rough carved and sanding. To ensure correct carve depths, you can drill at specific points to mark.
But generally, we feel the seat that quite thin to load big weight, it can break down. You should make the seat thicker.
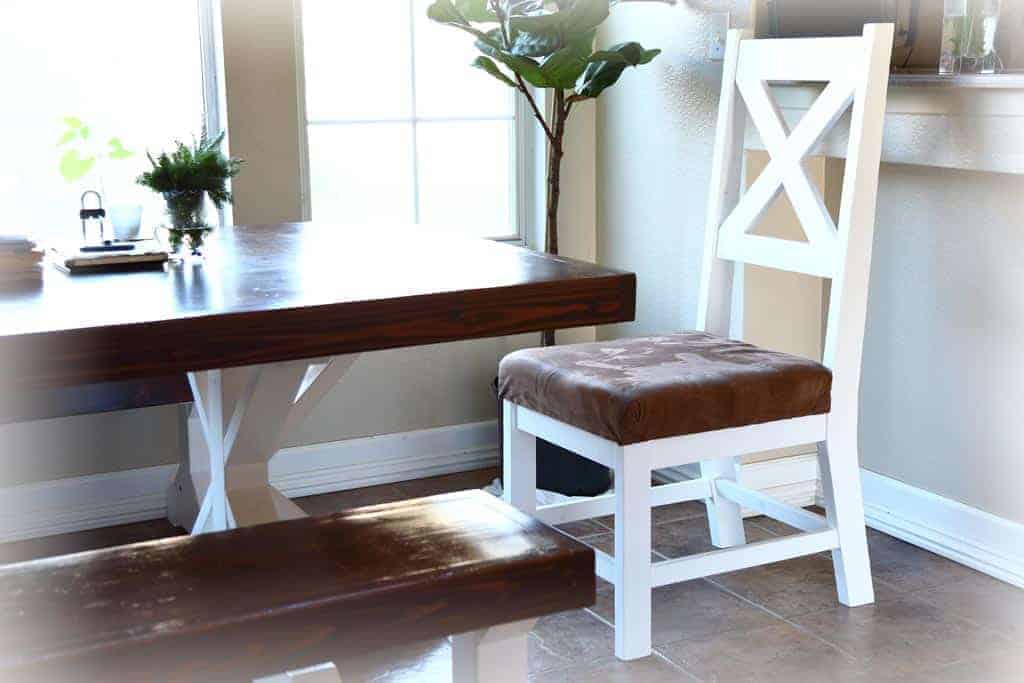
18. DIY Rustic Dining Chair
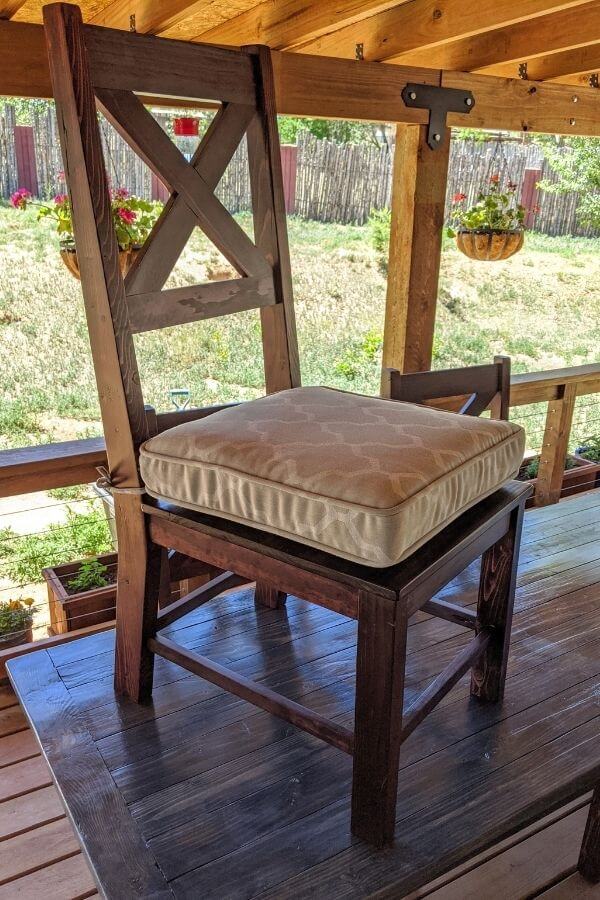
Most pieces of this DIY dining chair plan are connected together by biscuits to increase stronger joints, not screw holes. As a result, the whole chair has a uniform appearance with no apparent holes.
This chair has a unique “X” shape backrest, adding in a touch of flair and personality.
The shape is not just for looks, though, as it can also strengthen the whole backrest. After all, it will surely increase the number of joints between the pieces.
Project details: davidgunter.com
19. Make A Dining Chair From Home Dzine
One can say that this plan is 2 projects coupled together. The first one is to build a chair-shape frame and the second one is to upholster this frame.
The frame will be covered in foam later, so you do not need things like supporting pieces or comfortable seats.
That is why you can save quite a bit on the material budget and just build a base frame strong enough for the fabric to latch on.
Of course, the chair not having any support means you will need to do some tricks. You need to wrap flexible webbings around the frame to keep the foam in place.
The finished chair will receive another upholstering layer. It looks fancy and beautiful.
Project details: home-dzine.co.za
20. DIY Modern Dining Chair By Chris Salomone
With just one glance, you can tell that this plan has a much lower backrest than most dining chairs.
While this choice limits your comfort a little bit, it does wonders to the chair’s balance.
This chair plan can be divided into 2 processes, making the side pieces and the seat. The side part consists of 4 components: 1 front leg, 1 stretcher, 1 back leg, and a backrest piece.
The most vital ones are the back leg and backrest piece, as they are 1 sub-assembly that needs to be completed first.
The chair looks like the stylized “h” shape, with the back legs having more slope than the front ones. Thanks to this design, the chair can absorb a lot more pressure with ease.
21. DIY A Baltic Dining Chair
Just like most normal chair guides, this plan starts with the back leg/back support combo.
However, this time the angle is on the large side, measuring almost 20 degrees. That is why you will feel more at ease while relaxing on this chair.
The seat frame is built the traditional way, with 4 stretchers linking the legs. Things are different with the seat and backrest slats, though.
You will be alternating between 1x4s, 1x2s, and 1x1s. Between each slat, there should also be a 1/2” spacing. This choice grants the chair a unique design and different with normal chairs.
Project details: thedesignconfidential.com
22. 6 DIY Rustic Dining Room Chair
The project is purely for people interested in building a complete chair set. It looks rustic and beautiful.
After all, even the recommended material list is extra, with two 10 feet long 2x10s, eight 8 feet long 1x3s, six 8 feet long 2x2s, and eight 8 feet long 2x4s.
Start with the 2x10s, which will be serving as the seat. Cut this piece into six 20-inch long and six 18-3/4” inch long planks. Join them in pairs to make the seat.
The 2x4s will be the back legs and braces, cut into sixteen 1/2-inch pieces. As for the 1x3s and 2x2s, they will serve as the back components.
The biggest advantage of this method is that everything is uniform, so the completed set is very aesthetically pleasing.
23. Harriet Outdoor Dining Chair
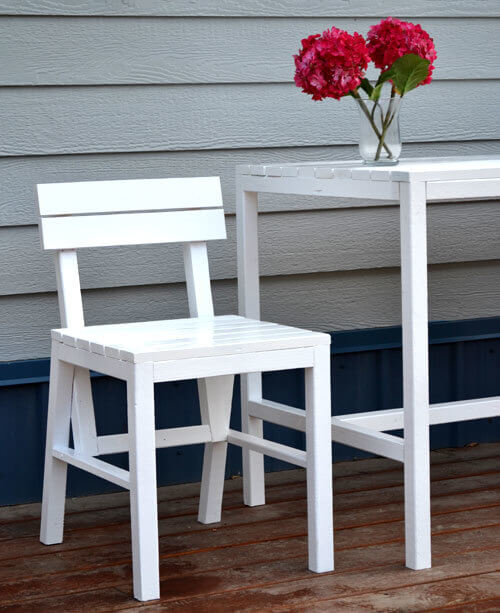
As you can easily see from the name, this dining chair plan makes use of the recently trendy Harriet chair design.
The reason for this decision lies in this design’s sturdy yet lightweight nature, allowing for easy transportation. The chair looks modern and fresh with white color.
The most obvious difference is in the back. While most dining chairs have the back legs also acting as the back rest’s supports, this plan doesn’t.
Instead, the backrest support is joined into both the back legs and the chair seat.
Doing so increases the strength of the backrest and lessens its weight. A uniform, solid piece of wood is always heavier.
Project details: ana-white.com
Conclusion
We hope one of these 23 DIY dining chair plans will satisfy you or create inspiration for you to start building a new dining chair.
While chair building is among the challenges for beginner DIY-ers, some plans are easy to do. Just pay close attention to the guide, and choose the right plan that suits your skill level.
Some of these plans involve upholstery, which is one of the most useful advanced skills. It helps eliminate the need to build complicated supporting pieces and also gives you a more comfortable chair as well as looks nicer.
You do need to be careful with the chair height, though. No one wants to waste time building a beautiful chair for it to not fit with their table.
If you see a lot of info helpful from this list please share it. We appreciate this!


