
If you’re a cat lover and looking for a good DIY project, consider one of these 15 DIY cat shelves plans!
With these shelves in the house, your furry friend will have a space all to themselves to climb, play, and relax.
These projects have been carefully curated to suit various DIY skill levels and budgets.
So whether you’re a seasoned DIY enthusiast or just starting out, there will be something for you and your cats!
Let’s dive in!
Table of Contents
- 1. Simplistic Cat Shelves Plan
- 2. DIY Simple Cat Wall Shelves
- 3. Climbing Wall Shelves With Sisal Steps
- 4. Cat Wall Shelves With Scratching Post
- 5. Wall Shelves from IKEA Lack Shelves
- 6. Easy Carpet-Coated Cat Shelves
- 7. Multi Colorful for Wall Shelves
- 8. DIY Floating Cat Shelves
- 9. Cat Shelves with Attached Cat Toys
- 10. DIY Cat Shelves Using Spare Wine Boxes
- 11. Carpeted Cat Ledge
- 12. Staircase Cat Shelves
- 13. Floating Cat Shelves Using Steel Rods
- 14. Easy DIY Cat Climbing Wall
- 15. Carpeted Floating Cat Shelves
- Conclusion
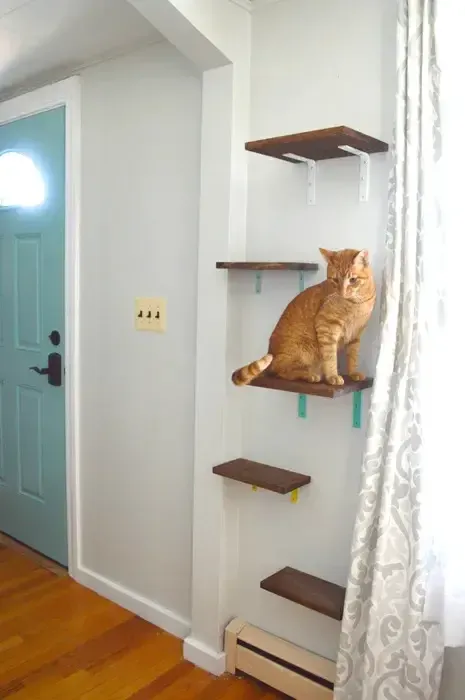
1. Simplistic Cat Shelves Plan
This simplistic cat shelves plan is perfect for beginners and DIY-ers on a budget.
For this project, you will need shelves of varying sizes (18-inch and 24-inch shelves are recommended) with mounting hardware.
It’s important to use sturdy wall anchors that can hold at least 50 pounds for the safety of your cats. Additionally, you will require a screwdriver and level as tools.
Cover the shelves with carpet squares to provide traction for your cats to climb. These squares can also add color and seamlessly blend with your home decor. You can find a decent patch of carpet square for $4 – $10 at any carpet store.
Project details: brooklynfarmgirl.com
2. DIY Simple Cat Wall Shelves
The optimized design gives your project a little bit more flair by allowing you to paint and draw a mural around the shelves. You’ll be giving your cat a whole corner to themselves here!
This project will require a wooden board of at least 1/2 inch thickness, measuring 12 inches deep and 18 inches wide.
Use sturdy “L” brackets with side lengths equal to at least half the board’s depth. Use heavy-duty wall anchors to stick the brackets to the house’s studs and wood screws to join the boards with the brackets.
You can cover the boards with fabric using spray adhesive. If you want to build multiple boards, space them out for safe cat travel.
Project details: hillspet.com
3. Climbing Wall Shelves With Sisal Steps

Your cats love to climb so these climbing wall shelves will be perfect for them, then!
The materials used include Ikea Ekby Valter shelf carriers made of untreated wood, solid oak panels in 20 cm and 30 cm widths, MDF plates, white primer, Flexa paint 9010 for matching interior, and 8mm thick sisal rope.
The project includes four small sisal steps. Each step is made from spruce wood measuring 7 x 4 cm and 26 cm deep.
The back step is 9.5 x 9.5 cm and is fixed to the wall with screws. The front step measures 9.5 cm x 6 cm. This part prevents the sisal from unwinding, which can be done by firmly securing it with a nail.
Otherwise, you can cover the wood with recycled carpets. You can customize it with design and style to be suitable for your space.
Project details: vivianneyiwei.nl
4. Cat Wall Shelves With Scratching Post
With this project, you’ll incorporate a scratching post into a wall shelf for your cat. It looks rustic.
The materials are simple: two 1″ x 12″ x 8′ pine boards with knots for aesthetics, one 6″ x 6″ x 8′ post, 100 feet of 3/8″ natural Sisal rope, and a roll of indoor/outdoor recycled carpet.
Additionally, 24 black steel L-corner brace brackets are needed for mounting.
The wood was sanded, measured, and cut into shelves of various lengths. After staining, a hole was cut in one shelf for alternative access.
The shelves were attached using the brackets, ensuring suitable spacing for cat mobility. The scratching post was wrapped with sisal rope, with a few parts of the wood exposed.
Project details: adventureratheart.com
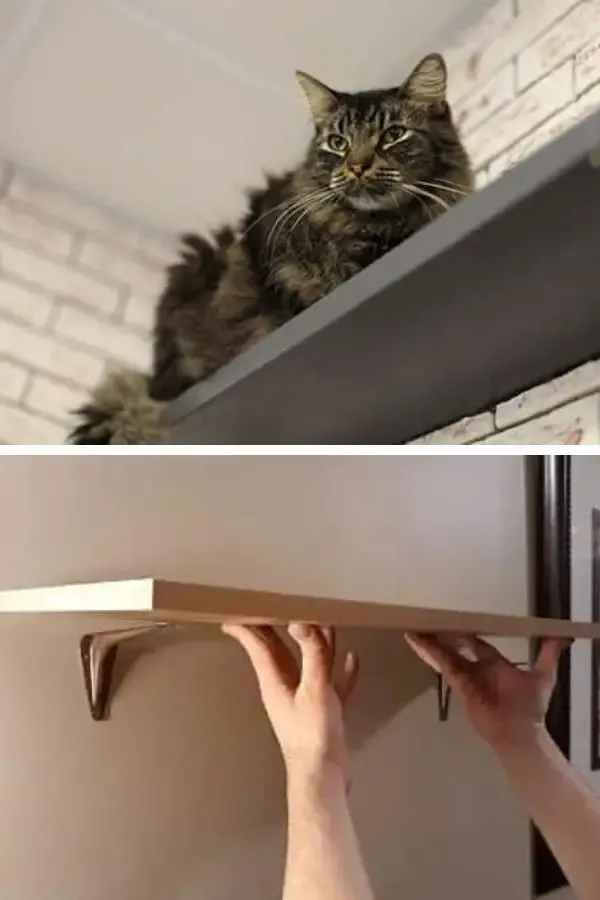
5. Wall Shelves from IKEA Lack Shelves

If you don’t want to bother too much with woodworking to get a good-looking shelf, you can repurpose IKEA Lack shelves, instead.
This project will work wonders as budget-friendly, zero-wood-working-required cat shelves.
First, cover the surfaces of Lack shelves with carpeting. You can buy Adum rugs from IKEA and cut off a big patch that fits the surface of the shelves using scissors and box cutters.
Using carpet glue, stick the cut rug pieces onto the tops of the Lack shelves, allowing them to dry for at least 24 hours.
Next, mount the Lack shelves onto the desired wall to create the cat tree. You can use brackets and attach them to the bottom of the shelves for more stability.
Project details: tatianasdelights.com
6. Easy Carpet-Coated Cat Shelves
A thick carpet coating can help your cats stay warm and comfy if you live in a cold region.
With this plan, you select a cut of wood and cut it to your cat’s size. Then, use metal brackets to mount it to the wall to create a base for your shelves (use screws to stick the brackets to the studs on the wall.)
You can either buy or use leftover carpeting and cut patches that suit the shelvings with a box cutter.
Remember to leave space for big bracket attachments. You can stick the carpeting to the shelves with an industrial stapler.
These shelves will create a climbing wall for your cats and add a style of interest to your house decor.
Project details: lizskittybootcamp.com
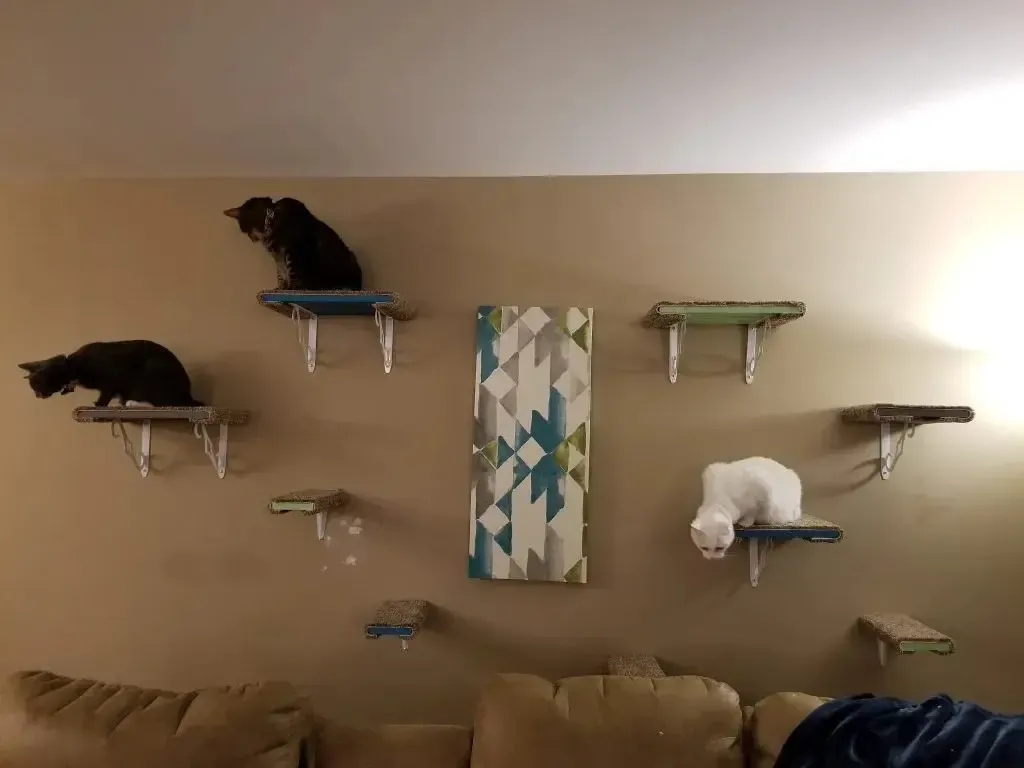
7. Multi Colorful for Wall Shelves
Looking for a more playful design that’ll give interest to show in your room? This cat shelf plan uses brackets in multiple colors.
The sample in the project used four three colors: blue, yellow, green, plus white. The color is spray-painted onto the brackets.
You can use whatever color you see fit for the project!
Other than the bracket being painted in different shades, the shelves themselves are pretty straightforward. They’re simply cuts of wood mounted to the wall via brackets and nails.
Project details: plasteranddisaster.com
8. DIY Floating Cat Shelves
Floating cat shelves are great if your house has a minimalist design. “Floating” simply means the shelves don’t have any visible support.
Although it will require you to be a bit craftier when it comes to supporting the shelvings, they aren’t any more difficult to build than normal shelvings with brackets.
Wood is measured and cut using a radial arm saw or miter saw for this cat shelf. Four cuts of wood are made and mounted directly to the wall using wood screws.
A white-painted facade encases the wood framing, giving the whole shelves a monolithic look. You can put this floating cat shelf on any corner of your home.
9. Cat Shelves with Attached Cat Toys
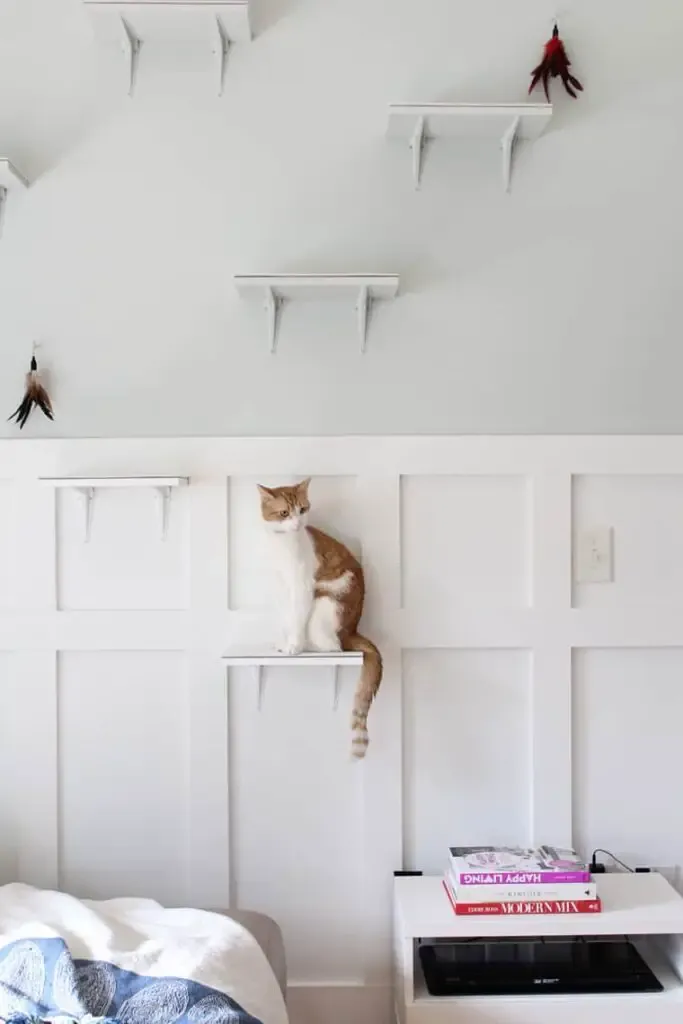
Most cats love a good toy. You can make the prospect of hanging out on the cat shelves far more attractive to your cats by hanging a couple of toys on them.
The toys hanging on the wall will also be a cutesy little touch to your walls. Bonus point if you have an entire section of the room carved out for your pets.
Start by measuring and cutting the shelves to the desired length. Lightly sand the shelves and attach brackets using wood screws. You can re-sand and paint up the shelves to your liking.
Cut carpet tiles to match the shelf size, apply adhesive to the rubber side, and press the shelf onto the glued carpet.
For hanging the shelves, locate studs using a stud finder, or use plastic anchors for support. Drive wood screws into the studs to hang up the shelves.
As for the cat toys, spray paint eye hooks to match the wall. Drill slightly smaller holes and screw in the eye hooks into a stud or use plastic anchors. Tie the cat toys to the hooks using a clear fishing line!
Project details: simplestylings.com
10. DIY Cat Shelves Using Spare Wine Boxes

Got a few of your wood wine boxes? You can give them a new lease of life by repurposing them into cat shelves. This project will be a great one if you don’t like wastage and are a huge fan of recycling.
Take out a couple of these boxes and resand, then repaint them over to your liking. Place carpeting on the top of each box to make your cats more comfortable.
Then, attach them to the wall by driving wood screws through them and into the studs (you can use a stud finder for this purpose.) You should add lids and supports after the boxes are screwed into the wall.
Project details: imgur.com
11. Carpeted Cat Ledge
A carpeted cat ledge like the one in this project is a great fit for cats that love climbing, and your house is a bit chilly.
The carpeting will keep them warm, and the tall ledge will definitely keep them happy, as well!
Two 2×4 wood beams are joined together to create one long post for your cat to climb on. The post is then covered in carpeting to create a more climbable surface, with a ledge on top for them to lay comfortably.
You can use this DIY for indoor cats who love climbing and looking down from high places.
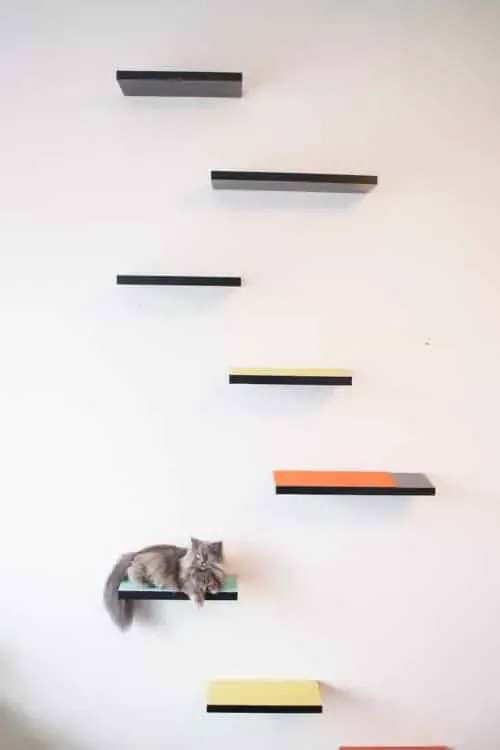
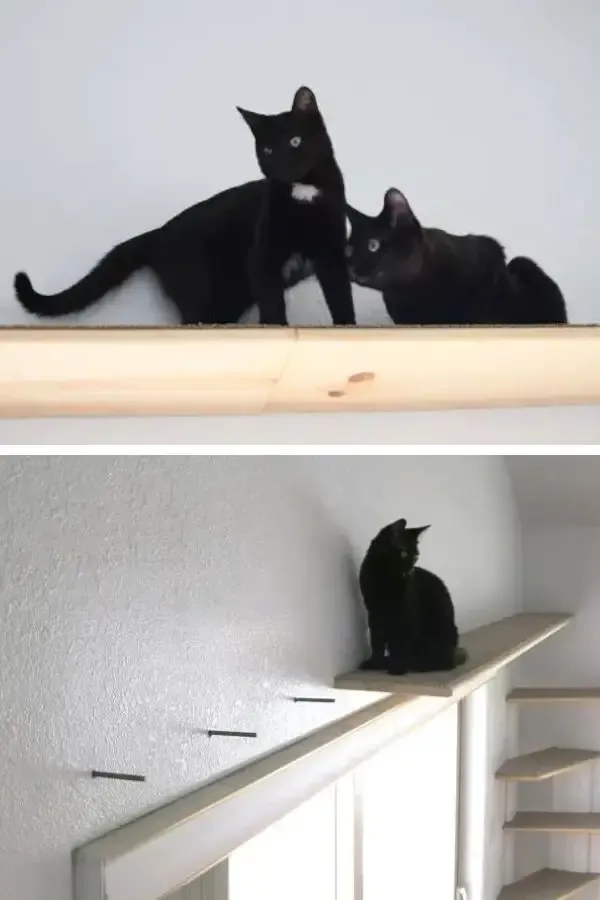
12. Staircase Cat Shelves

Staircase cat shelves are great for building a “jungle gym” for your cat. This plan will guide you to place the shelves leading the way up to the cat bed.
They’ll fit right with other equipment, like climbing posts and ledges, and turn that corner of the house into a cat utopia.
Start by cutting the wood to your desired length and sanding it thoroughly to achieve a smooth finish. Stain or paint the shelves in your preferred color.
Secure the joint with a ¼ round molding using nails and wood glue. Repeat the process for all three shelves while ensuring they are aligned properly.
Next, attach the 1×8 and 1×3 boards together using screws and pilot holes. Utilize other shelves to hold the wood in place while drilling.
Let them dry completely before allowing your cats to climb aboard!
Project details: worstontheblock.com
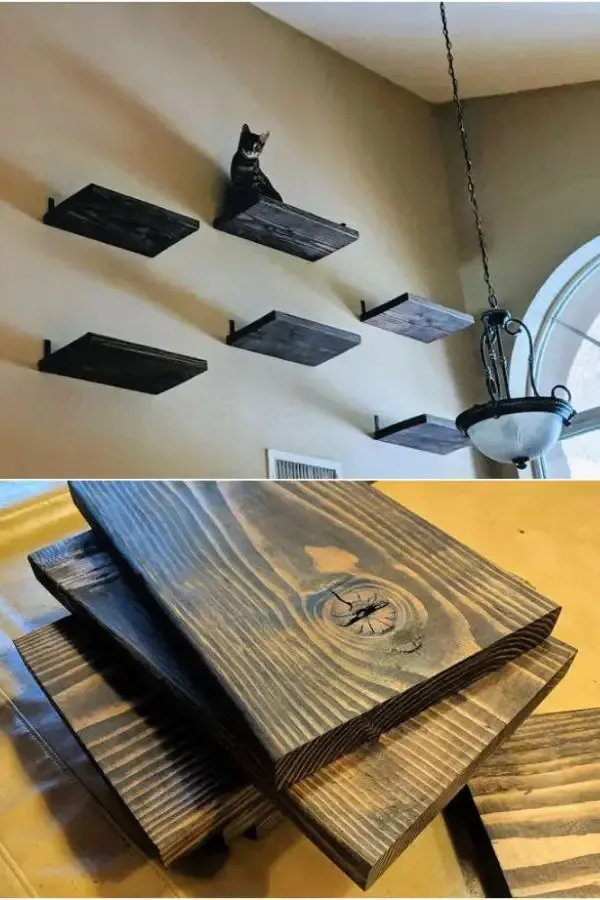
13. Floating Cat Shelves Using Steel Rods
There are more than one ways to design a set of cat shelves. Unlike previous projects that used wood blocks nailed to a wall, this one uses a series of steel rods hammered into the wall as anchoring.
You can cut a thin wood board and fix them to the steel rods, giving you the desired “floating” aesthetic.
Once the boards are in place, you can optionally staple carpeting to the top or just leave the wood surface bare.
This type of project works best if you want a slim, ladder-style series of cat shelves.
The ledges are very minimalistic and can blend into the house’s overall aesthetic very well.
Project details: makezine.com
14. Easy DIY Cat Climbing Wall
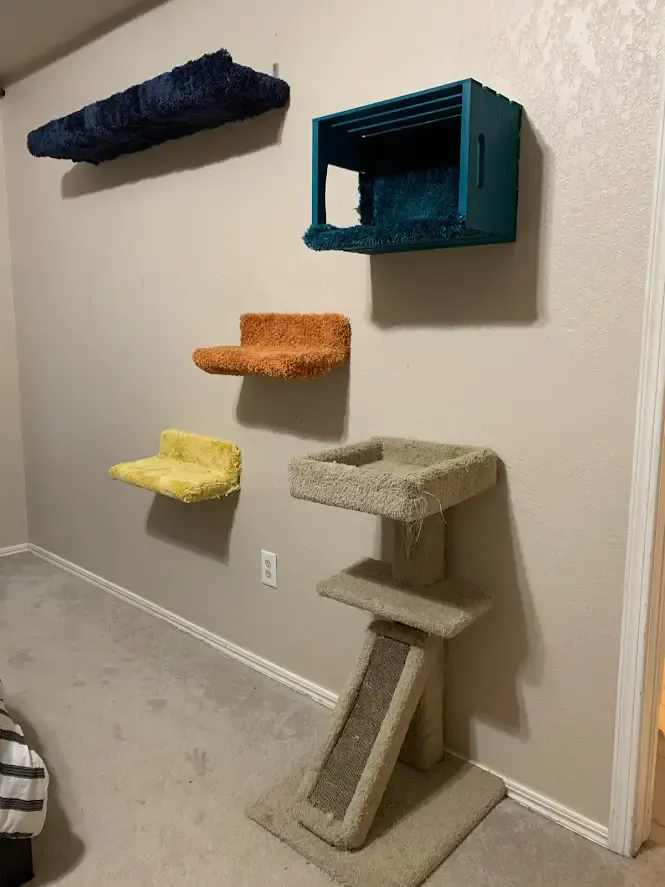
These cat climbing wall shelves are completely coated in carpeting, making them especially suitable for cold areas.
Each shelf uses different colored carpeting. So, if you have children in the house, they’ll be a hit among the kids (and the cats!)
The shelves are built simply from wood and mounted to the wall via L-brackets and screws. The carpeting is repurposed bath mats stapled to the wood.
These shelves will add style to any of your rooms. Moreover, you can customize it to be suitable with your wall such as adding a scratching post or extending it wider or taller, etc…
Project details: mamaandmore.com
15. Carpeted Floating Cat Shelves
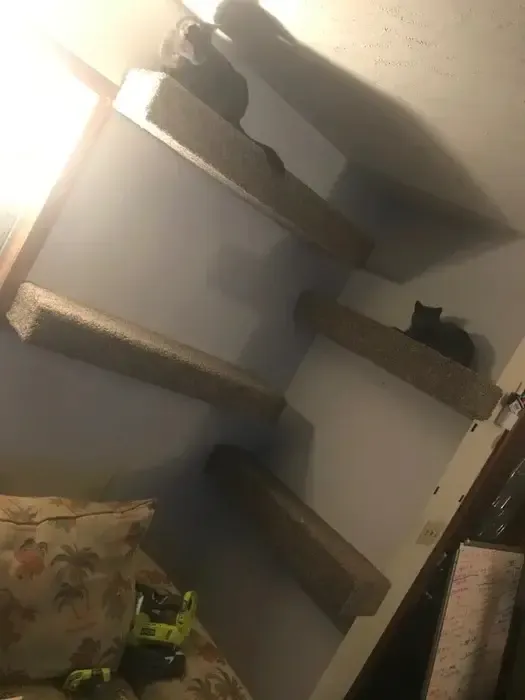
And last but not least, these floating cat shelves are carpeted to keep your cats warm even on the coldest days.
The cat shelves are assembled from several thin cuts of plywood. They’re mounted to the walls with screws.
Carpeting is used to coat the surface of the shelves. The old carpet patches are stapled into the wood using an industrial nail gun.
Just follow 8 simple steps from this plan then your shelf will be ready for your cats to rest comfortably and have fun.
Project details: instructables.com
Conclusion
DIY cat shelves can be a fun side project for you (the cats can help by providing emotional support!)
In general, each project has been carefully chosen to suit DIY-ers with various skill levels and budgets.
Pick the project that you like the best and suitable for your space, then follow the step-by-step instructions in the link to completion.
We hope you’ll end up with the cat shelters of your dreams and build a lovely gym for your cats!


