Today, there are many other convenient ways to store bread that breadboxes are no longer a choice to many people.
However, a conventional cabinet is still a perfect item for bread lovers to store their loaves.
A lovely DIY breadbox will also make your kitchen stand out from the boring modern-style ones.
With the 16 DIY bread box plans listed in this article, you can opt for the best solution to fit your kitchen.
For more info, scroll down to discover!
Table of Contents
- 1. Make A DIY Bread Box From Plywood
- 2. DIY Bread Box By Amateur Woodworker
- 3. DIY Pair Of Bread Boxes
- 4. DIY Pine Breadbox
- 5. Two Story Bread Box
- 6. DIY A Fancy Breadbox
- 7. Wood Burned Bread Box From Reclaimed Pallet Wood
- 8. DIY Bread Box By Bellman Woodworking And Designs
- 9. French Farmhouse Bread Box
- 10. DIY Bread Box From Pallet Wood
- 11. DIY Breadbox Makeover
- 12. DIY Wooden Breadbox By HomeSteady
- 13. Repurposed Bread Box By Artsy Chicks Rule
- 14. DIY Bread Box For Young Woodworkers
- 15. Poplar DIY Bread Box
- 16. DIY Wooden Breadbox Makeover
- Conclusion
1. Make A DIY Bread Box From Plywood
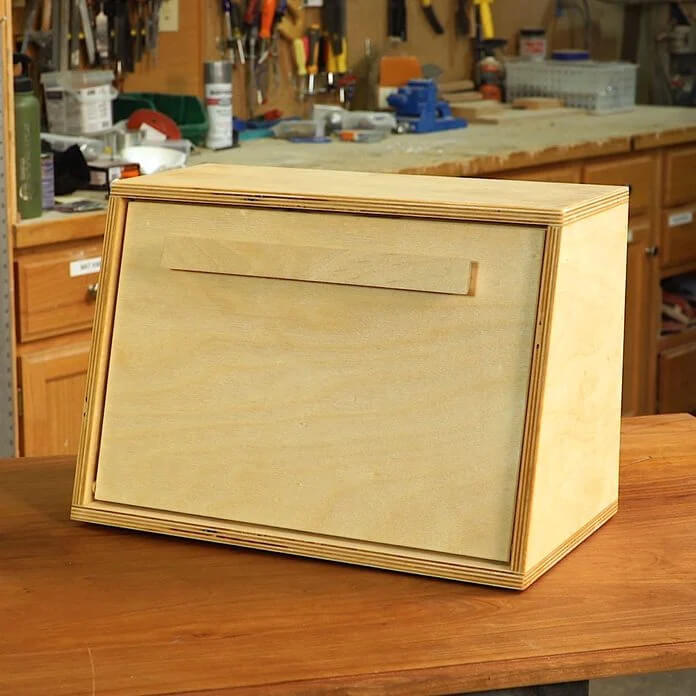
An interesting thing about this box is that it is made completely from only one large sheet of plywood.
It is very simple. Basically, you just need to cut the large board into the sizes as carefully described in the guide with detailed images. Then all you have to do is assemble the pieces together.
Most pieces of wood will be straight rectangles so it will be easier to cut wood. Dividing the box into two tiers on the inside will help you make optimal use of the box’s space.
The selling point of this box is that the door functions based on a neat pivot hinge mechanism. When this mechanism pairs with a handle, it becomes much more convenient to open and close the door.
Project details: familyhandyman.com
2. DIY Bread Box By Amateur Woodworker
This breadbox focuses completely on being as manageable as possible. There is no roll-top lid to struggle over, so it’s easy to build.
The only challenge is that to ensure the door can stay still on the box’s top when you open it, you must cut the bin’s front length to form an 80-degree angle, or else the door will only rest on a thin edge.
Another interesting design choice is the side grooves. These are uncharacteristically shorter than the top piece’s width.
As a result, the box has a much neater appearance if you cut a 1/2” x 1/4” corner behind the top piece.
Project details: amatuer-woodworker.com
3. DIY Pair Of Bread Boxes
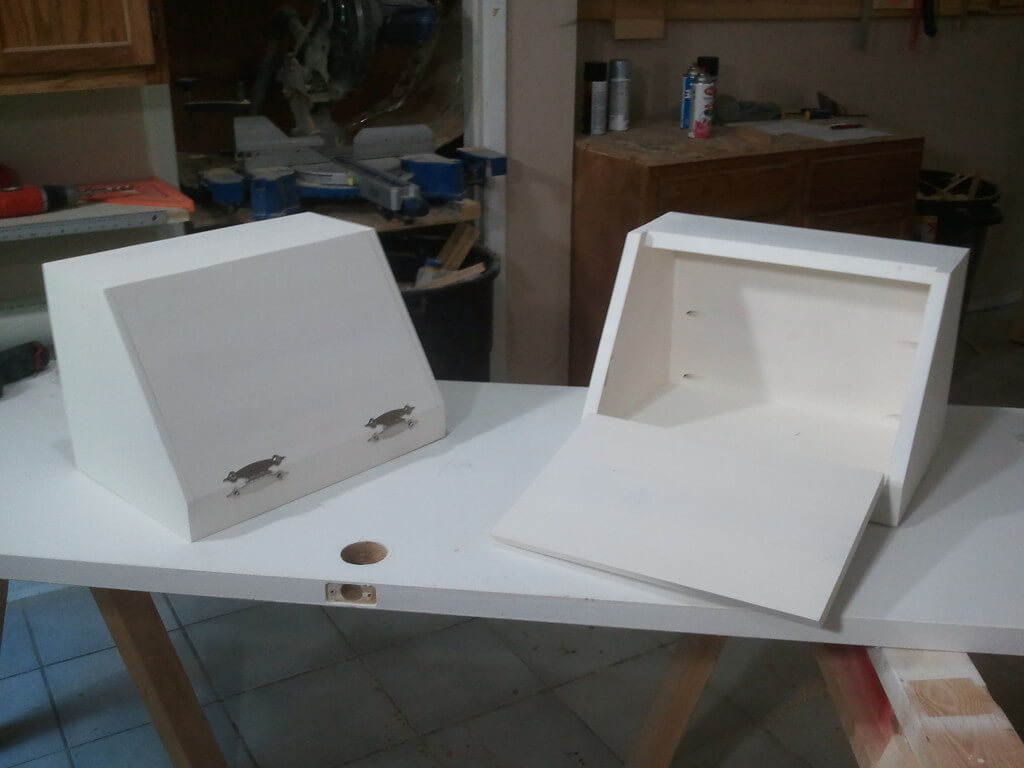
This plan lets you build not just one but two boxes. That’s not all, though, as you will also use different methods for each bin: one of them involves pocket holes and rabbets for the other.
However, as the goal is a pair of boxes, the most challenging process lies in the cutting.
To ensure that the boxes are identical in size and shape, it’s important to match the side cuts perfectly.
After all, the shape of the sides will be the basis for the bin’s entire assemblage.
Project details: jayscustomcreations.com
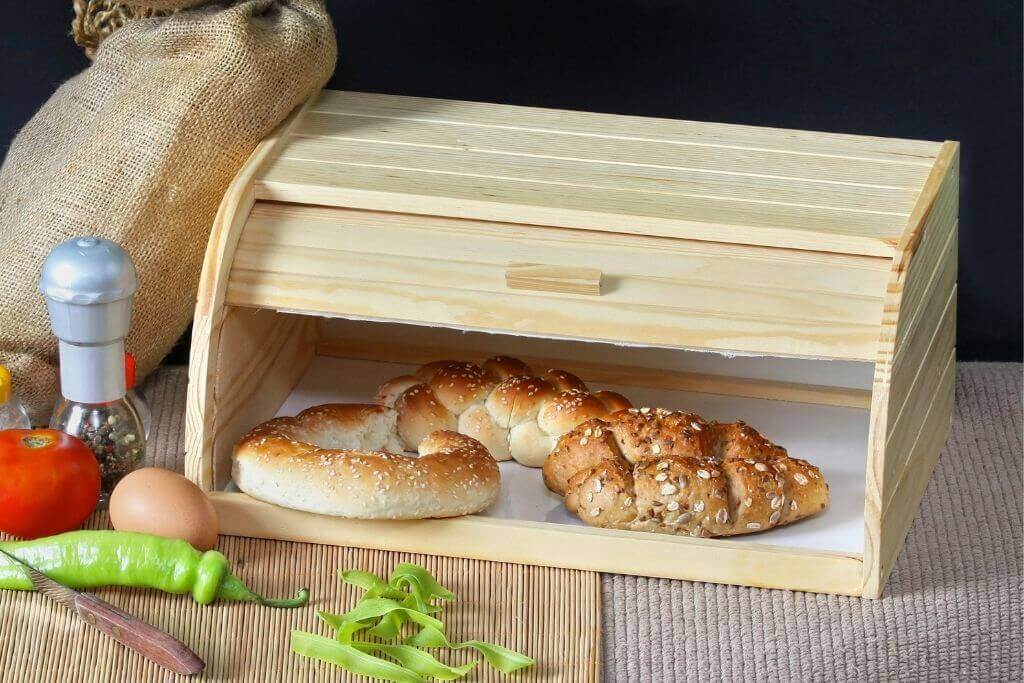
4. DIY Pine Breadbox
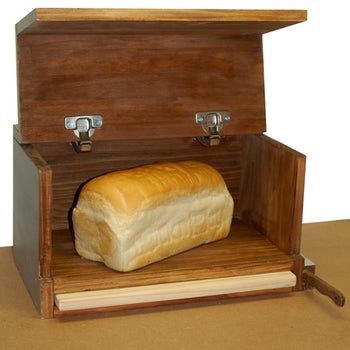
This pine breadbox is special because it does not only keep the bread for you. There are two hidden compartments that you can use to store a knife and a cutting board.
Plus, if measuring diagonals is too annoying for you, this box is a perfect choice.
You’ll start by gluing the shelves and base to the sides and securing them with screws. Next, attach the front of the lid under the back of it.
Once screw fixing is complete, move on to the part of the knife holder. Finish it by sanding and painting.
Project details: instructables.com
5. Two Story Bread Box
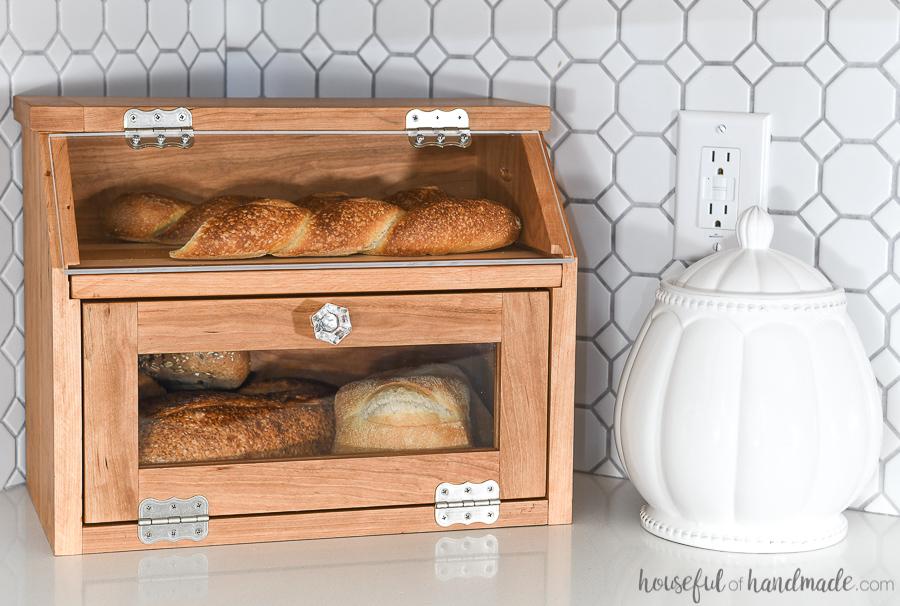
With this two-story design, the cabinet allows you to store double the amount of bread without taking up too much space.
What is more surprising about this cabinet is that its shelf is a cutting board which you can take out by drawing it out from the grooves.
The cabinet itself is not just a storage device but more of an exhibition. The reason for this comes from its plexiglass doors.
While protecting the content from environmental damage, these doors allow you to see the loaves inside.
Project details: learn.kregtool.com
6. DIY A Fancy Breadbox
There is no better word for this plan than “fancy”. The box has two compartments, each one having its ventilation design.
You will also notice that the doors open in opposite directions, making it easier to reach the loaves inside.
There are also some tenon joints and through mortises on both sides of the boxes. These improve the box’s durability as well as its appearance. After all, they provide an interesting break from the wood’s monotone color.
The frame is made from walnut, which contrasts nicely with the accent butternut of the door.
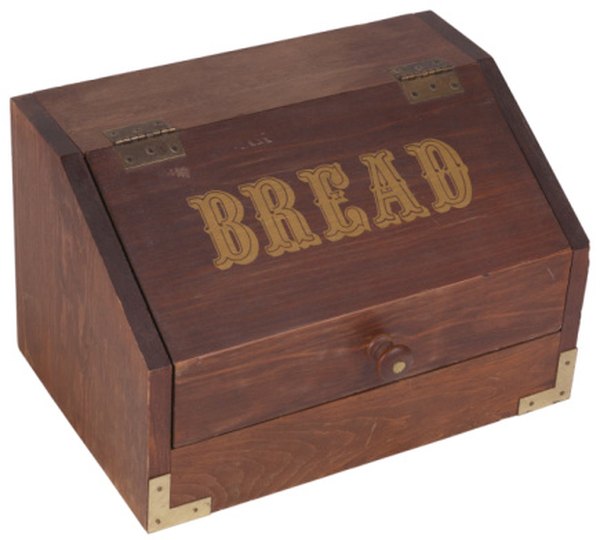
7. Wood Burned Bread Box From Reclaimed Pallet Wood
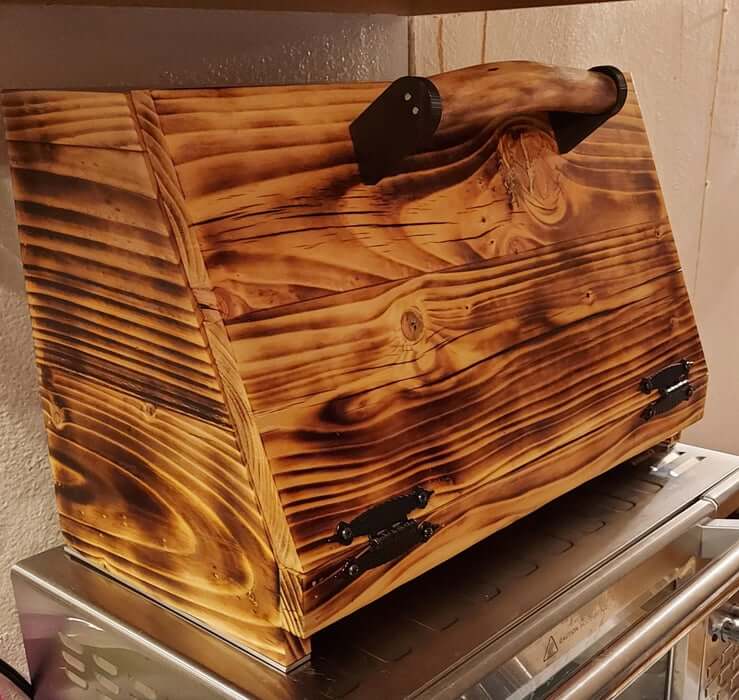
Within a glance, this cabinet with its prominent wood burnt patterns will immediately impress you. You can’t just acquire this pattern by merely burning the wood though.
You should use reclaimed wood as the material since it has patterns that can be emphasized by wood-burning.
When opened, the door can serve as a stable cutting board with strong wires keeping it in place.
All you need to do is clean it with a towel after use. This design also makes it much more efficient to prepare a loaf.
Project details: instructables.com
8. DIY Bread Box By Bellman Woodworking And Designs
This plan is on the advanced side, as it makes use of a tambour door. There is one big difference, however, from the usual tambour design.
The tambour pieces only receive rounding on the front, not the back. The reason for this choice lies in the canvas cloth that you will attach to the back to prevent the loaves from going bad.
The plan also makes use of both brad nails and the glue/clamp combo. With this combination, the brad nails can keep everything tightly pressed while the glue dries. The result is a firm cabinet structure.
9. French Farmhouse Bread Box
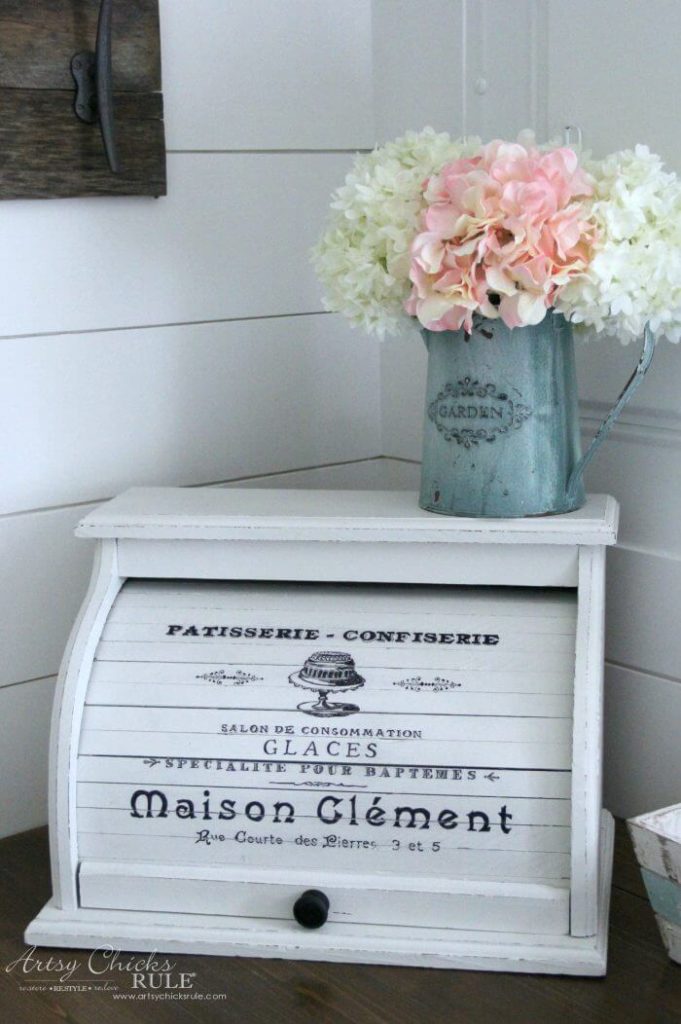
This project is not about making storage from scratch. Instead, it teaches you how to give an old box a makeover.
You will be painting the inside of the cabinet in Blue and putting a neat line of Frog Tape near the door. This choice gives the whole thing a break in the color scheme, making it more eye-pleasing.
The other special thing about this project is the etched patterns. You can obtain them easily by printing the design then using transfer paper. Then, you simply trace according to the line.
Project details: artsychicksrule.com
10. DIY Bread Box From Pallet Wood
This box will look a bit like a miniature wardrobe. The door will have glass so you can see what’s inside without opening the box.
This plan would also be a good option if you don’t like diagonal lines for your breadbox. After cutting the pieces of pallet wood into reasonable sizes, attach them together to form a box and secure with screws.
With the 2-layer additional protection of screws and glue. That is why this breadbox is very sturdy. However, there is no visible screw butt, as you will use dowels to cover them.
Finally, attach the door with glasses, decorate it, and you’re done!
11. DIY Breadbox Makeover
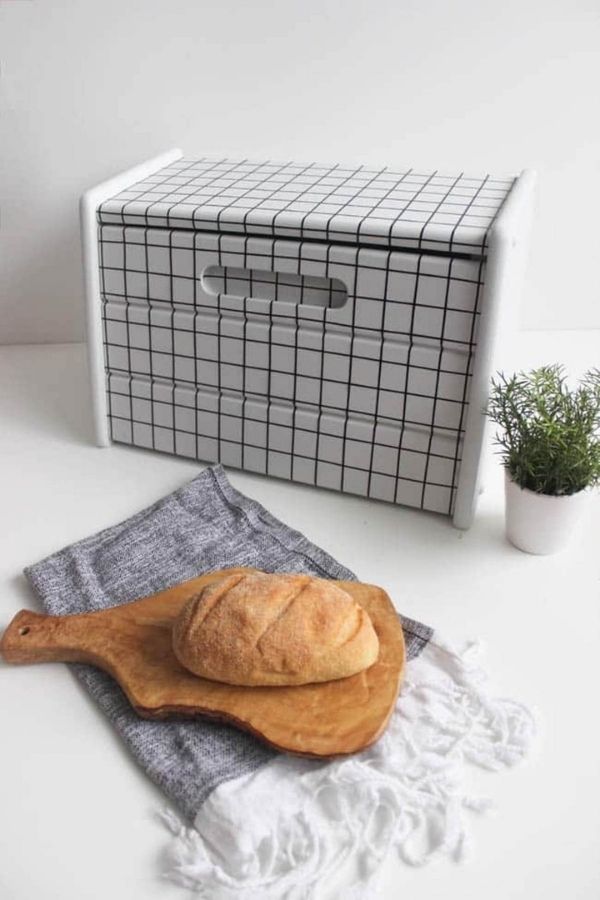
If your storage looks old and tattered, this DIY makeover project is perfect for you.
Since breadboxes often have crannies and edges, using a paint sprayer is a better option instead of brushes. A sprayer will save you lots of time, while brushes can take you forever for painting.
The next step is to add vinyl strips. These strips provide a break from the monotonous nature of the white paint, turning the storage into a more pleasing art piece.
Project details: lovecreatecelebrate.com
12. DIY Wooden Breadbox By HomeSteady
This breadbox plan ensures its structural quality by applying both pilot and counter-sink holes. The former is there to better accommodate the screws, while the latter’s main job is to hide the hideous screw heads.
As a result, other people will undoubtedly think that there is no screw involved in the building process.
The hinges are strategically placed at an exact distance from each end of the door. Thanks to this design, the door can easily fold out and allow quicker access to the bin’s content.
Project details: homesteady.com
13. Repurposed Bread Box By Artsy Chicks Rule
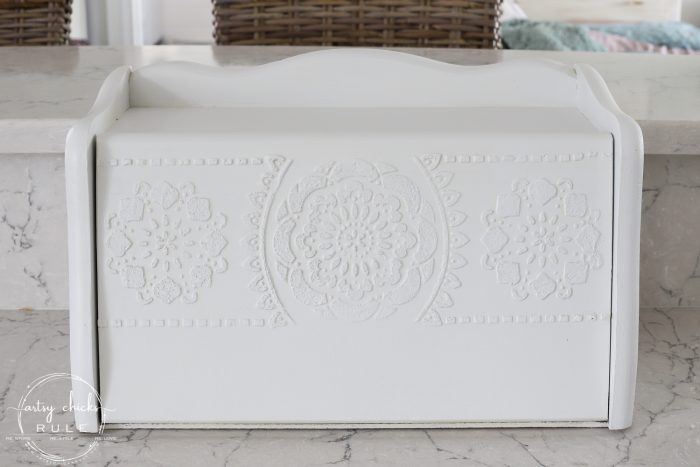
As old breadboxes are available at nearly every second-hand shop, it’s a good idea if can buy one or repurpose an old one and customize the cabinet according to your will.
This DIY plan shows you how to turn an old cabinet into a unique one with a “faux stone” style.
Another great thing is that it requires the use of a scraper tool to trace the design. The result is a much more accented artwork embedded onto your box’s surface.
It also follows the braille style, so even if you paint the same color over it, it still stands out.
Project details: artsychicksrule.com
14. DIY Bread Box For Young Woodworkers
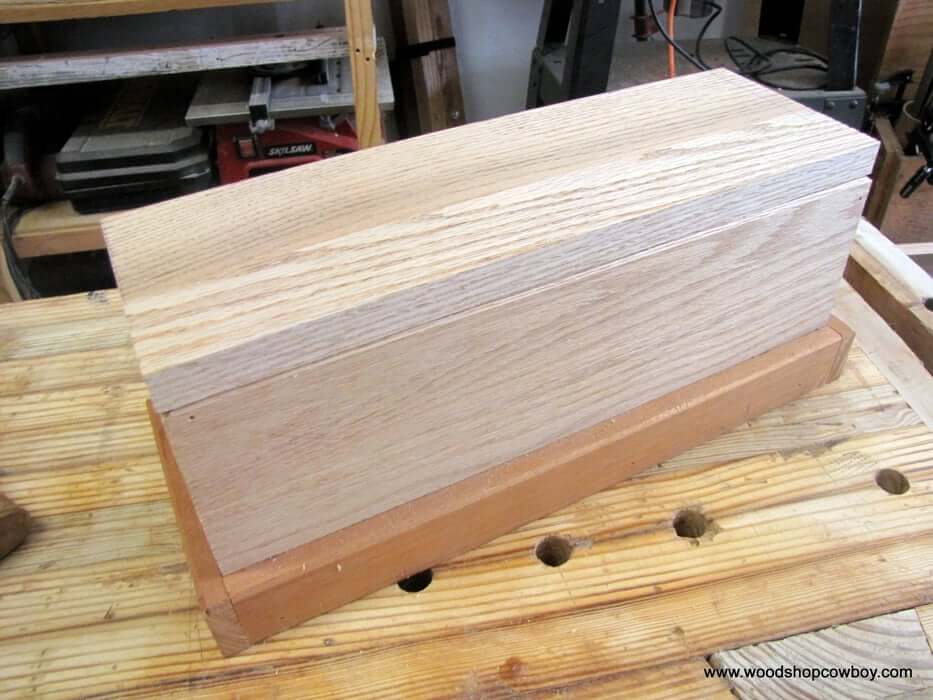
This plan is specifically designed so that a newbie woodworker can make it with no difficulty. However, the preparation of the size of the pieces of wood still requires care.
Moreover, this bread box has no diagonal lines, so measuring and assembling it is also easy.
After cutting the wood according to the parameters in the detailed guide, attach the wood to the long side at bottom of the box and 2 sides.
Secure them and continue adding wood to the remaining two short edges. Use a clamp to secure the box if needed. The last, add a lid to the box and sand all sharp edges.
Project details: instructables.com
15. Poplar DIY Bread Box
The building-up process of this project is much more simple than one might expect.
You simply cut and stick pieces of wood together based on the desired size, ensuring that its size will match the available space.
After the sanding and reassemble stages, remember to seek help from dowels to beautify your box.
The interesting point of this box is how the door operates. You need to make cleats to be able to close the box door.
Using two small pieces of wood, attach a small metal rod to one and place it inside.
The other piece has magnets and attaches to the outside of the door. It will become a handle for you to open the box easily and close the box more tightly.
16. DIY Wooden Breadbox Makeover
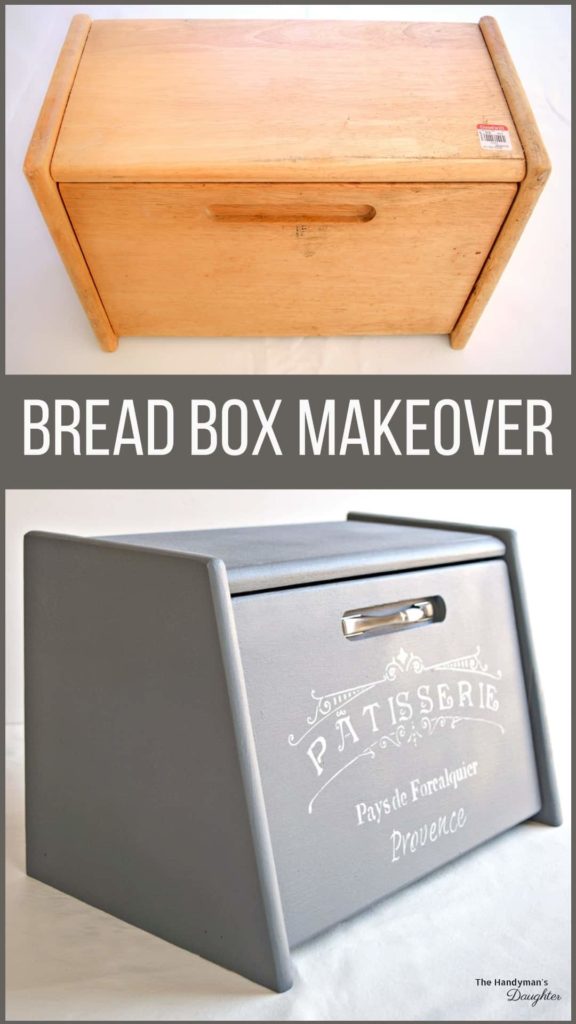
It takes a lot of work to makeover an old wooden breadbox, especially if the box is from a thrift store. However, this DIY plan will help you turn a beaten-up storage into a new decoration.
The basic steps are easy to do. You just need to give the old bin a thorough cleaning. Then, you can give the surface a new paint job. Remember to add a chalky finish for a better appeal.
An optional step is to add a stencil, which will make your breadbox more elegant.
Finally, you add a new hardware handle suitable to pull the door.
Project details: thehandymansdaughter.com
Conclusion
When it comes to long-term storage, refrigerators are the best option. However, as for short-term bread storage, a DIY breadbox is an ideal item.
This is not only because it does not destroy the taste and integrity of the bread. A breadbox can also serve as a decoration for your pantry.
If you worry about the difficulty of the 16 DIY bread box plans we provided, don’t.
Each of these has a different difficulty, so pros, newbies, and everyone in between will find their appropriate options.
What are you waiting for? Let’s start making a beautiful bin for your kitchen!


![9 Best Pole Saws of 2023 [Ultimate Guide]](https://handykeen.b-cdn.net/wp-content/uploads/2021/03/best-pole-saw-300x200.jpg "9 Best Pole Saws of 2023 [Ultimate Guide]")

