The Adirondack chair is a symbol of cottage country. It reflects the vibe of long summer days when watching the sunset by the lake’s shore.
Such a poetic thing, and you can now make a DIY Adirondack chair to enjoy the moment.
In this article, we share the top 40 free ideas and plans to build a beautiful Adirondack chair.
No matter if you are new or professional in woodworking. You can always find interesting projects.
Table of Contents
- 1. Build An Adirondack Chair By This Old House
- 2. Adirondack Rocking Chair By Instructables
- 3. Adirondack Rocking Chair Plans By construct101
- 4. 2×4 Adirondack Chair Plans
- 5. DIY Modern Adirondack Chair By Crafted Workshop
- 6. Adirondack Chair Plans From Skip To My Lou
- 7. Adirondack Style Chair (Pallet Wood)
- 8. DIY Big Adirondack Chair From Haha Bird
- 9. Double Adirondack Chair Plans
- 10. DIY Adirondack Chair By Instructables
- 11. Adirondack Style Rocker
- 12. DIY Cape Cod Chair
- 13. Adirondack Chair and Loveseat
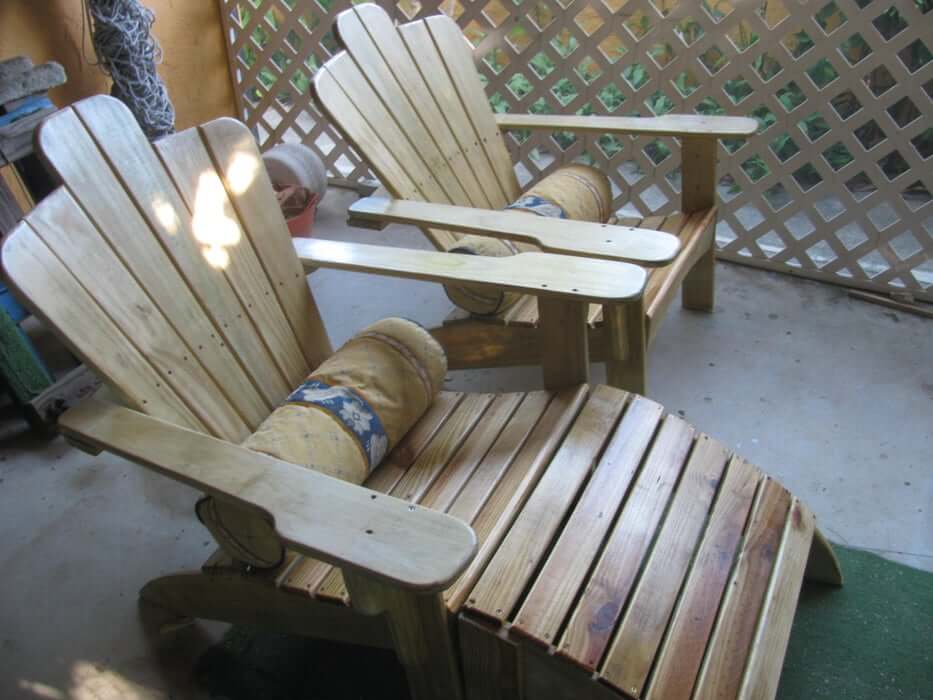
- 14. Ultimate DIY Adirondack Chair with Pull-Out Footrest
- 15. Pallet Adirondack Chair
- 16. Outdoor Adirondack Chair Plans
- 17. DIY Adirondack Chair By Ana White
- 18. Easy Modern Adirondack By Rogue Engineer
- 19. Free Adirondack Chair Plans
- 20. Scrap Adirondack Chair
- 21. Classic Looking Adirondack Chairs
- 22. Adirondack Loveseat Plans
- 23. Simple Adirondack Chair Plan
- 24. Adirondack Chair For Home
- 25. Adirondack Chaise Lounge
- 26. Child’s Garden Adirondack Chair From Rona
- 27. DIY Folding Adirondack Chair By April Wilkerson
- 28. Upcycled Adirondack Ski Chairs
- 29. DIY Adirondack Chair By Kirsten Dunn
- 30. Adirondack Beach Chair W/ 2 Positions
- 31. DIY 2×4 Modern Adirondack Chair
- 32. Wooden Pallet Adirondack Chair
- 33. Adirondack Chair Made From 2X4s Plans
- 34. Wine Barrel Adirondack Chair
- 35. DIY Upcycled Adirondack Chair By Addicted 2 DIY
- 36. Build A Modern Adirondack Chair By Crafted Workshop
- 37. Adirondack Chairs From Scratch
- 38. DIY Adirondack Chair With A Paracord Seat
- 39. DIY Pallet Adirondack Chair
- 40. DIY Adirondack Rocking Chair By My Outdoor Plans
- Conclusion
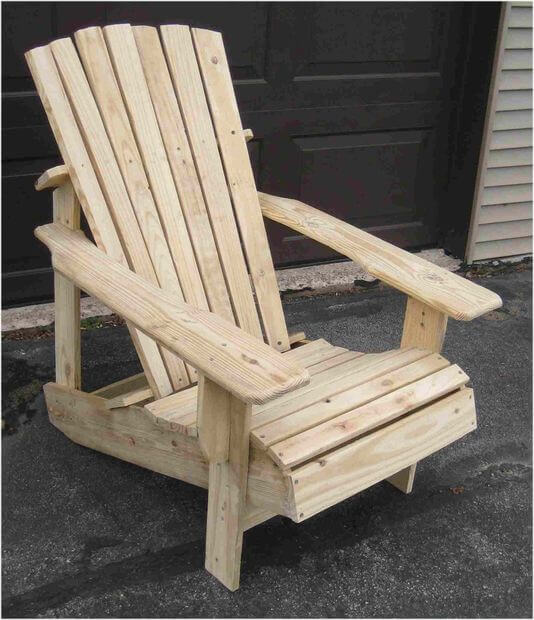
1. Build An Adirondack Chair By This Old House
This project is ideal for beginners to cut the frame with angles and curves and learn how to screw it together. This is a classic Adirondack chair with an extra-wide armrest.
- You need to round off one end and angle the other end where you attach the legs to the crosspiece in the base.
- Next, cut a curve into the middle of one slat of the seat. It helps create a 1¾-inch curved gap to sandwich the backrest.
- You can practice making a rear curved-cut seat at a 25-degree angle in the back braces.
- Another round curve is required for the arm as a comfortable rest for your arms while you lean back on the chair.
Once all curves and angles are ready, attach the slats and screw them securely.
Project details: thisoldhouse.com
2. Adirondack Rocking Chair By Instructables

The chair combines cuttings of both Adirondack and rocking chairs. The upper part adopts the sloping seat and resting fan-shaped backrest like other Adirondack designs.
However, the lower base has gentle curves that allow slow and resting rocking motion.
In addition, the seat is more prominent and closer to the ground than the traditional Adirondack chairs. The accurate dimensions of this project are 34 x 37 x 45 ½ inches.
Together, the chair eliminates the butt-bite feeling and pressures on the legs when you sit down on the chair.
Project details: instructables.com
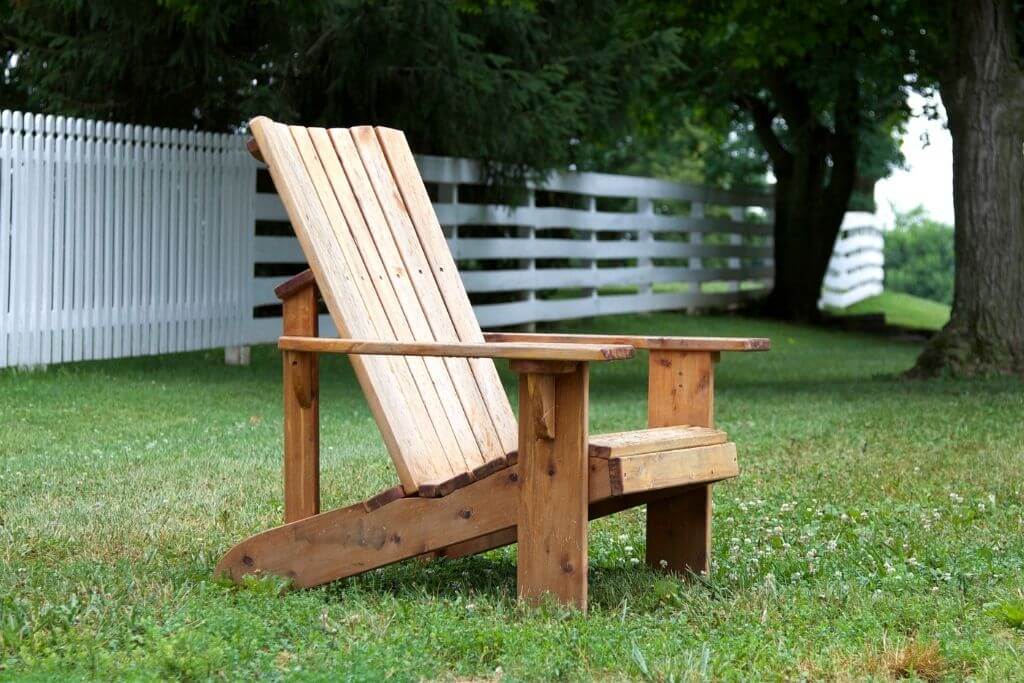
3. Adirondack Rocking Chair Plans By construct101
The project is also a combined Adirondack rocking chair. But the legs are just slightly curved, so the chair does not move too much.
What we like about its design is the support rails at the bottom back and the top back. They are more sloping and larger than a typical Adirondack chair to benefit people with severe back pain.
The chair is pretty big. It is suitable for people as tall as 6 feet. If you are shorter, you should reduce the dimensions.
Project details: construct101.com
4. 2×4 Adirondack Chair Plans
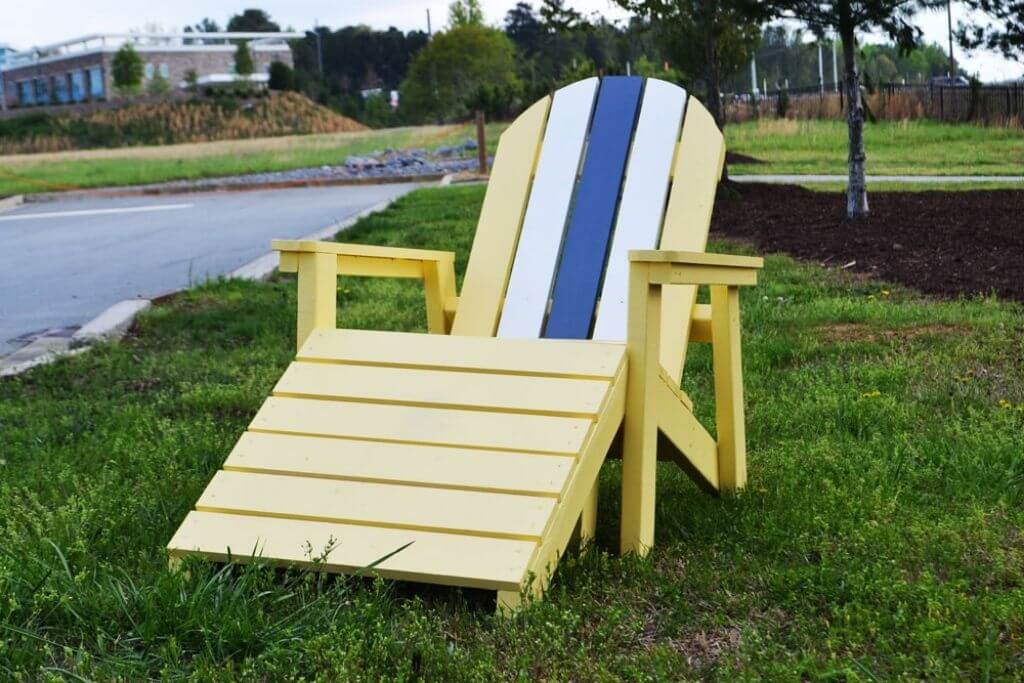
You will like to create and put this Adirondack chair by the swimming pool or backyard. It has an intense recline seat and backrest, along with a complete footstool.
Two parts are built separately.
The chair is 22 ½ x 31 ½ x 36 inches, which is spacious for a big adult. There are two stretcher boards longer than normal and connecting the seat and legs to create a deep recline position for you to relax.
A footstool plan is also available to adopt additional comfort to your chair. It is straightforward to build from two sturdy legs with an angled-cut board of stool stringers.
When put together, the chair and the footstool makes a perfect inclining bed for a nap.
With all cuttings available in the guide, you can follow this video to start the assembly.
Project details: ana-white.com
5. DIY Modern Adirondack Chair By Crafted Workshop
With a style modern, this Adirondack chair looks attractive and classic. It creates a relaxing and peaceful feeling for your room.
For us, the back panel is the most interesting part. It is screwed from three sturdy wood pieces and one large backrest along with combining some of the metallic parts. Such a design gives off a balance and support stable.
Although the project is great, the video is a little complicated to follow. You should have woodworking experience to follow the guide.
6. Adirondack Chair Plans From Skip To My Lou
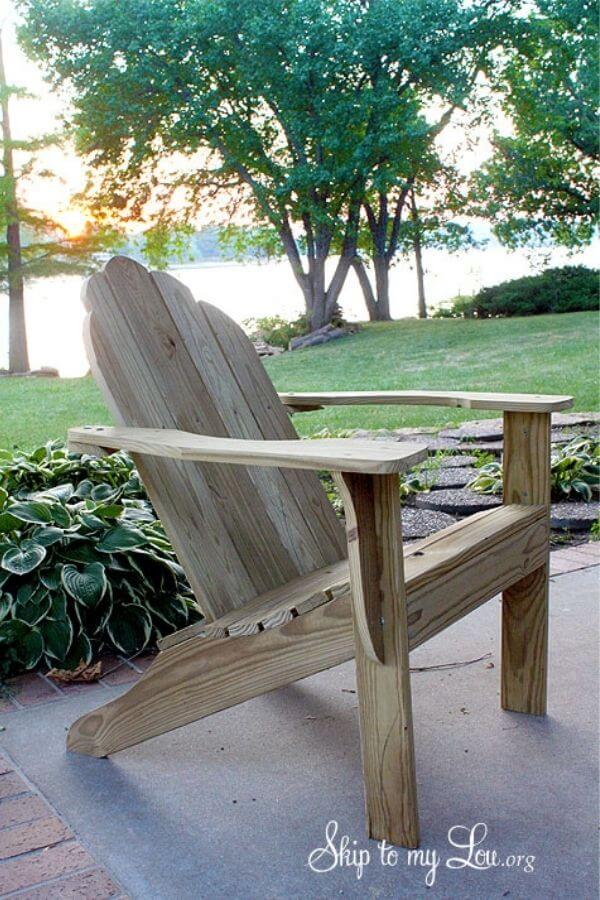
It’s family time! Even your kids can give you a hand with this easy plan. You will cut the lumbers to sizes according to the template.
What to prepare:
- 60 -1 ½-inch deck screws
- 10 – 2×1/4-inch carriage bolts, washers, and flat nuts
- 2 – 1×6 treated lumbers of 12 feet
- 1 – 1×4 treated lumbers of 10 feet
- 1 – 1×4 treated lumbers of 8 feet
- Power tools as a band saw, sander and drill.
- Socket set
Get started with bolting legs together and screwing crosspieces between the legs. The arm supports and backrest will follow.
Then, the chair is ready to use.
Project details: skiptomylou.org
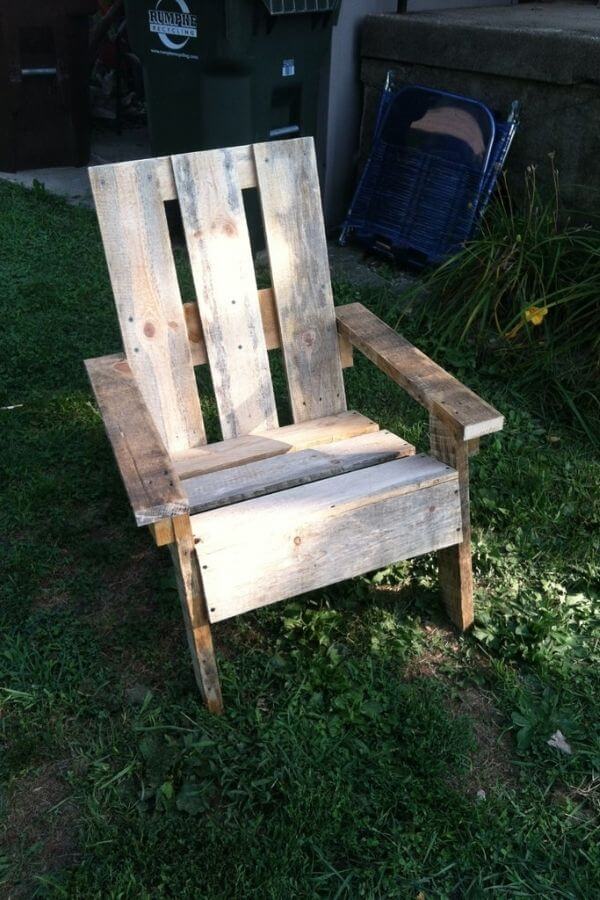
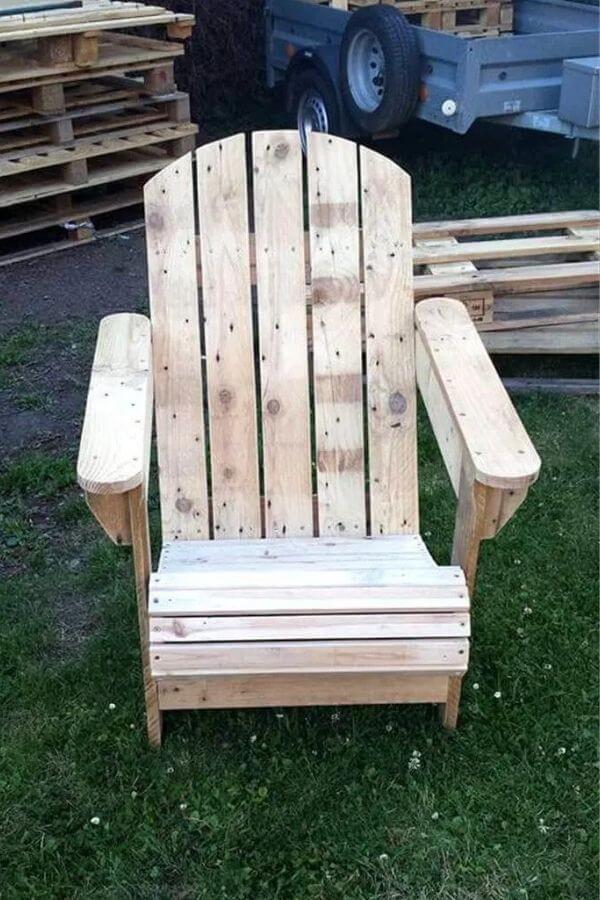
7. Adirondack Style Chair (Pallet Wood)
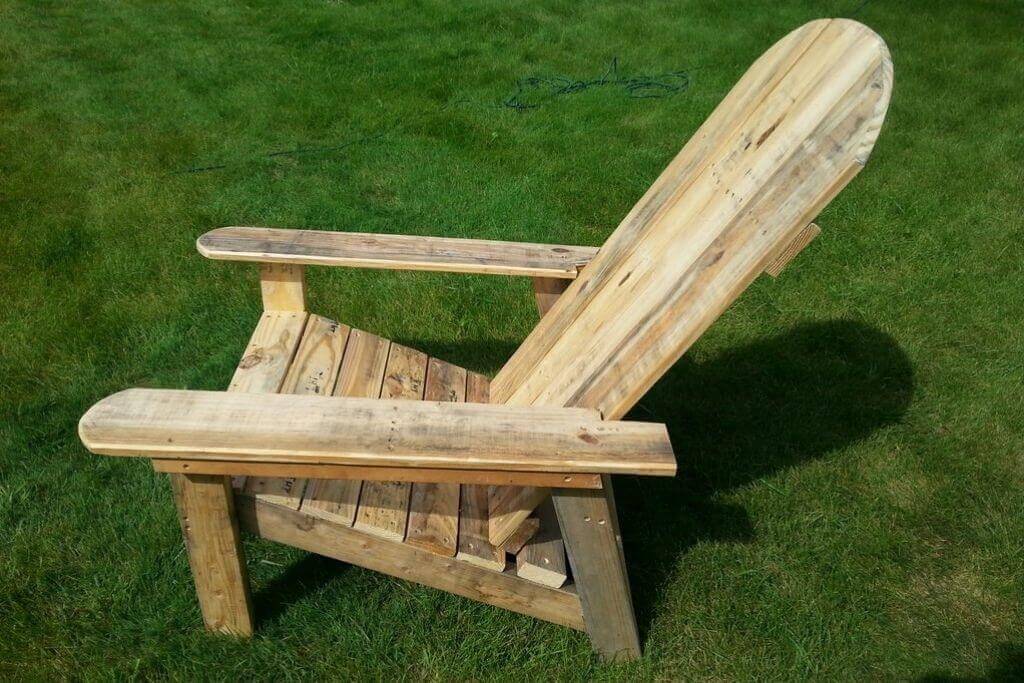
The project inspired you to create an environmentally-friendly chair from recycled pallet woods.
Since the used workpieces might come with some defects, you should be extra careful with cuttings.
Moreover, we suggest adding two pieces across the back to improve the sturdiness when you lean over the chair.
To add beauty to the finished design, you can also cut a rounded top and draw it on the chair back. Avoid filling in existing knots and nail holes of the recycled wood so that your chair looks more rustic.
Project details: instructables.com
8. DIY Big Adirondack Chair From Haha Bird
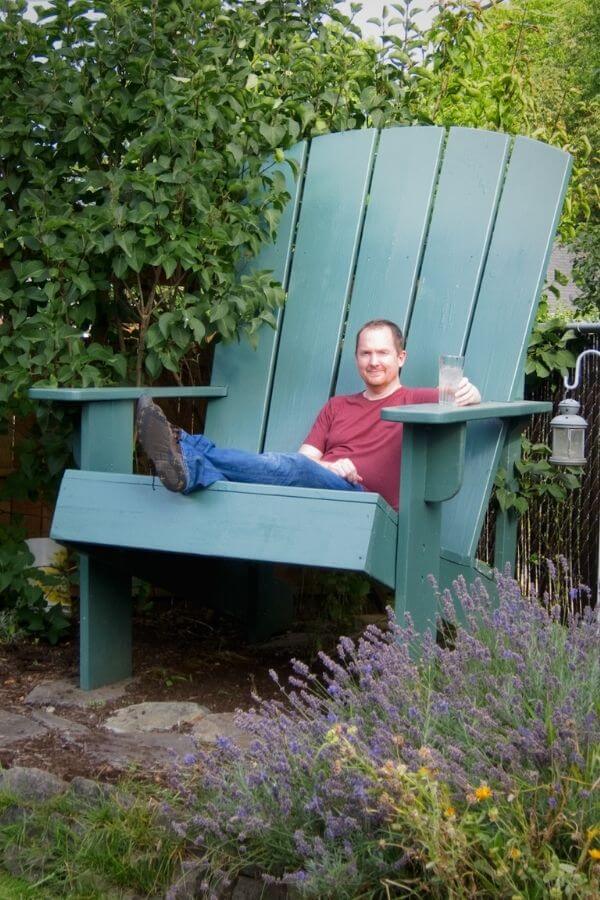
We have to say that such a substantial Adirondack chair is not very practical. More than that, it works as a decorating feature in your oversized garden and backyard.
Otherwise, the chair can serve multiple adults and children at a time.
You had better lend a hand to cut and assemble the parts. The most tricky part is the backrest.
- Prepare three 2×12 lumbers of 12 feet and cut them in half to get six 6-foot boards. Use five boards as backrest slats.
- Create a half-inch gap between slats by tapering each board to 9.2 or 9.25 inches.
- Take 2 inches off of the side slats so that you can form a beautiful fan shape out of the backrest.
Follow the guide for other parts. Once you’re done, you can keep them apart to paint and move to the final destination.
Project details: hahabird.com
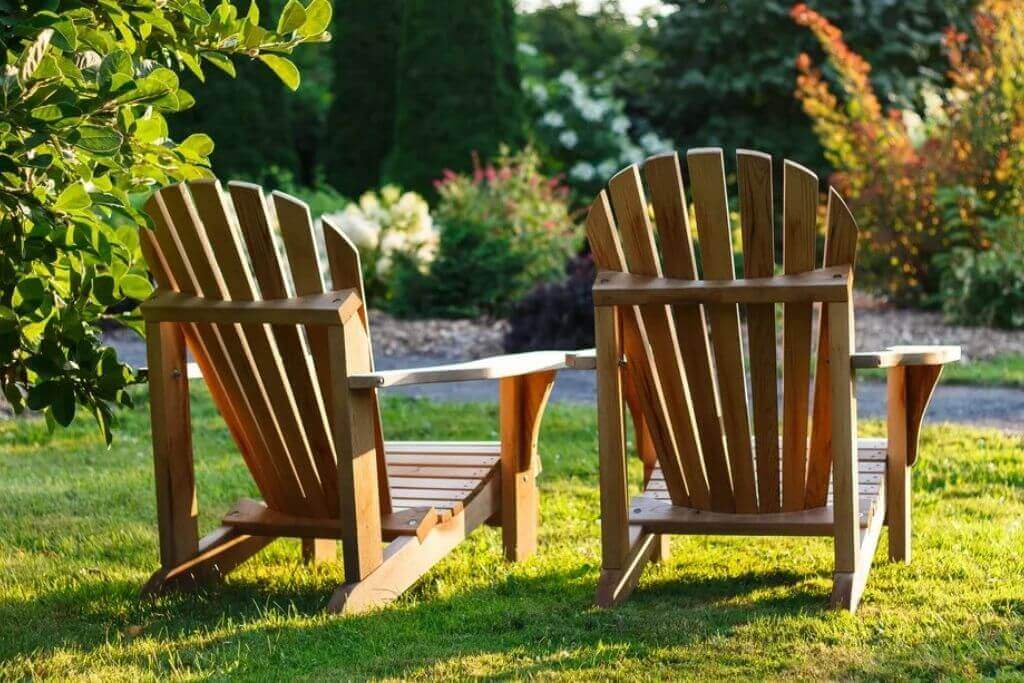
9. Double Adirondack Chair Plans
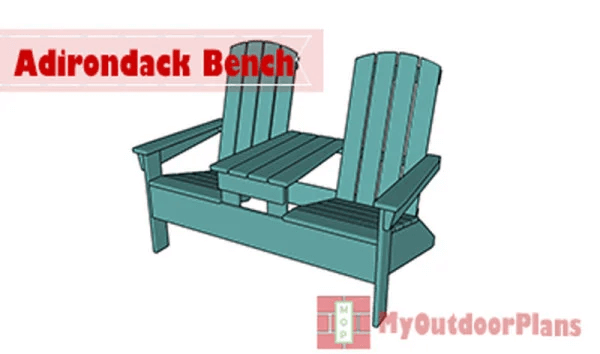
The draw of this project is its double style. Two people can sit together to talk, drink tea, and so on.
You will combine 2 Adirondack chairs into one – each is 15 ¼ inches wide, with a 13-inch table attached in the middle.
You will take turns completing each component of the chair. The first thing to do is build back legs and fit the front legs.
After that, you will construct and provide the front and back support. Continue with building the seat, back panel.
The job finishes after you fit the armrests and install the table support to the product.
Project details: myoutdoorplans.com
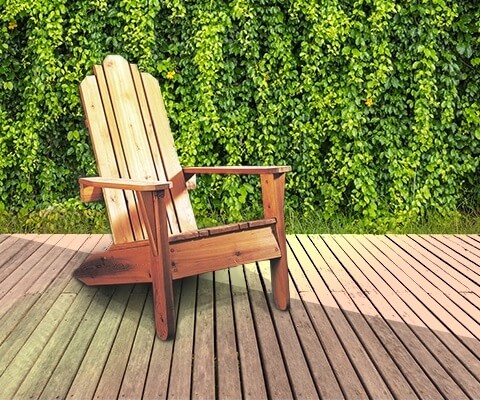
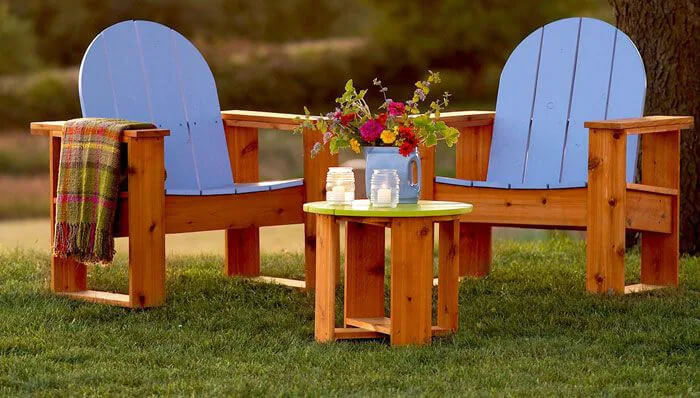
10. DIY Adirondack Chair By Instructables
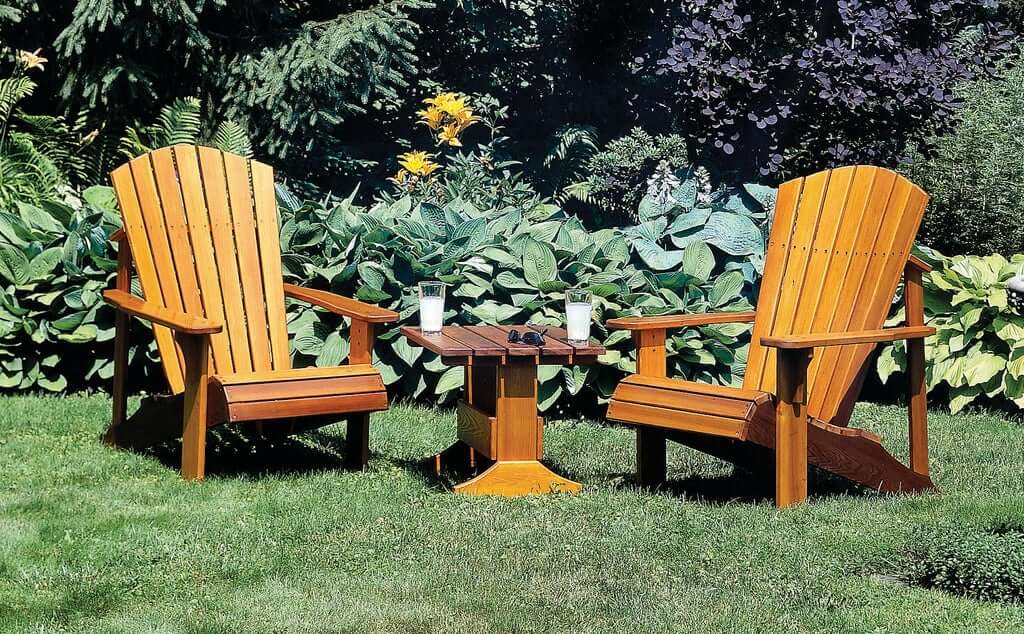
Back to simple, this project instructs how to build traditional Adirondack chairs from cedar woods.
The seat has a comfortable footrest. All slats are cut to size and round the upper edges to ¼ inches. When installed together, the exposed edges will not abut the side and back rails.
Besides the chairs themselves, the project comes with a table plan as a bonus. Then, you can build a set of chairs and a table to enjoy a tea party in the garden.
Project details: instructables.com
11. Adirondack Style Rocker
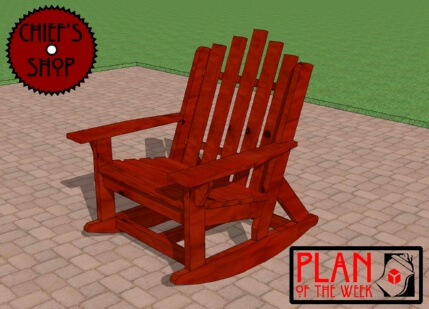
A cross of classic Adirondack-style and a modern mechanism is praised for this project.
Typically, you will find iconic parts of an Adirondack chair such as the reclining backrest and sloping seat. Yet, the seat is larger than most traditional chairs – about 38 inches wide and they are also not too deep.
The inclining motions are attributed to the rocking legs. Each is 39 ⅞ inches long and round cured on two ends. When you lean on the chair, it will create a slight swing to soothe your tiredness away.
This chair comes dark brown coating. It would match perfectly in many decors, especially the traditional American houses.
Project details: chiefs-shop.com
12. DIY Cape Cod Chair
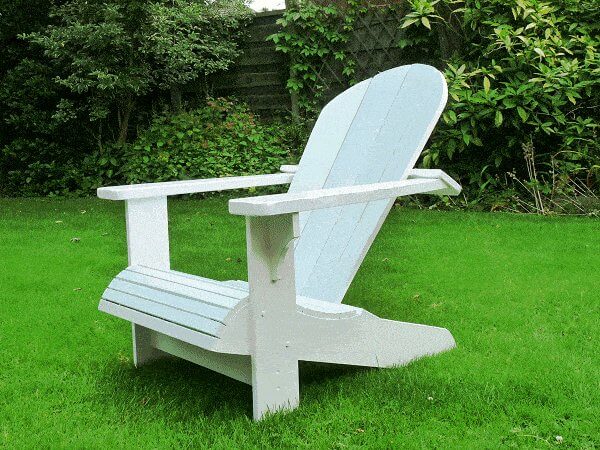
The next project we want to share has a low seat (only 7 inches high), reclined back angle, and big handles.
The most important part is to shape the woods in either of 3 ways: by measurement, by a grid plan, or by a pattern printout. Yet, we suggest using the measure to adjust the dimensions to your requirements freely.
For the chair in the project, you need:
- 38 feet of 3×4 and 5 ½ workpieces for seat, sides, back slats, legs, upper black support, and seat slats.
- 8 feet of 3×4 and 3 ½ blocks of wood for lower back support, arm braces, font and rear spacers.
- 5.3 feet of 1 ½ and 5 ½ wood for arms.
Then, use your techniques to curve the foot and armrest and assemble all parts. You can consider painting the chair to create a smooth and attractive look.
Project details: buildeazy.com
13. Adirondack Chair and Loveseat
Even a novice can build this Adirondack chair because it does not require complicated cuttings or curving.
All you need are four straight lumbers for legs, nic curved recess seat, and wide arms.
You might prefer the fact that the seat is not steeply sloping downward. You have to trade less comfort while sitting, but it allows you to get out without a boost.
Moreover, the arms are wide enough to rest your hands and place a cup of tea or snacks.
Project details: familyhandyman.com
14. Ultimate DIY Adirondack Chair with Pull-Out Footrest
Above is a 12-minute video explaining how to build a multipurposeAdirondack chair, and it is worth seeing.
You need to spend more time complete it. The chair takes 30 feet full of 5/4×8 material, and the final dimensions are 2 feet 11 inches tall, 3 feet 2 inches deep, and 2 feet 10 inches wide.
We especially adore the idea of the footrest. It has four positions: collapsed, horizontal, angled, and stand-alone.
It means you can hide it under the seat or even disassemble it when sitting up. Yet, when you want to lie down for a nap, pull the footrest out. It will comfortably accommodate your legs. Such a convenient design!
Project details: jackmanworks.com
15. Pallet Adirondack Chair
The chairs look basic and easy to build. You can make the backrest and the seat with only 3 slats. Not to mention, the chairs are budget-friendly as you can recycle used wood pieces.
The project aims at making compact seats from a 42×60-inch pallet cut to 1×6 and 2×4 lumbers, following the steps:
- Cut the rails 33 inches long and cut a 90-degree angle in the corner.
- Build the seat from four 1×6 lumbers of 21 inches long. Make sure that the cuttings are 2 inches from the ground.
- Make the backrest with two 2×4 runners and three 1×6 braces of 30 ½ inches tall. Screw and sand them.
- Cut the legs and attach the arms to finish the project.
The project is not complex. You can complete the chair within an afternoon, even by a beginner.
Project details: instructables.com
16. Outdoor Adirondack Chair Plans
This project is easy to build with no complex cuts or angles.
A small tip from the project that one end of the two legs is cut 6 inches off to form an adjacent edge. That way, the chair can sit more sturdily on the ground.
Nonetheless, we do not like a too deep seat – around 16 ½ inches from the apron’s inside edge. You might have difficulties standing up. You can consider adjusting the depth to your comfort, then.
Project details: blackanddecker.com
17. DIY Adirondack Chair By Ana White
If you desire an Adirondack chair for small rooms or backyard, feel free to look at this project.
It has a compact style and low seat that will not take up much space. Overall, the chair is 37 ½ x 30 ⅝ x 19 ½ inches.
The assembly is easy to follow. Once you are done, consider buying a standard 18×18 cushion to fit the seat.
Project details: ana-white.com
18. Easy Modern Adirondack By Rogue Engineer
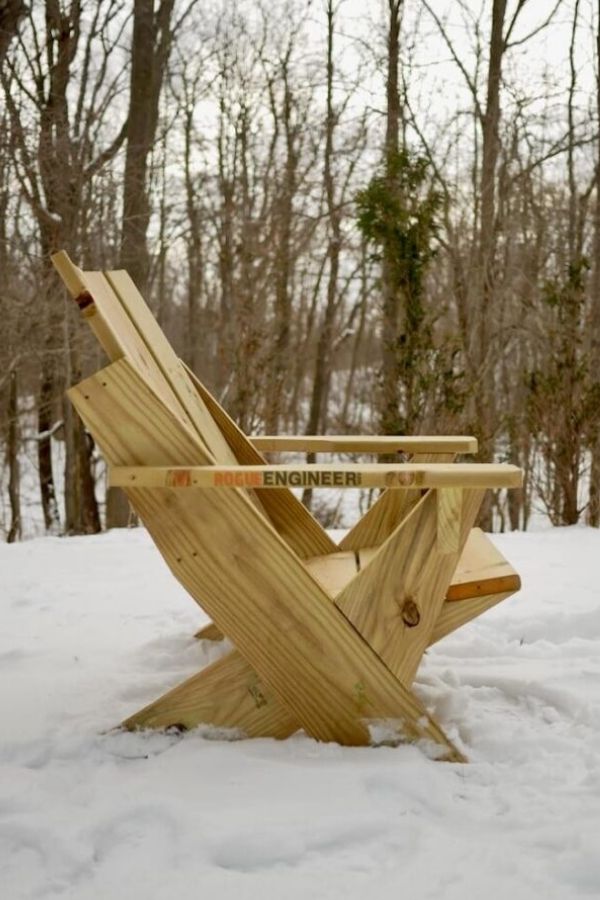
For those who are big people, you will want to have a big Adirondack chair with an extra sturdy base to support your weìght. Then, the project of Rogue Engineer is exactly for you.
In specific, the base is formed out of two long legs and two short legs. They are both large and thick.
Then, the short legs are set on the top of the long ones – around four inches from their bottom, to create an X intersection.
Secure the legs in place using the 2-1/2″ wood screws or bolts. After connecting, the legs must sit flat on the ground.
You will also like that the seat is not too deep and it does not prevent your big body from getting out.
Project details: rogueengineer.com
19. Free Adirondack Chair Plans
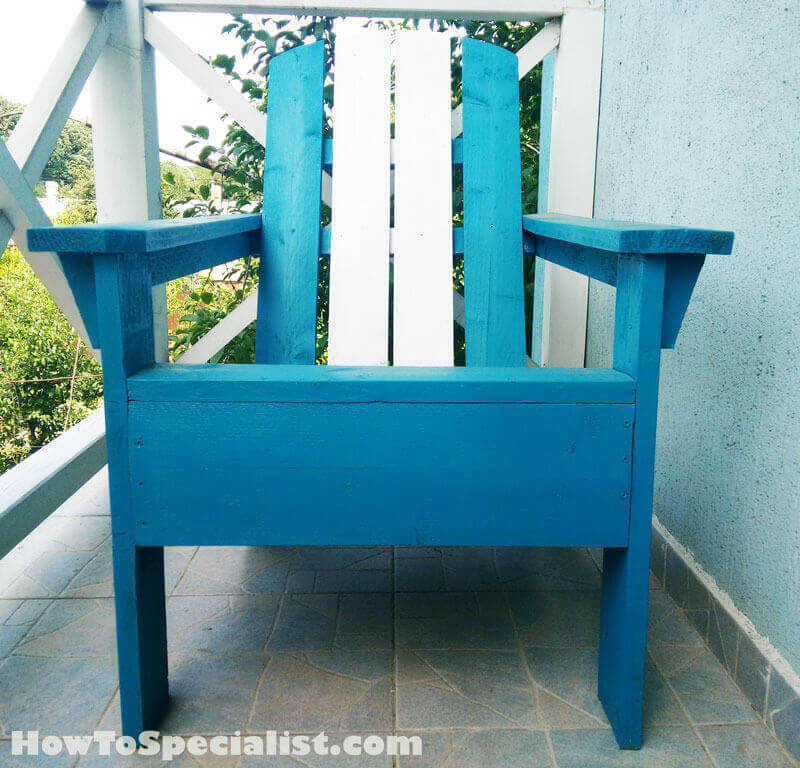
If you want a perfect DIY chair that is suitable for a narrow space, consider its neat design.
The material should be quality lumber for this project, which does not absorb heat from the sunlight. You can place it in your garden and sit on it to read books or simply take a break.
The first thing, you start building the frame. The process involves straight cuts and contours. You might need a jigsaw available.
Continue with the back support, using 1×6 wood pieces and 1 x 4 braces. You should round its top and attach it at a 30-degree angle to the frame. Such a slight reclining ensures a comfortable sitting while it does not take up much space.
Once the frame is sturdily locked, install the armrests and seat slats to complete the chair.
Project details: howtospecialist.com
20. Scrap Adirondack Chair
The thick base is what catches our eye. It gets involved with both straight and dado cuts. Together, the cuts create a balance under a lot of weight in reclining.
In addition, the legs are attached closely to the base, allowing the chair to stand stable on any surface.
This design makes the DIY product ideal for a cabin deck or poolside patio where the available space is 8 feet larger.
Speaking of other parts, they are pretty similar to the traditional Adirondack chairs, except for the arms. They are too short for comfortable hand rest and are not curved enough.
Project details: instructables.com
21. Classic Looking Adirondack Chairs
We call this one a hybrid chair, a cross between the old and the new.
You can see the slatted back and the inclined seat reminiscent of the classic Adirondack, while you will replace the signature rear legs with a more modern design.
The 4 legs come from 2 square frames, which you will build first. Then, you add 4 braces on those frames to make the seat, 2 angled braces on 2 sides.
After you’ve done with the frame, just add the back and seat slats to it. Each back slat needs to align with the seat slats to create a smooth surface.
Project details: lowes.com
22. Adirondack Loveseat Plans
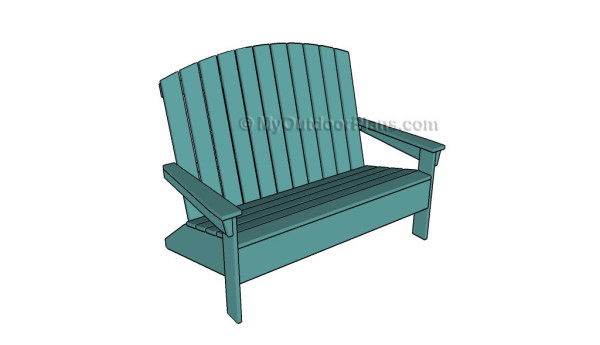
What makes this outdoor chair special is the wide seat of 46-1/2 inches long. Up to 2 adults or 4 children can sit on the chair at the same time. If you are alone, you can lie on the seat to take a quick nap.
The big size requires more attention in terms of sturdiness in the making process. You will start with the 1x8x46-½-inch leg as usual.
But the point here is to glue all the joints after screwing them to double the strength.
Also, you should add 2 2×2 supporters in for the large backrest, one close to the curved part and one aligned with the armrests. This way, the chair can load 2 oversized adults with ease.
Project details: myoutdoorplans.com
23. Simple Adirondack Chair Plan

An Adirondack chair with small slats can be somewhat uncomfortable if sitting for long hours. That’s when this project has its moment with the least slats used on this list.
In detail, there will be only 2 9-¼x20-inch slats (or we can call them boards with their large sizes) on the seat and 2 pieces of 9-¼x32 inches on the backrest.
This will minimize the space on the seat and the back to reduce pain.
With such simple materials, you don’t need many tools here. You can use a jigsaw for all the straight and bevel cuts with the help of a ruler.
Project details: popularmechanics.com
24. Adirondack Chair For Home
You may think that the normal process to build an Adirondack chair is to make the frame and add the slats of the seat and backrest to it. But things get a little different here.
You will make the legs and the seat plus the backrest as 2 separate parts, then attach them together. This is because the slats will cover the seat’s front to form a curve, which is harder to complete if attached to the leg.
The curved front will bring comfort to the back of your knees. However, you’d better ask for another hand when joining 2 parts since the seat plus the back is rather heavy.
Project details: woodworkingformeremortals.com
25. Adirondack Chaise Lounge
This Adirondack chair has the same shape as the deck chair used at the beach. It has a long body with a footrest, on which you can lie.
It’s coated with varnish and built by pressure-treated wood.
The reclined back design pushes your body near the sunlight direction. If you often sunbathe, consider trying this concept.
The seat is not only inclined but also concave to resemble the deck chair, while the footrest is convex. This design offers you more comfort when lounging on it.
Project details: instructables.com
26. Child’s Garden Adirondack Chair From Rona
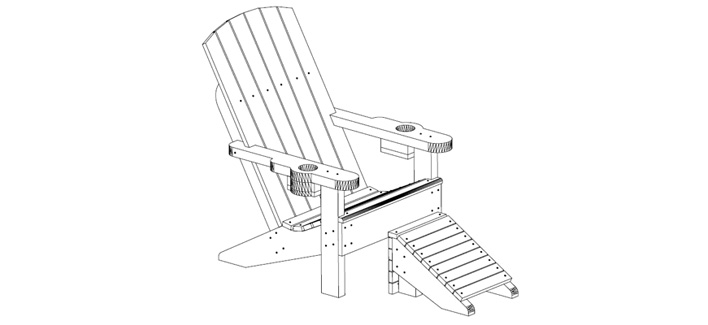
The idea of Rona is to build a garden chair for small kids. Of course, this DIY product will be compact and light. But the great thing about this idea is the design of armrests and the detachable pull up foot stool.
You can customize the shape of the chair as you desire. But make sure that you drill big holes in the middle of each handle. You can take advantage of these holes to hold a cup of juice. The children can both relax and enjoy the drinks.
Also, if the weather is rainy, you can install an umbrella to the holes. Your kids will have fun without getting wet!
Besides the chair, you will also build a footstool. It can be put under the seat to add extra balance to the chair, pulled out for another kid to sit, or simply used as a footrest.
Project details: rona.ca
27. DIY Folding Adirondack Chair By April Wilkerson
We have another interesting plan from April Wikerson: a foldable Adirondack chair. How can you fold such a huge thing?
Well! You build the chair as normal, but there will be a small secret at the end to make it foldable. You need to attach a small block to the back lower arch in the main leg.
Do not overtighten the screws, as you will want the legs to be movable. This design makes the chair foldable for easy transportation and storage.
28. Upcycled Adirondack Ski Chairs
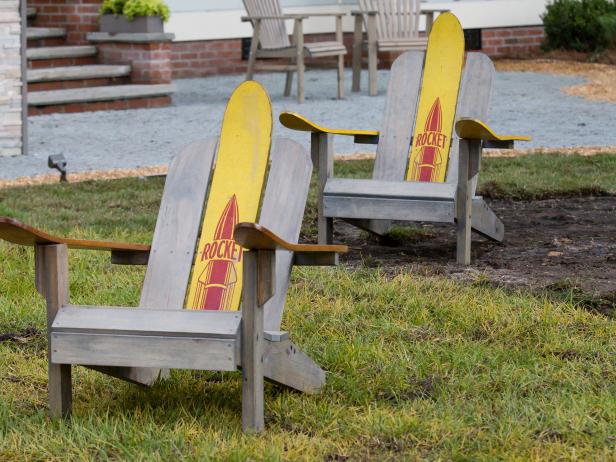
Do you have old water skis? Don’t throw them away! This concept of DIY Network guides you how to recycle the water skis to build an Adirondack chair.
You will need to cut pressure treated pine wood using a jigsaw and circular saw into slats. These pieces of wooden boards are necessary to build the seat, arms, and legs.
For the water skis, you need to use a drill to remove the hardware, such as remaining screws, bits, etc.
You can sand the surface and sides of the skis to get rid of sharp edges. And then, combine multiple skis together to form the chair back.
As the back is made of water skis, it will resist water well. This design makes the chair ideal for rainy regions.
Project details: diynetwork.com
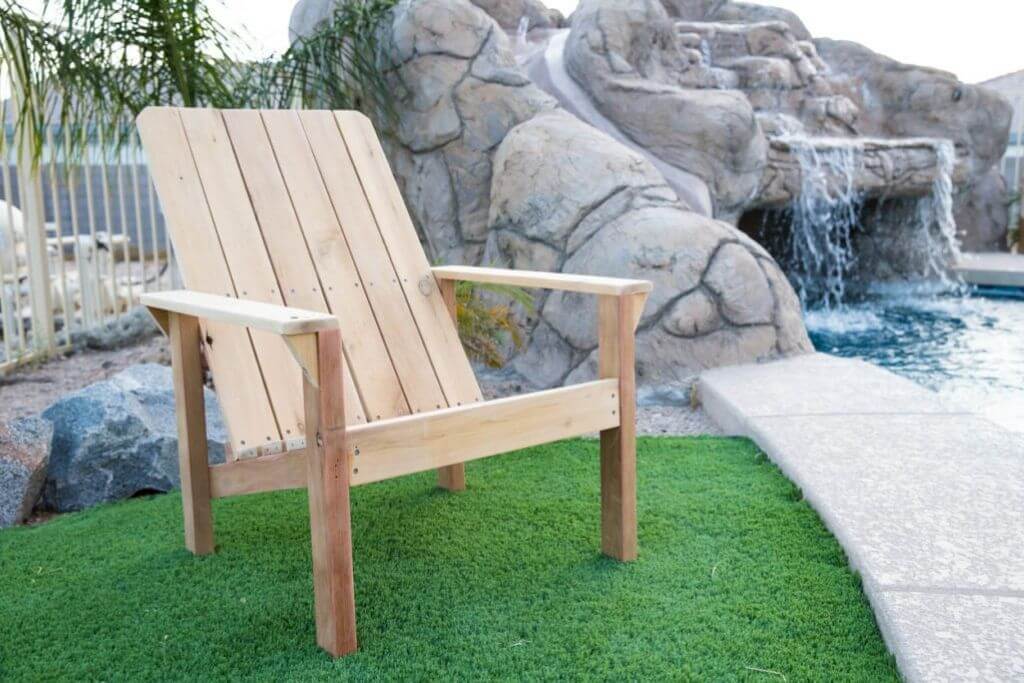
29. DIY Adirondack Chair By Kirsten Dunn
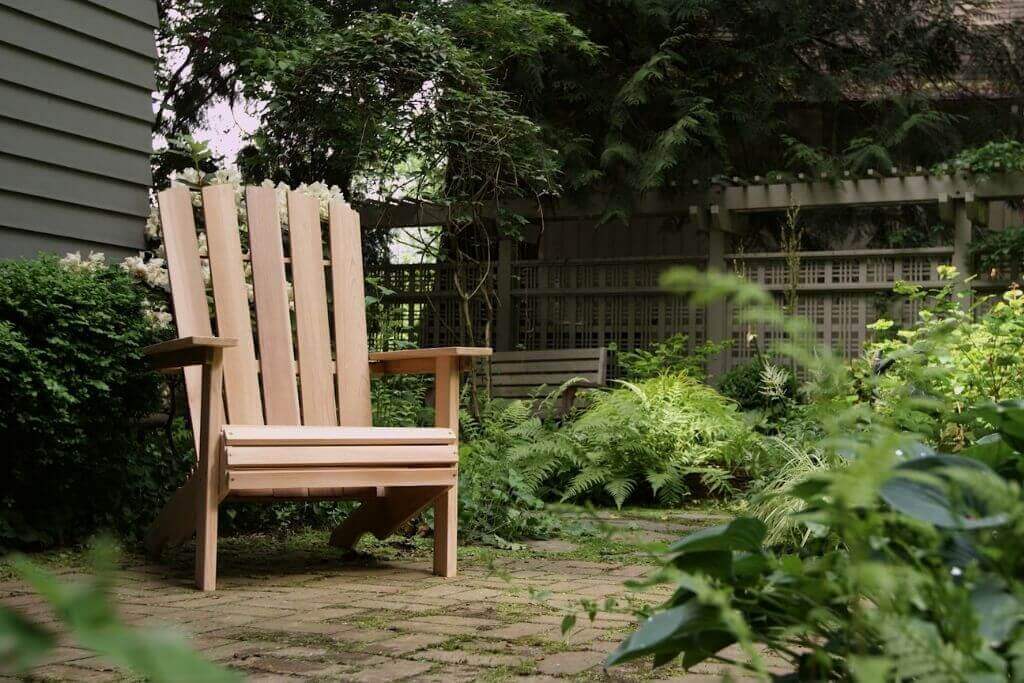
If you want to build your DIY chair with high-quality materials, give a try to the DIY Dunn Lumber concept.
The main material for this project is clear grain cedar wood, which is quite expensive but very durable and beautiful.
The owner of the plan has given a cutting diagram that shows clearly the ratio of the lengths on the wooden boards you need to cut. You need to follow the diagram to prepare all the slats for the work.
You probably guess the rest of the work. Simply attach all the slats you have cut, sanding and match them together.
It is important to notice that the chair back has a curved shape on top. This part should not be sharp so that you can lean your neck on without getting hurt.
Project details: diy.dunnlumber.com
30. Adirondack Beach Chair W/ 2 Positions
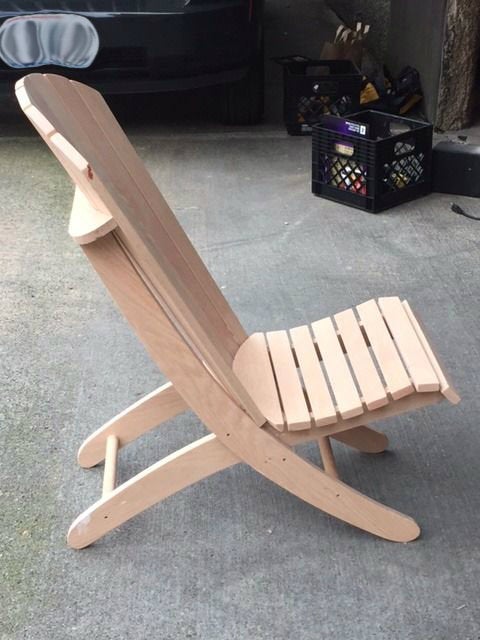
This adirondack beach chair comes with 2 adjustable positions and no arm. You can set up the chair in the regular position for straight sitting, or pull out the front and back legs for reclined mode.
There is a PDF template that contains all components of the chair, only except the rectangular seat slat.
However, this part is very easy to build. You can learn from the instructions or customize 1 with your own style.
Assembling the legs seems to be the most tricky step. You will need to attach the back and front legs using screws.
It is necessary to choose the right position for this screw so that it keeps the legs close together, but still allows users to open and close them.
Project details: instructables.com
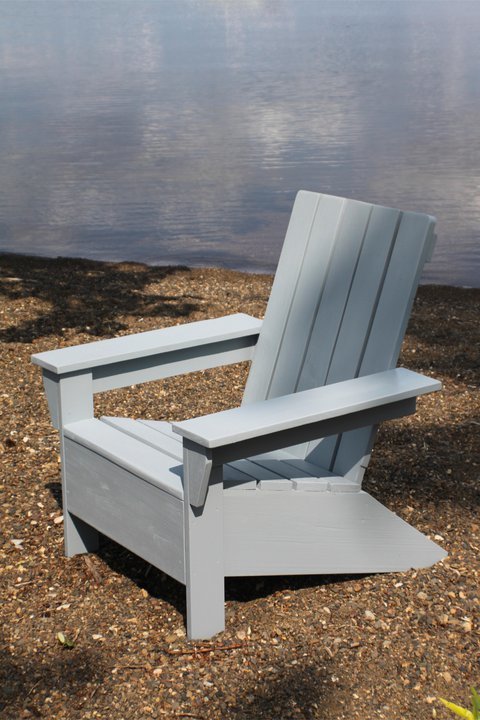
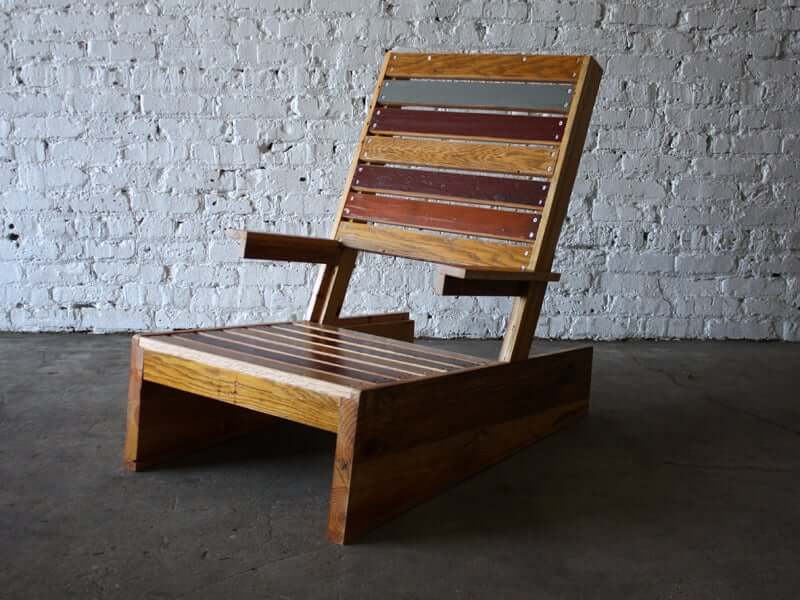
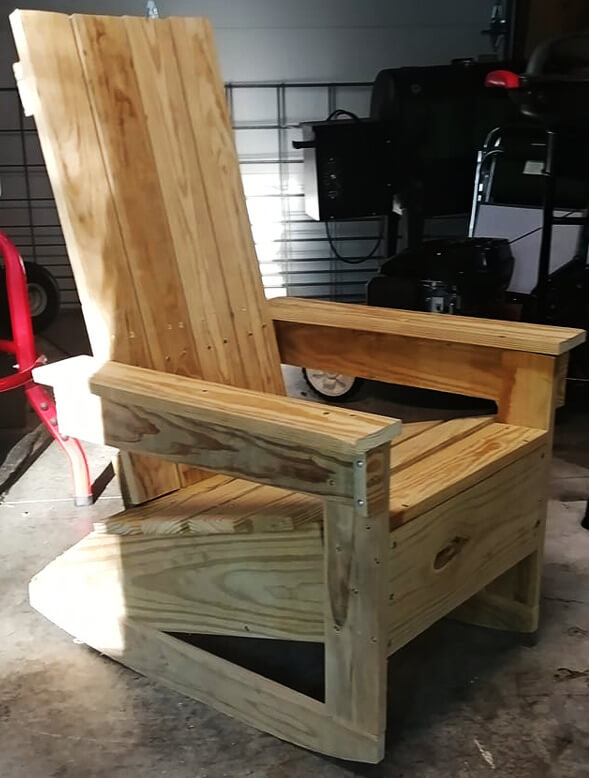
31. DIY 2×4 Modern Adirondack Chair
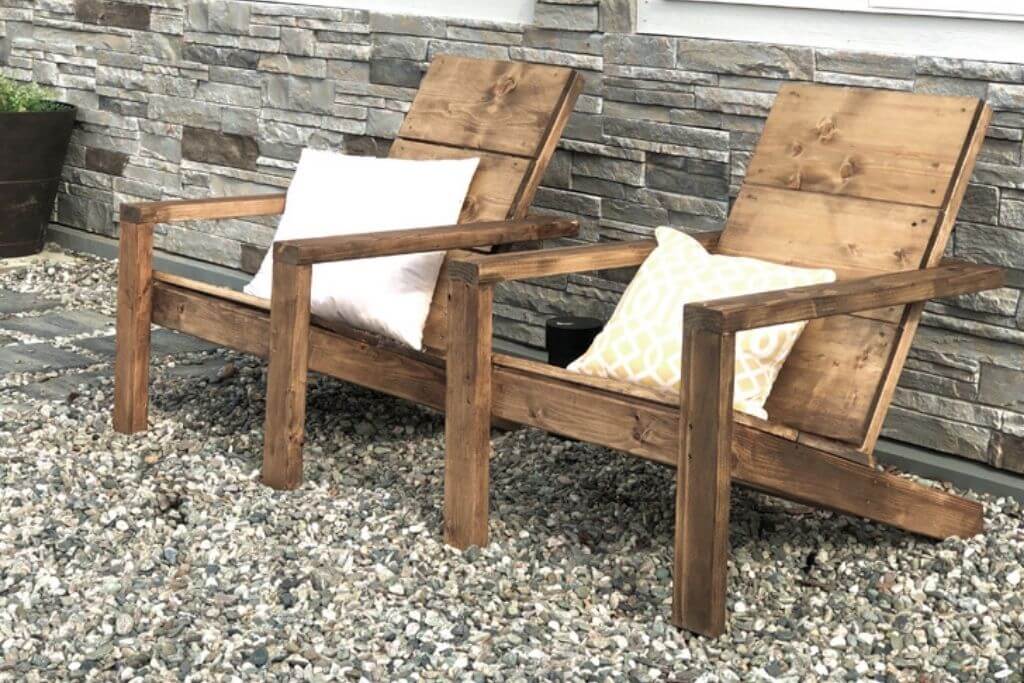
Not all of us are fans of the slats usually seen in the traditional Adirondack chair design, as the gaps can be really uncomfortable.
This plan doesn’t use them, but wide boards for both the backrest and the seat. This choice leaves practically no gap in these places, ensuring more comfort for your back and bottom.
Of course, having absolutely no gap at all is not a good idea, as it can lead to water accumulating. This plan takes care of this issue by leaving a small space between the seat and the backrest.
Due to the seat’s slope, water will quickly flow there and drain away.
Project details: ana-white.com
32. Wooden Pallet Adirondack Chair
It has the rare design of a reclined backrest by using old wooden pallets, which means you can rest with a lot more comfort.
Yet, the challenge your full weight creates once you relax completely is not at all easy to solve.
To combat this issue, this plan employs 2 additional supporting pieces connecting the backrest top supports with the armrests and the back legs. With them, all the pressures are equally distributed throughout the chair, all the way to the 4 legs.
The bottom support is also cut into a slightly curved design. As a result, once you place all the back slats, they will have a contour that fits your back more than a straight line.
Project details: homestratosphere.com
33. Adirondack Chair Made From 2X4s Plans
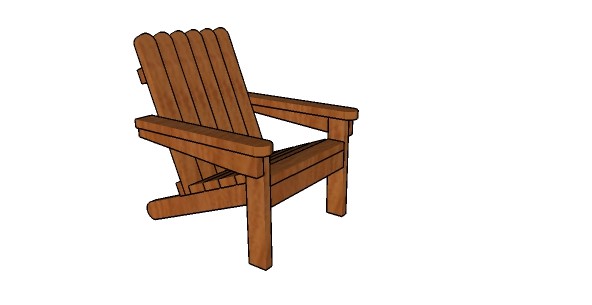
The core concept of this project is that it will only use 2x4s for every single component. Thanks to this uniformity in the material, you can save quite a bit of time on planning and money on buying.
But you should invest in the best materials such as cedar or pine to weather resistance.
Another special thing about it is the fact that the centerpiece of the whole thing is the piece supporting the armrest.
Aside from the armrest, this piece also connects to the second support piece of the backrest, lessening the strain placed onto it.
Without it transferring the pressure toward the front legs, this chair will surely topple once you fully relax.
Project details: howtospecialist.com
34. Wine Barrel Adirondack Chair
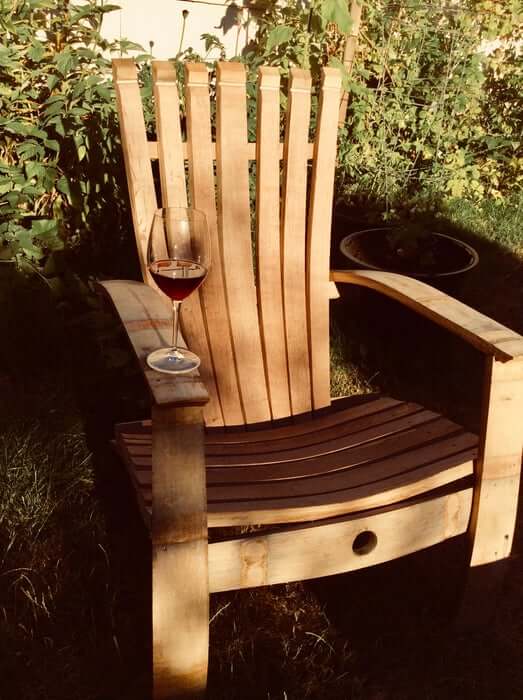
With just one glance, you can immediately recognize that this Adirondack chair plan is special with its incredibly stylish bent slats.
These slats are not just scoring style points, but also comfortable points, as they are more accommodating to the shape of our bottoms.
Before screaming that plank bending is quite an advanced woodworking trick, you should know that there is no need to perform that technique to attain this effect. All you need to do is find a used wooden wine barrel.
Once you remove the hoops from the barrel, you will get a bunch of staves with unique compound curves. Then, just choose the best-looking staves and start building your stylish chair.
Project details: instructables.com
35. DIY Upcycled Adirondack Chair By Addicted 2 DIY
With this project, the focus this time is on upcycling, so you will not need to spend anything on the material. Instead, you can recycle the wood from a sectional sofa that will otherwise get wasted, bringing the cost to zero.
Another great thing is that you don’t even need to waste time cutting the reclaimed wood to size. Most sectional sofas have a seat frame made up of 1×4 slats, which can absolutely be used as the frame for the chair’s base.
After you have built the frame for this Adirondack chair from the reclaimed slats, you will notice a 2×3 bevel being left out. You can put it as a shim to give more support to the backrest.
Thanks to this shim, there will be way less space between the back slats, ensuring a more comfortable feel for your back. It also gives more space for the screws to bite.
Project details: addicted2diy.com
36. Build A Modern Adirondack Chair By Crafted Workshop
This Adirondack chair makes use of some advanced techniques like dados for slat connection and half-laps for the joinery between the legs and the backrest.
Using these instead of the usual screws and nails ensure a much more natural appearance.
Also, once you fit the dados and half-laps together, you only need to add some glue for a stronger connection between the parts.
Obviously, this advanced method requires lots of concentration. For example, you need to make sure that each dado in the seat is recessed exactly half an inch in the sides.
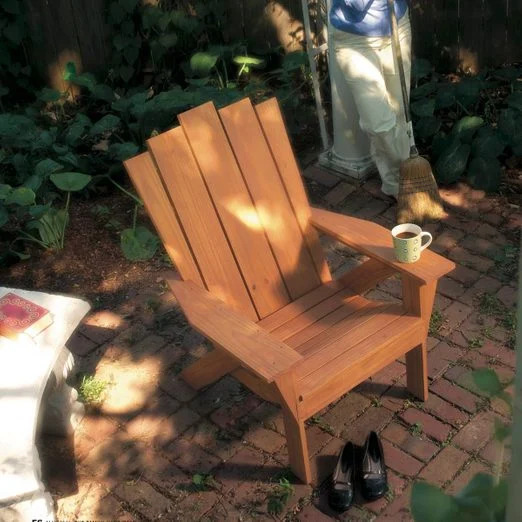
37. Adirondack Chairs From Scratch
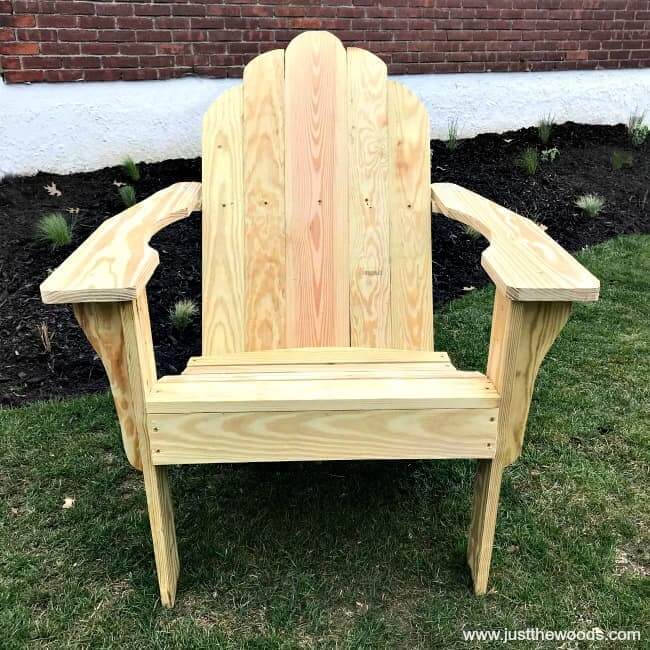
Apart from the back and butt, your arms also need comfort to fully relax. To attain this goal, this chair has a unique design choice of boring some curves onto the armrest.
These curves follow the shape of your arm when putting on the armrest so that it can support yours to the fullest.
The traditional straight armrest style inadvertently restricts the sitter from turning to either side.
As such, the available sitting space of most Adirondack chairs is more limited than it appears. With just some curves, this restriction is taken care of completely.
Project details: justthewoods.com
38. DIY Adirondack Chair With A Paracord Seat
A weakness that many chairs following the Adirondack style have is tiring out the sitter over time due to the low seat height and hard material. This plan is built specifically to combat this issue.
The core advantage lies in the paracord seat, which is both soft and spongy, unlike the usual hardwood.
As a result, it perfectly counters the issues that the low seat height incur by lessening the pressure placed on the sitter’s pelvis.
Of course, there is a price to pay, and that price is you having to spend at least 2 hours weaving the seat from paracord. There must be 12 consecutive loops tightly wrapped around each other for reliability.
Project details: instructables.com
39. DIY Pallet Adirondack Chair
Some of us like to sit bending our legs into the seat, especially with seats that have low leg height like Adirondack chairs.
But this style means the square seat corner will prick into the skin, hurting us.
This plan chose to design the front apron connecting the seat and the leg as a round curve. Thanks to this curve, once you put in all the slats, there will be no sharp corner pricking at your legs.
All the joints in the primary frame are also connected together with accent headed steel bolts. Doing so ensures that the chair doesn’t look bulky without losing too much strength.
Project details: easypalletideas.com
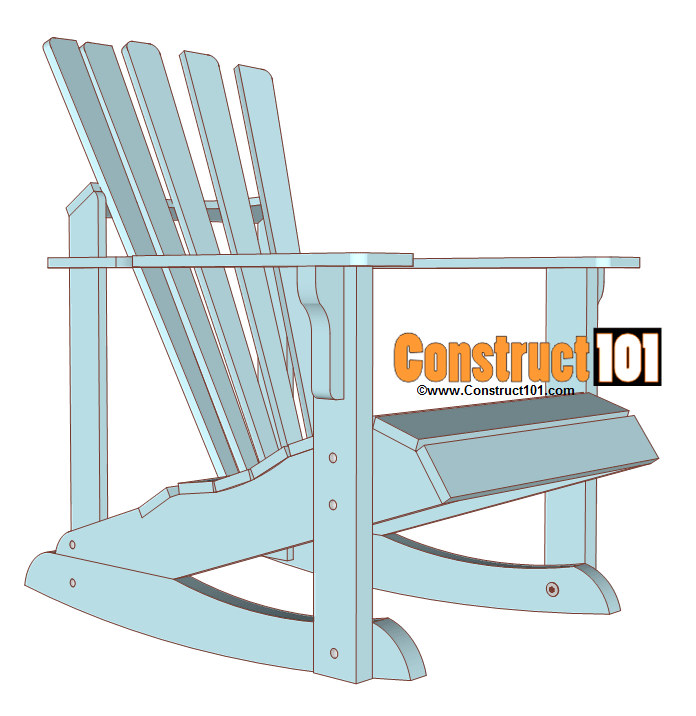
40. DIY Adirondack Rocking Chair By My Outdoor Plans
The only description that you can give to this Adirondack chair after just one look is quite heavy-duty. After all, every single component is some sort of wide wooden plank, and they all have some type of reinforcement.
However, this plan also incorporates a rocking feature into the base to create a comfortable feel.
The process is actually quite simple. You start by building the back legs from 1×8 planks, ensuring the most structural strength possible, then you fit in the front legs.
After the base is done, cut out rockers from 1x4s then attach them into the front legs through pocket holes and insert bolts to back legs.
This method ensures that the rocking base is not weak at all. You don’t need to worry about it breaking if you relax fully and drop your whole weight onto it.
Project details: myoutdoorplans.com
Conclusion
Throughout this list, we have shared with you the top 40 DIY Adirondack chair plans. Many projects require working time of 2 – 3 days and skills woodworking. Some simple plans only need a day to be completed.
Instead of spending a lot of money on a premade Adirondack product? Why you do not make a one by yourself. Right?
The DIY product you make still has all features as a regular model has. Plus, the chair will have a unique design as your own style, which other people can not find on the market.


![How To Start A Woodworking Business [Ultimate Guide]](https://handykeen.b-cdn.net/wp-content/uploads/2021/10/woodworking-business-1-300x200.jpg "How To Start A Woodworking Business [Ultimate Guide]")
