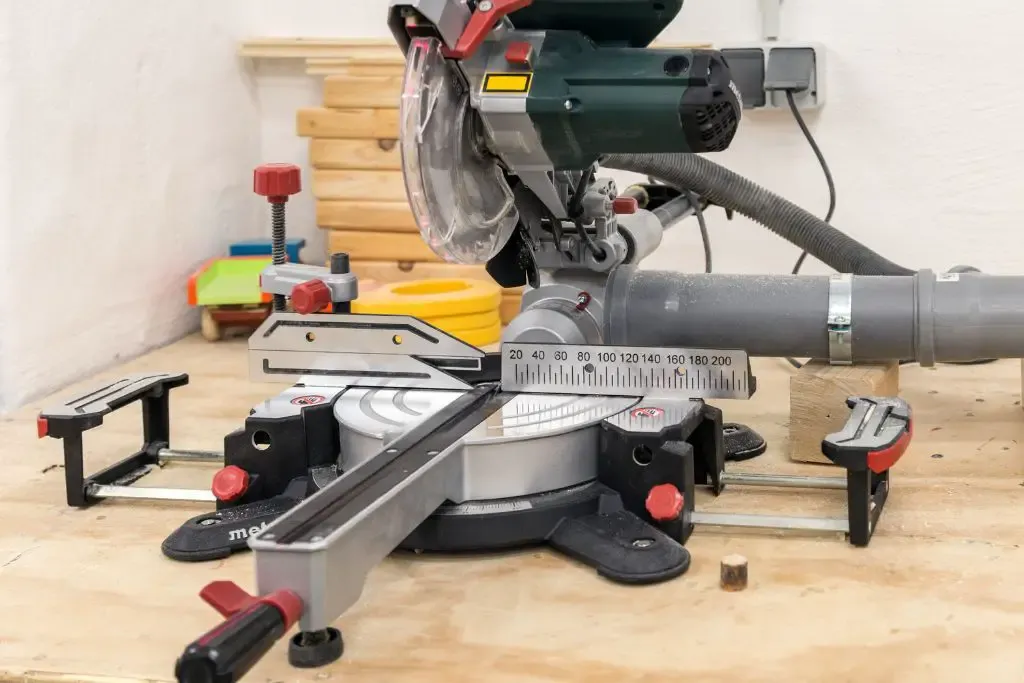
Wondering what sort of tools you would need to cut tiles? Try a miter saw!
Although this tool is more commonly used in woodworking, it’s entirely possible to cut tile with a miter saw so long that you have the right blade and cutting technique.
In this article, we’ll dive deeper into cut tile with a miter saw, and give you a more detailed explanation.
Let’s dive into it!
Table of Contents
Can You Cut Tile with a Miter Saw?
The answer is yes, but with some caveats.
Much like timber, a miter saw can be used to make clean and precise cuts on tiles so long that you have the right blade attachment.
Most types of tiles these days, like porcelain, are extremely durable. You’ll need something harder to cut through them effectively, like diamond or abrasive carbide blade attachments.
Picking the right blade attachment doesn’t just ensure more quality cuts. Since they’re tougher, these blades will also wear out less quickly than traditional dedicated wood blades.
Types of Miter Saw Blade for Cut Tiles
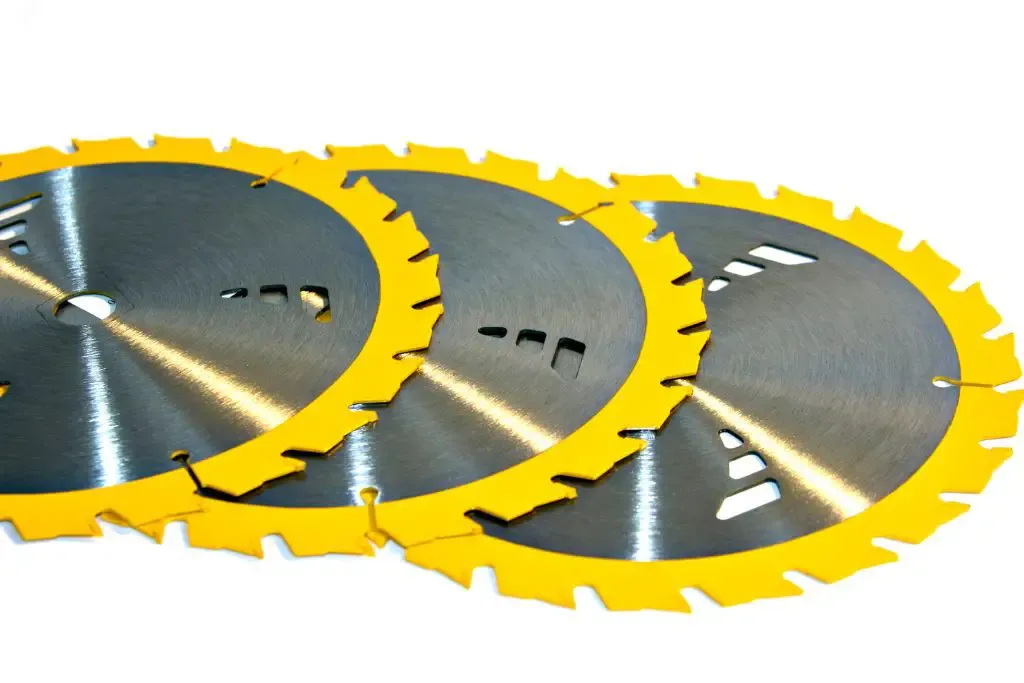
Diamond or carbide blade attachments are the best if you’re dry-cutting (cutting without using water as a lubricant).
Only these two kinds of blades are tough enough to make clean, precise cuts through porcelain and ceramic without catching or dulling.
Besides the material, you should also pay attention to the size of the blade. Most miter saws will accept blades that range from 8 inches to 12 inches in diameter. To be sure, consult your miter saw’s manual before you buy and install the blade.
Last but not least, consider the number of blade teeth the blades have. Blades with more teeth will provide a smoother cut, while blades with fewer teeth will cut faster but may leave a rougher edge.
We recommend picking blades with more teeth. Cutting will take longer, but the cut tile will look much better on the floor.
How Can You Cut Tile With A Miter Saw?
There are three kinds of cuts that you can make with a miter saw: straight cuts, angle cuts, and square cuts.

Straight Cuts
Straight cuts are the easiest kind of cut to make. You can use them to make tiles that fit along a straight edge, like a wall or baseboard.
This type of cut is also useful for trimming tiles to fit around fixtures. They’re fairly straightforward to do:
- Use a tape measure and pencil to mark the tile’s face.
- Secure the tile onto your working surface (clamped down to ensure it won’t shift around as you work and ruin your precision.)
- Squeeze the saw’s trigger and slowly lower the blade into the tile, carefully cutting along the marked line until you’re across and the tile is split.
Angle Cuts
Angle cuts create tiles with angled edges that fit together to create a specific pattern or design.
These cuts are commonly used in floors with a diagonal plan, where tiles are laid at a 45-degree angle relative to the surrounding walls.
If you want to make decorative borders or fit tiles around corners or other obstacles, this type of cut is also essential to learn.
One of the best things about a miter saw is that the angle of the blade can be freely adjusted from 0° to 45°.
To make an angle cut, here’s what to do:
- Loosen the adjustment lever to slant the blade. There should be a gauge on the saw that you can use to estimate and set the correct angle for your cut. Alternatively, you can also use pencil markings on the tile as a guide.
- If you want to cut on the tile’s face, slant the blade left or right. And if you want to cut along the edges, you can angle the blade up or down to the left.
Square Cuts
Square cuts are more complex than straight or angle cuts and require precision and patience. However, this is an important cut to learn.
It can create cut-outs in tiles to fit pipes, outlets, or other fixtures. You can also use it to trim tiles to fit in tight spaces that don’t fit a full tile.
- Place the tile face-down onto your working surface and mark your cut on the back of the tile. This will ensure that the surface of the tile won’t be damaged and ruined its look.
- Secure the tile to the working surface using clamps and lower the blade onto the cut lines. As you cut along the marked lines, rotate the tile as you wish to achieve the desired cut.
- Lightly tap the cut-out area with either a tool or your knuckles until it falls out.
Safety Precautions
Using a miter saw is dangerous without the proper training. But even if you’re familiar with power-cutting tools, remember to take some safety precautions before starting.

Here’s a checklist before you begin working:
Wear Protective Gear
Wear your PPE, including safety glasses and a dust mask, to protect yourself from airborne dust particulates and debris.
Since miter saws are loud, we recommend ear protection like ear plugs. And additional face protection, like a face shield, may be useful, too.
Secure The Tile
Using clamps or vices to hold them down to prevent it from shifting or sliding during the cutting process.
Inspect The Blade
Carefully inspect the cutting diamond blade and replace it if it’s dull. Dull blades can cause dangerous kickbacks.
Keep Your Hands Away From The Blade
Always use a push stick or other safety device to guide the tile through the blade. Never reach out or put your limb near the blade while it works.
Besides the checklist above, we also have a few extra safety tips that you can use.
Work in a well-ventilated area
Cutting tile with a miter saw can create a lot of dust and debris, which can be harmful in an inhaled case.
That’s why it’s so important to work in a well-ventilated area. You don’t want to be caught in a tight room with all that dust particulates.
Take breaks
If you must work long hours, take regular breaks. Even with the help of a power tool, this is a really physically-demanding job.
Be aware of your surroundings
When using a miter saw, you must know your surroundings. Keep pets, children, and people not trained on power tool safety out of your working area.
Be mindful of where excessive dust and debris are flying, not just to keep a tab of where to clean up later but also to minimize the chance of people walking by and getting hit by them.
How To Cut Tile With A Miter Saw

Here’s some steps to follow for cutting tile with a miter saw
1. Prepare Your Workspace and Safety Equipment
Prepare your work area and clean up as much as possible. You don’t want errant debris around when you’re working.
Also, take some time to don your safety gear, such as gloves and eye goggles.
2. Apply Lubricant
Lubricant helps keep the diamond blade cool and prevents it from overheating, which can mess up both your tool and your cut. You can use water or a specialized tile-cutting lubricant.
3. Set Up Your saw
Give your saw a top-to-bottom inspection to make sure everything’s in order, then install the correct blade, such as a diamond-tipped, smooth-edged blade. Adjust the angle of the blade to match the angle of the cut you want to make.
4. Mark The Cut Line
Measure and mark the tile where you want to make the cut using a straight edge and a marker.
Use a ruler to double-check your measurements to ensure accuracy, especially if you want it to fit seamlessly to a piece of furniture, a part of the wall, or already-laid tiles.
5. Secure The Tile On Your Workspace
Place the tile on the saw bed and secure it with a clamp or vice. This will prevent the tile from shifting or moving during the cut and mess up your accuracy.
If your saw doesn’t come with a clamp, use a piece of wood or weight to hold the tile in place.
6. Start Your Cut
Turn on the saw and slowly lower the blade onto the tile. Take it slow and use a steady and controlled motion as you cut along the marked line you made.
Begin the cut at the outer edge of the tile and move towards the center. This will prevent the tile from chipping or breaking.
Once the cut is complete, turn off the saw and wait for the blade to come to a complete stop before removing the tile. Do not pick up the tile or move your hand anywhere near the tooth blade while the saw is still powered and spinning.
7. Remove The Piece and Inspect
Inspect the piece to make sure the cut is clean and accurate. If it’s still not to your liking, you can clamp it back down and do some trimming work until you get the perfect cut.
8. Clean Up
Start cleaning up your working area from tile dust collection and debris with a dry vacuum. Wipe down the blade of your miter saw to prevent lubricant build-ups.
Conclusion
Though it’s not the most common choice for cutting tile, a miter saw is certainly on the table (literally) if you need to cut porcelain or ceramic tiles.
Of course, you’ll need careful preparation before you can make a precise and safe cut.
We hope you now have a better idea of how to cut tile with a miter saw. If you have any other questions, don’t hesitate to comment down below, and we’ll get back to you as soon as we can!


